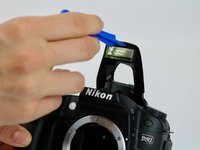
Salta al contenuto principale

Nikon D80 Flash Assembly Replacement

Cosa ti serve

  1. Nikon D80 Flash Assembly Replacement, Flash Assembly: passo 1, immagine 1 di 3 Nikon D80 Flash Assembly Replacement, Flash Assembly: passo 1, immagine 2 di 3 Nikon D80 Flash Assembly Replacement, Flash Assembly: passo 1, immagine 3 di 3
    • Press the highlighted button to pop the flash up.

    • Otherwise, use a plastic opening tool to gently lever open the flash by inserting the tool into the gap between the flash and the camera.

  2. Nikon D80 Flash Assembly Replacement: passo 2, immagine 1 di 1
    • Use the #00 Phillips-head screwdriver to remove both 4.20 mm screws by rotating the screwdriver to the left.

  3. Nikon D80 Flash Assembly Replacement: passo 3, immagine 1 di 2 Nikon D80 Flash Assembly Replacement: passo 3, immagine 2 di 2
    • Using a plastic opening tool, pry open the cover.

    • Be advised, some plastic struts may snap off when you remove the cover.

  4. Nikon D80 Flash Assembly Replacement: passo 4, immagine 1 di 2 Nikon D80 Flash Assembly Replacement: passo 4, immagine 2 di 2
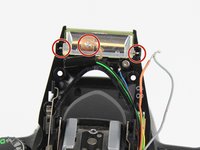
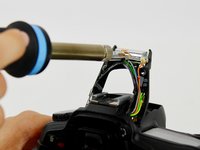
    • Using a soldering iron, desolder the orange, tan, and gray wires from the flash assembly.

    • For more information on how to solder and desolder connections, please visit this guide.

    • Use caution while using the hot soldering iron.

  5. Nikon D80 Flash Assembly Replacement: passo 5, immagine 1 di 1
    • Gently remove the flash assembly from the casing.

    • The surface may still be hot, so grab it with caution.

Conclusione

To reassemble your device, follow these instructions in reverse order.

Team

USF Tampa, Team S1-G1, Leahy Fall 2017 Membro di USF Tampa, Team S1-G1, Leahy Fall 2017

USFT-LEAHY-F17S1G1

4 Membri

5 Guide realizzate

0 Commenti

Aggiungi Commento

Visualizza Statistiche:

Ultime 24 Ore: 3

Ultimi 7 Giorni: 12

Ultimi 30 Giorni: 31

Tutti i Tempi: 2,092