Introduzione
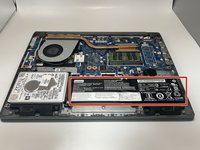
Is your Lenovo IdeaPad not turning on, even when plugged in to the charger for hours? You likely have a faulty battery. This guide will walk you through replacing the battery in your Lenovo IdeaPad S145-14IWL. This guide requires an opening tool, angled tweezers, and a Phillips #0 screwdriver from the iFixit Tool Kit.
Cosa ti serve
-
-
Use a Phillips #0 screwdriver to remove the ten screws that secure the lower case.
-
Insert an opening tool into the gap between the lower case and chassis.
-
Pry around the perimeter of the device until the lower case fully releases.
-
Remove the lower case.
-
-
-
-
Use angled tweezers to gently pull the battery connector directly out of its socket.
-
-
-
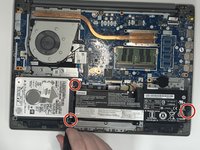
Use a Phillips #0 screwdriver to remove the screws securing the battery.
-
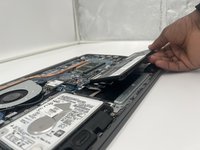
Lift the battery up and out of the chassis.
-
To reassemble your device, follow the above steps in reverse order.
For optimal performance, after completing this guide, calibrate your newly installed battery.
Take your e-waste to an R2 or e-Stewards certified recycler.
Repair didn’t go as planned? Try some basic troubleshooting.
To reassemble your device, follow the above steps in reverse order.
For optimal performance, after completing this guide, calibrate your newly installed battery.
Take your e-waste to an R2 or e-Stewards certified recycler.
Repair didn’t go as planned? Try some basic troubleshooting.
Annulla: non ho completato questa guida.
Altre 3 persone hanno completato questa guida.


