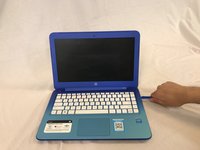
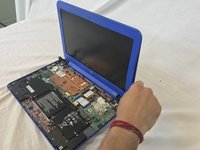
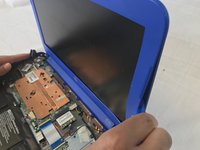
Salta al contenuto principale

HP Stream 13-c010nr Display Replacement

Cosa ti serve

  1. HP Stream 13-c010nr Display Replacement, HP Stream 13-c010nr Disassembly: passo 1, immagine 1 di 1
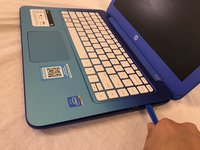
    • Remove the five rubber feet from the bottom of the laptop with a plastic opening tool.

  2. HP Stream 13-c010nr Display Replacement: passo 2, immagine 1 di 2 HP Stream 13-c010nr Display Replacement: passo 2, immagine 2 di 2
    • Remove the thirteen 5mm Phillips #0 screws from the bottom case.

  3. HP Stream 13-c010nr Display Replacement: passo 3, immagine 1 di 2 HP Stream 13-c010nr Display Replacement: passo 3, immagine 2 di 2
    • Flip the laptop over and open it up.

    • Wedge a plastic opening tool between the keyboard and bottom case, pry upwards to separate the two pieces.

    • Lift up the keyboard.

    • Ribbon cables still connect the two pieces.

  4. HP Stream 13-c010nr Display Replacement: passo 4, immagine 1 di 1
    • Use a spudger to flip up the retaining flaps on the keyboard ribbon cable ZIF sockets.

    • Pull up the ribbon cables from their sockets.

  5. HP Stream 13-c010nr Display Replacement, Display: passo 5, immagine 1 di 1
    • Remove the screw covers from the bottom corner edges of the screen.

  6. HP Stream 13-c010nr Display Replacement: passo 6, immagine 1 di 2 HP Stream 13-c010nr Display Replacement: passo 6, immagine 2 di 2
    • Remove the two 5mm Phillips #0 screws from the screen bezel.

  7. HP Stream 13-c010nr Display Replacement: passo 7, immagine 1 di 2 HP Stream 13-c010nr Display Replacement: passo 7, immagine 2 di 2
    • Wedge the plastic opening tool between the frame of the screen and the casing of the laptop.

    • Pry upwards on the plastic opening tool to separate the bezel from the display.

  8. HP Stream 13-c010nr Display Replacement: passo 8, immagine 1 di 1
    • Remove the four 3mm Phillips #0 screws from the screen.

  9. HP Stream 13-c010nr Display Replacement: passo 9, immagine 1 di 1
    • Use a spudger to flip up the retaining flap on the screen ribbon cable ZIF socket.

    • Pull the ribbon cable out of the ZIF socket.

    • Remove the screen.

Conclusione

To reassemble your device, follow these instructions in reverse order.

Team

USF Tampa, Team S1-G3, Cagle Spring 2018 Membro di USF Tampa, Team S1-G3, Cagle Spring 2018

USFT-CAGLE-S18S1G3

4 Membri

12 Guide realizzate

0 Commenti

Aggiungi Commento

Visualizza Statistiche:

Ultime 24 Ore: 0

Ultimi 7 Giorni: 1

Ultimi 30 Giorni: 4

Tutti i Tempi: 723