Salta al contenuto principale
Unisciti alla Community delle riparazioni - Crea un account

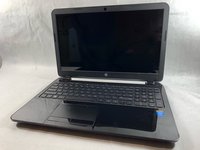
HP 15-R011DX Cooling Fan Replacement

Cosa ti serve

    1. HP 15-R011DX Cooling Fan Replacement, Battery: passo 1, immagine 1 di 2 HP 15-R011DX Cooling Fan Replacement, Battery: passo 1, immagine 2 di 2
      • Slide the lock mechanism on the left side of the laptop to the right.

      Chiedi a FixBot

      Aggiungi Commento

    2. HP 15-R011DX Cooling Fan Replacement: passo 2, immagine 1 di 1
      • While holding the right slide mechanism, remove the battery from the laptop.

      • The battery is not pictured here because it is missing from this particular device.

      Chiedi a FixBot

      Aggiungi Commento

    1. HP 15-R011DX Cooling Fan Replacement, How to Access the Internal Components of an HP 15-R011DX: passo 3, immagine 1 di 2 HP 15-R011DX Cooling Fan Replacement, How to Access the Internal Components of an HP 15-R011DX: passo 3, immagine 2 di 2
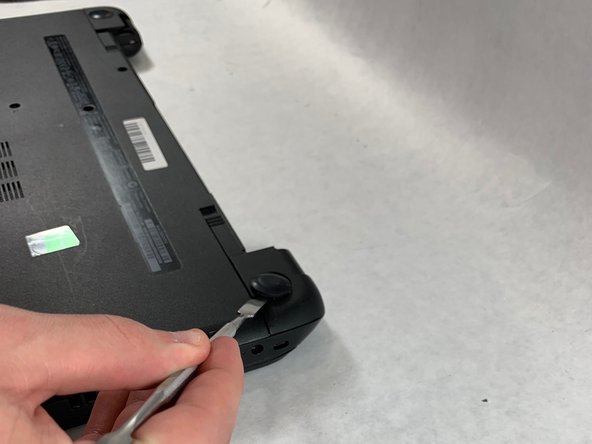
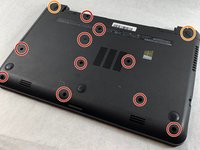
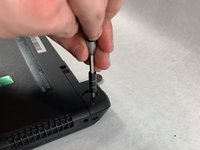
      • Flip the laptop over to reveal screw locations.

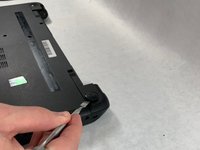
      • Use a metal spudger to remove the two rear rubber feet. There are screws hidden underneath them.

      Chiedi a FixBot

      Aggiungi Commento

    2. HP 15-R011DX Cooling Fan Replacement: passo 4, immagine 1 di 2 HP 15-R011DX Cooling Fan Replacement: passo 4, immagine 2 di 2
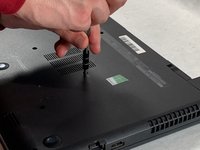
      • Remove the twelve 5mm Phillips #1 screws on the back of the laptop.

      Chiedi a FixBot

      Aggiungi Commento

    3. HP 15-R011DX Cooling Fan Replacement: passo 5, immagine 1 di 2 HP 15-R011DX Cooling Fan Replacement: passo 5, immagine 2 di 2
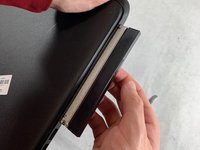
      • Remove the DVD drive from the laptop.

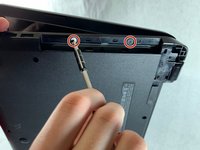
      • Remove the two 3 mm Phillips #1 screws underneath the DVD drive.

      Chiedi a FixBot

      Aggiungi Commento

    4. HP 15-R011DX Cooling Fan Replacement: passo 6, immagine 1 di 3 HP 15-R011DX Cooling Fan Replacement: passo 6, immagine 2 di 3 HP 15-R011DX Cooling Fan Replacement: passo 6, immagine 3 di 3
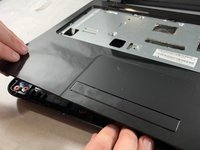
      • Flip the laptop and open.

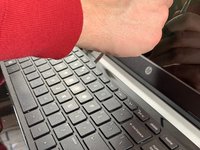
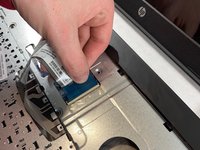
      • Detach the keyboard by prying it free from the laptop using a spudger.

      • Do not completely remove the keyboard yet. It is still attached by a ribbon cable.

      • Disconnect the keyboard ribbon cable.

      Chiedi a FixBot

      Aggiungi Commento

    5. HP 15-R011DX Cooling Fan Replacement: passo 7, immagine 1 di 2 HP 15-R011DX Cooling Fan Replacement: passo 7, immagine 2 di 2
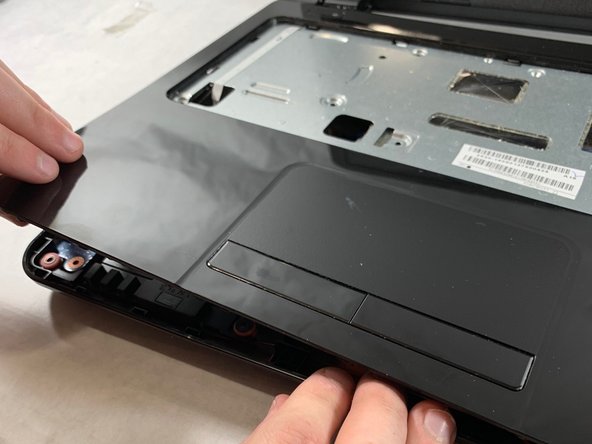
      • Disconnect the two narrow ribbon cables to the left of the keyboard connection.

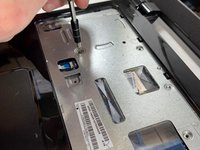
      • Remove five 4 mm Phillips #1 screws from the metal tray for the keyboard.

      • Pry open the plastic casing using a spudger.

      • If struggling to remove the plastic case, check that all screws have been removed.

      Chiedi a FixBot

      Aggiungi Commento

    1. HP 15-R011DX Cooling Fan Replacement, Hard Drive: passo 8, immagine 1 di 1
      • Remove two 5 mm Phillips #1 screws located at the base of the hard drive.

      Chiedi a FixBot

      Aggiungi Commento

    2. HP 15-R011DX Cooling Fan Replacement: passo 9, immagine 1 di 2 HP 15-R011DX Cooling Fan Replacement: passo 9, immagine 2 di 2
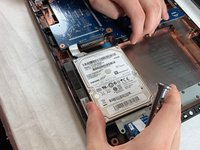
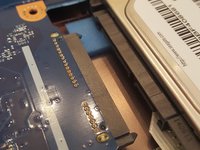
      • Pull the hard drive upwards and away from the laptop.

      • The hard drive should disconnect from its port on the motherboard as shown in the second image.

      Chiedi a FixBot

      Aggiungi Commento

    3. HP 15-R011DX Cooling Fan Replacement: passo 10, immagine 1 di 1
      • Flip the hard drive over.

      • Remove the two 4 mm Phillips #1 screws from the base of the hard drive.

      • Remove the mounting brace (silver bracket) from the hard drive.

      Chiedi a FixBot

      Aggiungi Commento

    1. HP 15-R011DX Cooling Fan Replacement, Motherboard: passo 11, immagine 1 di 2 HP 15-R011DX Cooling Fan Replacement, Motherboard: passo 11, immagine 2 di 2
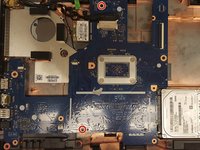
      • Remove the remaining two 5 mm Philips #1 screws from the motherboard.

      Chiedi a FixBot

      Aggiungi Commento

    2. HP 15-R011DX Cooling Fan Replacement: passo 12, immagine 1 di 1
      • Remove the tape from the display connector attached to the motherboard.

      • Disconnect the display connector from the motherboard.

      Chiedi a FixBot

      Aggiungi Commento

    3. HP 15-R011DX Cooling Fan Replacement: passo 13, immagine 1 di 1
      • Remove one 4 mm Phillips #1 screw from the wireless chip.

      • Remove the wireless chip from the motherboard.

      Chiedi a FixBot

      Aggiungi Commento

    4. HP 15-R011DX Cooling Fan Replacement: passo 14, immagine 1 di 1
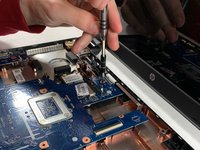
      • Remove two 5 mm Phillips #1 screws from the USB component connected to the motherboard.

      • Lift the USB component until the band connecting it to the motherboard lifts off of the laptop.

      Chiedi a FixBot

      Aggiungi Commento

    5. HP 15-R011DX Cooling Fan Replacement: passo 15, immagine 1 di 1
      • Slowly lift the motherboard out of the computer.

      • Be sure that the I/O ports on the left side of the motherboard are not stuck on the laptop frame.

      • Disconnect the power connector from the motherboard as shown in the image.

      Chiedi a FixBot

      Aggiungi Commento

    1. HP 15-R011DX Cooling Fan Replacement, Cooling Fan: passo 16, immagine 1 di 1
      • The cooling fan assembly is located on the underside of the motherboard.

      • Using a Phillips #1 screwdriver, remove the three 5mm screws that secure the cooling fan assembly to the motherboard.

      Chiedi a FixBot

      Aggiungi Commento

    2. HP 15-R011DX Cooling Fan Replacement: passo 17, immagine 1 di 1
      • Separate the cooling fan assembly from the motherboard and proceed to use the canned air to clean the inner pieces of the fan.

      • You can now clean the inner parts of the fan assembly or replace with a new assembly.

      Chiedi a FixBot

      Aggiungi Commento

    3. HP 15-R011DX Cooling Fan Replacement: passo 18, immagine 1 di 1
      • Before reconnecting the cooling fan assembly, make sure to properly apply thermal paste and touch the two connectors together when reassembling your laptop.

      Chiedi a FixBot

      Aggiungi Commento

Conclusione

To reassemble your device, follow these instructions in reverse order.

Annulla: non ho completato questa guida.

Un'altra persona ha completato questa guida.

1Commento della guida

It appears as though the jfan1 connection on the motherboard doesn’t have a plastic connector. I’ve bought a fan for this laptop to solve some overheating issues, but I can’t find anywhere to plug it in (I’m assuming that on similar models, the jfan1 connection would be the one to use). Is there any way that I can somehow plug my fan into this motherboard?

Brandon Peterson - Rispondi Condividi

Aggiungi Commento

Visualizza statistiche:

Ultime 24 ore: 0

Ultimi 7 giorni: 6

Ultimi 30 giorni: 18

Tutti i Tempi: 1,508