Introduzione
If the Vivoactive's display unit is cracked or still unresponsive after trying other solutions in our troubleshooting guide, this guide details how to replace the screen of the Vivoactive. This is a simple procedure that will leave your device looking new and functional again.
Note: Replacing the screen will damage the waterproof adhesive.
Cosa ti serve
-
-
Hold the the metal screwdriver, with a T5 Torx bit, in your dominant hand.
-
Hold the rubber screwdriver, with a Hex T6 Torx bit, in your other hand.
-
While holding the rubber screwdriver in place, simultaneously unscrew the pin (counterclockwise) with the metal screwdriver in your dominant hand.
 Chiedi a FixBot
-
-
-
Once the 1mm screw is removed, reinsert the metal screwdriver in that same hole.
-
Gently push the strap's pin out. It will begin to protrude from the other end.
-
Use your fingers to grab the exposed pin and slide it free. The strap should now be disconnected from the device.
-
-
-
Place a heated iOpener over the display to loosen the adhesive.
-
After about a minute, the iOpener may be removed.
-
-
-
-
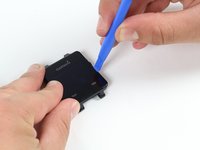
Place the blue plastic opening tool in-between the screen and plastic casing of the watch and slowly pry up one side of the screen.
-
-
-
Once the first side has come free, wedge the blue pick in between the screen and watch unit on that side.
-
Complete one pass around the perimeter of the screen to break the adhesive bond on all four sides.
-
-
-
Use the blue plastic opening tool to pry up the side of the glass. Raise it to a point where your fingernail can fit in the gap.
-
Do the same on the opposite side of the device until you have a good grip of the screen.
-
-
-
Obtain a careful grip of the screen from two of its sides.
-
Slowly lift the screen off of the case. Separate it just enough so as not to damage the connection to the motherboard.
-
-
-
Detach the orange tab that connects the screen to the motherboard with a gentle uplift using a plastic opening tool.
-
Upon completing this step, the screen should be free from the rest of the device.
-


To reassemble your device, follow these instructions in reverse order.
Annulla: non ho completato questa guida.
Altre 16 persone hanno completato questa guida.
Team

Cal Poly, Team 1-21, Maness Fall 2015 Membro di Cal Poly, Team 1-21, Maness Fall 2015
CPSU-MANESS-F15S1G21
4 Membri
17 guide realizzate
40Commenti sulla guida
Does anyone knows where can I buy a vivoactive display?
Did anyone ever find a location where you can order a replacement screen?
Dylan
I've called Garmin support service but they said that displays units are not for sale from their side, only entire watch can be sold. I find it quite strange for not saying stupid because it's normal that using a watch displays can have a problem or that can be broken and easily fixed by replace them.
Being that said, if someone finds an alternative please share it, thanks