Salta al contenuto principale
Unisciti alla Community delle riparazioni - Crea un account

Fitbit Blaze Vibration Motor Replacement

Cosa ti serve

    1. Fitbit Blaze  Vibration Motor Replacement, Wristband: passo 1, immagine 1 di 2 Fitbit Blaze  Vibration Motor Replacement, Wristband: passo 1, immagine 2 di 2
      • Locate the front LCD screen on your device.

      • Fitbit logo should appear in the bottom center of the screen.

      Chiedi a FixBot
      Aggiungi Commento

    2. Fitbit Blaze  Vibration Motor Replacement: passo 2, immagine 1 di 1
      • Push the screen out through the back of the metal ring enclosure.

      • Use a small amount of force on screen to prevent damage. Use other hand to catch screen.

      Chiedi a FixBot
      Aggiungi Commento

    3. Fitbit Blaze  Vibration Motor Replacement: passo 3, immagine 1 di 3 Fitbit Blaze  Vibration Motor Replacement: passo 3, immagine 2 di 3 Fitbit Blaze  Vibration Motor Replacement: passo 3, immagine 3 di 3
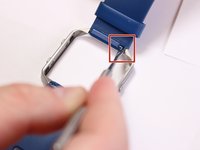
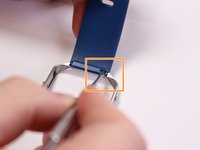
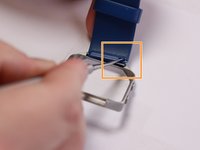
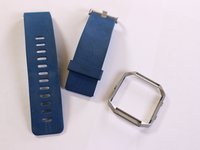
      • Locate the metal pin behind the wristband located on the edge of metal ring.

      • Insert the pointed end of the metal spudger into the pin hold and push it into the blue rectangle enclosure.

      • Use a small amount of force to avoid damaging the pins.

      • Remove wristband.

      Chiedi a FixBot

      Aggiungi Commento

    1. Fitbit Blaze  Vibration Motor Replacement, Display Frame: passo 4, immagine 1 di 3 Fitbit Blaze  Vibration Motor Replacement, Display Frame: passo 4, immagine 2 di 3 Fitbit Blaze  Vibration Motor Replacement, Display Frame: passo 4, immagine 3 di 3
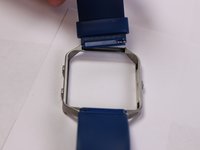
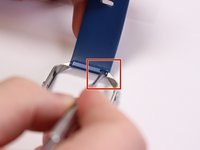
      • Locate the pin behind the second wristband located on the edge of metal ring.

      • Insert the pointed end of the metal spudger into the pin hold and push it into opposite direction.

      • Use a small amount of force to avoid damaging the pins.

      • Remove wristband.

      Chiedi a FixBot

      Aggiungi Commento

    1. Fitbit Blaze  Vibration Motor Replacement, Vibration Motor: passo 5, immagine 1 di 3 Fitbit Blaze  Vibration Motor Replacement, Vibration Motor: passo 5, immagine 2 di 3 Fitbit Blaze  Vibration Motor Replacement, Vibration Motor: passo 5, immagine 3 di 3
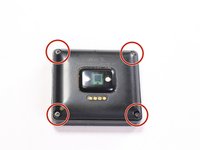
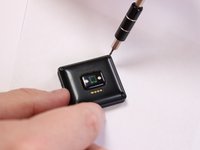
      • Place device screen face down and locate the four screws attaching the back cover.

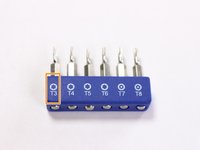
      • Use a T3 torx head or T3 torx screwdriver to remove the four screws.

      Chiedi a FixBot

      Aggiungi Commento

    2. Fitbit Blaze  Vibration Motor Replacement: passo 6, immagine 1 di 3 Fitbit Blaze  Vibration Motor Replacement: passo 6, immagine 2 di 3 Fitbit Blaze  Vibration Motor Replacement: passo 6, immagine 3 di 3
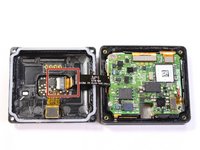
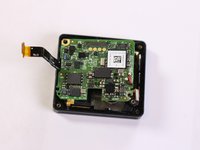
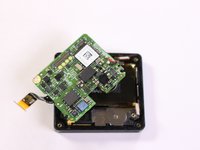
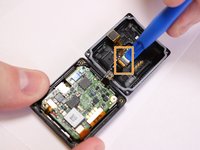
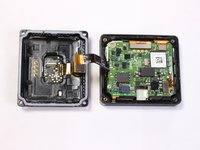
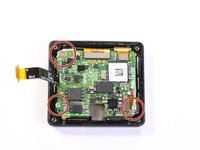
      • Grab the back, lift and open like a book to expose the motherboard. Locate the ribbon connector on the left.

      • Use a plastic spudger tool on the ribbon connected from the heart rate monitor to the motherboard.

      • Insert and lift the plastic opening tool to release the ribbon.

      • Only a small force when lifting the plastic connector is needed to avoid damage.

      Chiedi a FixBot
      Aggiungi Commento

    3. Fitbit Blaze  Vibration Motor Replacement: passo 7, immagine 1 di 3 Fitbit Blaze  Vibration Motor Replacement: passo 7, immagine 2 di 3 Fitbit Blaze  Vibration Motor Replacement: passo 7, immagine 3 di 3
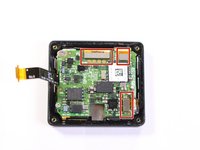
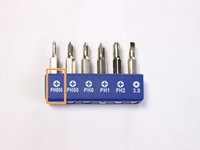
      • Separate the back and set aside, locate the three screws attaching the motherboard.

      • Use a PH000 head or a PH000 screwdriver to remove the three screws.

      Chiedi a FixBot
      Aggiungi Commento

    4. Fitbit Blaze  Vibration Motor Replacement: passo 8, immagine 1 di 3 Fitbit Blaze  Vibration Motor Replacement: passo 8, immagine 2 di 3 Fitbit Blaze  Vibration Motor Replacement: passo 8, immagine 3 di 3
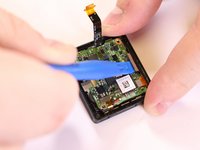
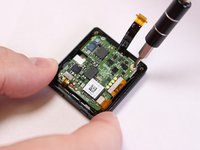
      • Use a plastic spudger tool on the ribbons connected to the motherboard.

      • Insert the tool under the ribbon and lift to release the connection.

      • Only a small force when lifting the plastic connector is needed to avoid damage.

      Chiedi a FixBot
      Aggiungi Commento

    5. Fitbit Blaze  Vibration Motor Replacement: passo 9, immagine 1 di 3 Fitbit Blaze  Vibration Motor Replacement: passo 9, immagine 2 di 3 Fitbit Blaze  Vibration Motor Replacement: passo 9, immagine 3 di 3
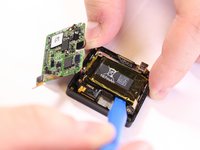
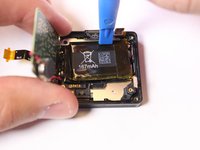
      • Lift and push the motherboard to the side to uncover the 167mAh battery.

      • Use a plastic spudger tool to pry out the battery from its adhesive plastic underneath.

      • Lift up and pull downward to remove battery. Switch to the top portion of the battery and push downward to pry out battery.

      Chiedi a FixBot

      Aggiungi Commento

    6. Fitbit Blaze  Vibration Motor Replacement: passo 10, immagine 1 di 2 Fitbit Blaze  Vibration Motor Replacement: passo 10, immagine 2 di 2
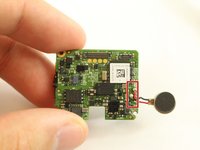
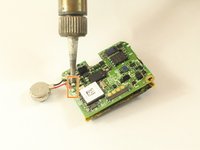
      • Flip the motherboard back to the front to locate the metal pins from the vibration motor soldered to the board.

      • Desolder the connection to remove the motor component.

      • Follow this guide on how to solder and desolder connectors Soldering Guide

      • Excessive heat will damage the components, so do not apply the soldering iron to the component for long amounts of time.

      Chiedi a FixBot

      Aggiungi Commento

Conclusione

To reassemble your device, follow these instructions in reverse order.

Annulla: non ho completato questa guida.

Team

USF Tampa, Team S3-G3, Sullivan Spring 2017 Membro di USF Tampa, Team S3-G3, Sullivan Spring 2017

USFT-SULLIVAN-S17S3G3

4 Membri

15 guide realizzate

4Commenti sulla guida

anyone got a part number or a description of the motor that gets replaced. looking to do this and fix. thanks

Ben - Rispondi Condividi

And how many destroyed “FitBit Blaze” are we going to see now?

tjhbob - Rispondi Condividi

what kind of motor can you replace this with?

dbick - Rispondi Condividi

Any idea what is the value of the C3 capacitor?

P J - Rispondi Condividi

Aggiungi Commento

Visualizza statistiche:

Ultime 24 ore: 3

Ultimi 7 giorni: 10

Ultimi 30 giorni: 28

Tutti i Tempi: 3,649