Salta al contenuto principale
Unisciti alla Community delle riparazioni - Crea un account

Comfort Zone CZ6C Switch Replacement

Cosa ti serve

    1. Comfort Zone CZ6C Switch Replacement, Switch: passo 1, immagine 1 di 3 Comfort Zone CZ6C Switch Replacement, Switch: passo 1, immagine 2 di 3 Comfort Zone CZ6C Switch Replacement, Switch: passo 1, immagine 3 di 3
      • Make sure to unplug the Comfort Zone CZ6C before cutting any wires.

      • Before replacing your switch, learn how to solder using the How To Solder and Desolder Connections Guide.

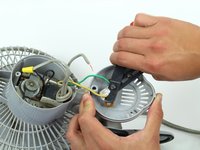
      • Start with the fan on its back. Unscrew the back panel to expose the internal wiring.

      Chiedi a FixBot

      Aggiungi Commento

    2. Comfort Zone CZ6C Switch Replacement: passo 2, immagine 1 di 2 Comfort Zone CZ6C Switch Replacement: passo 2, immagine 2 di 2
      • Remove the plastic cover on the switch by pulling it apart from the the back panel.

      Chiedi a FixBot

      Aggiungi Commento

    3. Comfort Zone CZ6C Switch Replacement: passo 3, immagine 1 di 1
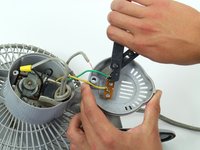
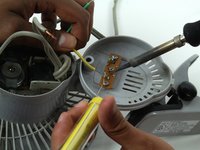
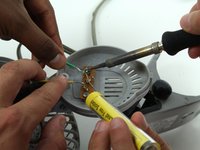
      • Use the soldering iron with caution. Don't touch the tip of the soldering iron to avoid the risk of injury.

      • This step can be made easier with the help of a partner to hold the wiring while you desolder the connection.

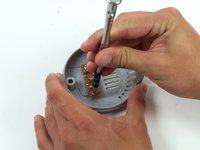
      • Disconnect the gray power wire from the switch by desoldering the connection.

      Chiedi a FixBot

      Aggiungi Commento

    4. Comfort Zone CZ6C Switch Replacement: passo 4, immagine 1 di 2 Comfort Zone CZ6C Switch Replacement: passo 4, immagine 2 di 2
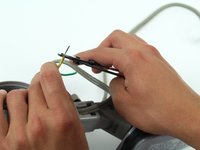
      • Cut the green and yellow wire as close to the switch connection as possible.

      Chiedi a FixBot

      Aggiungi Commento

    5. Comfort Zone CZ6C Switch Replacement: passo 5, immagine 1 di 3 Comfort Zone CZ6C Switch Replacement: passo 5, immagine 2 di 3 Comfort Zone CZ6C Switch Replacement: passo 5, immagine 3 di 3
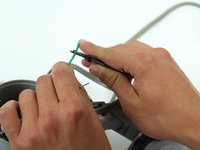
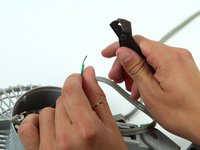
      • Strip the green and yellow wire about two centimeters from where it was just cut.

      Chiedi a FixBot

      Aggiungi Commento

    6. Comfort Zone CZ6C Switch Replacement: passo 6, immagine 1 di 3 Comfort Zone CZ6C Switch Replacement: passo 6, immagine 2 di 3 Comfort Zone CZ6C Switch Replacement: passo 6, immagine 3 di 3
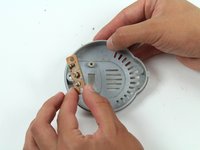
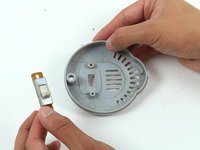
      • Unscrew the switch from the back panel and remove it.

      Chiedi a FixBot

      Aggiungi Commento

    7. Comfort Zone CZ6C Switch Replacement: passo 7, immagine 1 di 3 Comfort Zone CZ6C Switch Replacement: passo 7, immagine 2 di 3 Comfort Zone CZ6C Switch Replacement: passo 7, immagine 3 di 3
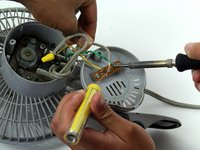
      • After replacing the switch, resolder the gray power cord, the green wire, and the yellow wire.

      Chiedi a FixBot

      Aggiungi Commento

Conclusione

To reassemble your device, follow these instructions in reverse order.

Annulla: non ho completato questa guida.

Un'altra persona ha completato questa guida.

James Abundis

Membro da: 04/08/15

169 Reputazione

Una guida realizzata

Team

Cal Poly, Team 17-5, Forte Spring 2015 Membro di Cal Poly, Team 17-5, Forte Spring 2015

CPSU-FORTE-S15S17G5

4 Membri

7 guide realizzate

1Commento della guida

I need a replacement switch for a Comfort Zone CZ40 heater. Can you help?

Michael Drasic - Rispondi Condividi

Aggiungi Commento

Visualizza statistiche:

Ultime 24 ore: 2

Ultimi 7 giorni: 10

Ultimi 30 giorni: 39

Tutti i Tempi: 2,808