Questa traduzione è stata generata automaticamente e non è stata ancora revisionata da una persona. Parli questa lingua? Dai un’occhiata.
Introduzione
La rimozione del pannello laterale con presa per telecomando è sicura e semplice. Richiede solo un cacciavite. Prima di iniziare questa riparazione, spegni la fotocamera e rimuovi la batteria.
Cosa ti serve
-
-
-
Rimuovi le due viti nere da 4,8 mm sopra l'obiettivo sulla parte frontale della fotocamera.
 Chiedi a FixBot
-
-
-
Rimuovi la vite nera da 4,3 mm sotto l'anello dell'obiettivo e la vite nera da 4,8 mm sotto la fotocamera.
-
-
-
Rimuovi il pannello frontale sollevandolo dal corpo della fotocamera.
-
-
-
-
-
-
Rimuovi le sette viti nere da 4,25 mm sul pannello inferiore.
-
-
-
-
-
Rimuovi le due viti nere da 6,5 mm dal pannello.
-
-
-
Rimuovi il cappuccio di plastica della presa del telecomando tirandolo verso l'esterno.
-
-
-
Fai scorrere il pannello verso la parte inferiore della fotocamera per rimuoverlo.
-
-
-
Rimuovi la singola vite argentata da 4,8 mm dalla presa di controllo.
-
-


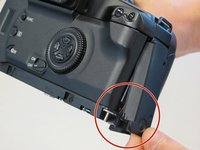
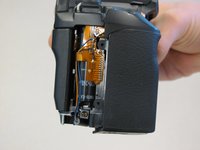


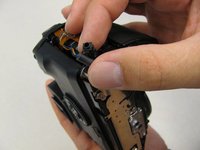
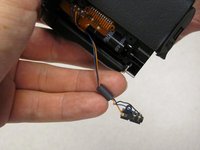
Per rimontare il dispositivo, segui queste istruzioni in ordine inverso.

Team

Cal Poly, Team 8-8, Regan Spring 2011 Membro di Cal Poly, Team 8-8, Regan Spring 2011
CPSU-REGAN-S11S8G8
5 Membri
132 guide realizzate
3Commenti sulla guida
i have this camera and the door that holds the film in will not stay closed because the plastic piece has broken at the release point. Which piece is it that I need to replace?
That's a bit of a bugger. The piece that's broken off is most likely the little "hook" on the "door" (the proper name of this "door" would be "back").
Since this little hook is integral with the back, you'd have to replace the entire back.
If you still have the piece that has broken off, it may be possible to glue it back in place, but you'd have to reinforce it with e.g. a small piece of aluminium sheet cut from a soft drink can or something like that. Use cyanoacrylate glue (otherwise known as "superglue") and make sure the pieces are clean and fit perfectly before applying the glue. You need only a tiny drop.
The EOS 30 is a film camera and therefore does not have an A/V Port, since it does neither Audio nor Video. The socket near the bottom on the grip side is for a wired remote control.
