Salta al contenuto principale

Asus Transformer Book T100TAF Keyboard Replacement

Cosa ti serve

  1. Asus Transformer Book T100TAF Keyboard Replacement, Keyboard: passo 1, immagine 1 di 1
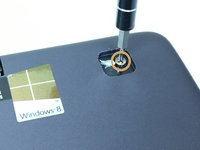
    • Detach the keyboard from the screen by depressing the silver button on the hinge and pulling upwards on the tablet.

  2. Asus Transformer Book T100TAF Keyboard Replacement: passo 2, immagine 1 di 2 Asus Transformer Book T100TAF Keyboard Replacement: passo 2, immagine 2 di 2
    • Use a Phillips #00 screwdriver to remove the six 4 mm screws on the underside of the device.

  3. Asus Transformer Book T100TAF Keyboard Replacement: passo 3, immagine 1 di 2 Asus Transformer Book T100TAF Keyboard Replacement: passo 3, immagine 2 di 2
    • Use a metal spudger to pry up the rubber pads covering the two upper silver screws.

    • Use a Phillips #00 screwdriver to remove the two 5.5 mm screws under the rubber pads.

  4. Asus Transformer Book T100TAF Keyboard Replacement: passo 4, immagine 1 di 3 Asus Transformer Book T100TAF Keyboard Replacement: passo 4, immagine 2 di 3 Asus Transformer Book T100TAF Keyboard Replacement: passo 4, immagine 3 di 3
    • Remove the back cover.

    • Use a Phillips #00 screwdriver to remove all the screws from the metal, inside panel, including four black 4.0 mm screws along the top.

    • Remove four black 3.0 screws along the bottom.

    • Remove the one silver 5.0 mm screw in the top right corner.

  5. Asus Transformer Book T100TAF Keyboard Replacement: passo 5, immagine 1 di 1
    • Remove the metal keyboard cover from the device.

  6. Asus Transformer Book T100TAF Keyboard Replacement: passo 6, immagine 1 di 1
    • Use the Phillips #00 screwdriver to remove the 4.5 mm screw on the keyboard circuit board.

  7. Asus Transformer Book T100TAF Keyboard Replacement: passo 7, immagine 1 di 1
    • Peel the yellow tape and label away from the motherboard with the metal spudger.

  8. Asus Transformer Book T100TAF Keyboard Replacement: passo 8, immagine 1 di 1
    • Unplug the cable which leads to the hinge by gently pulling it away from the motherboard.

  9. Asus Transformer Book T100TAF Keyboard Replacement: passo 9, immagine 1 di 3 Asus Transformer Book T100TAF Keyboard Replacement: passo 9, immagine 2 di 3 Asus Transformer Book T100TAF Keyboard Replacement: passo 9, immagine 3 di 3
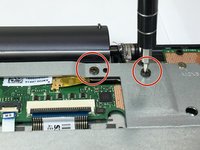
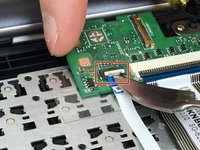
    • Flip up the tab on the white ribbon cable labeled “MB” using the metal spudger and then pull the white ribbon cable away from the motherboard.

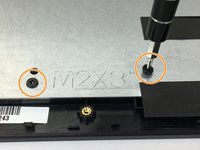
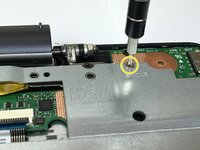
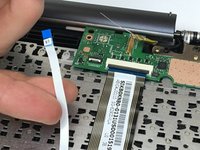
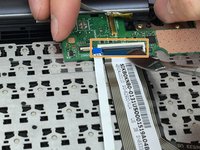
    • Use a spudger to carefully flip up the black tab on the ZIF connector and pull the black striped ribbon cable away from the motherboard.

    • Don't use a metal spudger for work on the internals of your laptop. The photo in this guide is incorrect. The metal spudger is not ESD safe and could harm the components in your laptop.

  10. Asus Transformer Book T100TAF Keyboard Replacement: passo 10, immagine 1 di 1
    • Gently remove the motherboard from the keyboard by pulling up with even pressure applied to all sides of the board.

Conclusione

To reassemble your device, follow these instructions in reverse order.

Altre 6 persone hanno completato questa guida.

Elizabeth

Membro da: 10/01/16

565 Reputazione

3 Guide realizzate

Team

USF Tampa, Team 4-3, Passmore Fall 2016 Membro di USF Tampa, Team 4-3, Passmore Fall 2016

USFT-PASSMORE-F16S4G3

4 Membri

10 Guide realizzate

Un commento

Très facile. Merci. Et le fait d'avoir pu démonter mon clavier et souffler la poussière à l'intérieur à fait en sorte que les touches qui ne fonctionnaient plus ont recommencé à le faire. Merci encore.

Etienne Olemba - Replica

Aggiungi Commento

Visualizza Statistiche:

Ultime 24 Ore: 0

Ultimi 7 Giorni: 2

Ultimi 30 Giorni: 49

Tutti i Tempi: 6,871