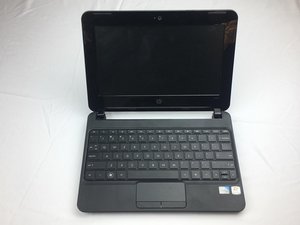
Wiki con Collaborazione Studenti
Un fantastico team di studenti del nostro programma educativo ha realizzato questo wiki.
Audio Distortion
You have trouble listening to sounds on your computer.
Loose Headphone Jack
Test audio through the computer speakers, then test it using headphones. If the audio is only distorted while listening via headphones, the audio jack or the headphones themselves may be faulty. Audio that cuts in and out is often a sign of a loose audio jack, so make sure the audio jack is fully inserted in the computer.
Faulty Driver
If the audio sound is distorted when listening through the laptop’s speakers, the audio driver may be corrupt. Search for http://support.hp.com/us-en/product/HP-M... then click “Software and Drivers.” Click the “Go” tab and select and download the appropriate driver. Go to Control Panel -> Device Manager -> Sound Controllers. Click on your sound card and click “Update driver.” Select your updated driver, then restart the computer.
USB Ports
’’USB ports won’t recognize devices or won’t work properly with connected device’’
Before You Begin
’’’Some USB devices require that devices software and drivers be installed in order to connect. Read the manufacturer's installation instructions before continuing with troubleshooting’’’
Troubleshooting Steps
For the main steps to troubleshooting USB devices follow HP’s instructions.
USB Device not Detected by Windows 7
If the USB device you are trying to use isn’t being detected by windows then follow HP’s solution.
USB Audio Device not Playing Sound
If the device you are trying to connect is an audio device and can’t get sound to play then follow these steps to fix the problem.
Problem Still Occurring?
Please contact customer support:
Phone Number: 1(800) 474-6836
Power on Button Not Working
Your HP Mini 110-3131dx does not respond to power on button.
Loose Power Adapter
Make sure power adapter plugged in properly. If it is, make sure the adapter is working or not by looking at indicator light on adapter. If the light is not on even adapter is plugged in, the adapter is broken or not working. Necessary purchasing a replacement of proper adapter.
Missing Battery/Faulty
If the adapter is plugged in properly and the indicator light is on, connect the adapter to the laptop. If the laptop powers up when the adapter is plugged in, then the new battery is necessary.
Keyboard/Keys Not Responding
The keys on your keyboard won’t retort or display to be damaged or missing.
Faulty Keyboard
When the entire keyboards fails to react, try using this guide.
Keys Are Stuck In Place
If keys can’t be pushed down, there might be something underneath the actual key holding it up. To fix the problem, removed the key and make sure there is nothing underneath it. You will need to clean the area underneath it. Once it’s clean, snap the key back in place.
Keys Are Missing
If the keys on the keyboard are missing, exchange the keys.
PC is not turning off/Slow Processing
Your HP Mini 110-3131dx does not responding to any key or button.
Lack of RAM
If your laptop freeze or stopped responding during normal tasks. Then you do not have enough RAM into your laptop. Required more RAM.
Power Shutdown
If your laptop freeze and none of the buttons are responding, Simply hold power button for 5 to 8 seconds.
Computer Will Not Power On
The laptop won’t retort or show any sign of operating.
Faulty Power Adapter
Make sure the power adapter is plugged up. If the adapter is plugged in, ensure the the light on the adapter is turned on. If the adapter is plugged up and the lighting is still not lighting up, the adapter is faulty.
Faulty Battery
If the adapter is inserted, and the light on the adapter is on, make sure the adapter is inserted into the laptop. If the laptop only running when the adapter is inserted, regarding of the time it has been charged, then the battery is faulty. Exchange the battery using this guide.
Computer Not Starting Up
“While starting up, the laptop displays the HP logo and [f9] and [f10] options but it stays on that screen.”
Run Diagnostic Test
If you are able to boot to bios (F10), run the start up test (or diagnose test) and let it check out the memory and hard drive. (The diagnostic test may fail).
Replace or Disconnect Webcam
Follow these steps to replace or disconnect your webcam:
- remove the battery.
- Get a thin piece of rigid plastic that you can run around the edge of the laptop screen section to pop open the little clips holding it in place. Always use plastic as using metal may score the plastic and ruin the look of the laptop.
- Start at the top of the screen and push the plastic into the little ridge where the glossy bezel around the lcd meets the top cover of the laptop (the outer edge rim). you should find it will open up a bit and you then need to run the plastic tool around the rim forcing all the clips to pop open. You will hear clicking sounds, this is normal it’s just the clips opening. Do this all the way around and then along the bottom too where the battery is.
- You will find that the inner side of the glossy bezel which is nearest the lcd screen is held in place with long strips of very sticky double sided tape along the top and bottom edges. there are also short strips on each side. You need to gently pull the bezel back off of the sticky tape and you should then have enough room to disable or replace the webcam.
- The webcam is at the top edge of the screen in the middle. Look for the lense. You will find 3 cables running along the top of the screen, two are to the wifi antennas at each side and one is to the webcam in the middle. There should be a short grey cable with a white plastic moulded plug with a strip of clear plastic over it to protect the connection. This is what you want to disconnect. The little plug pulls out from the left side of the webcam and you gently pull the plug to the left and it will come off.
- The laptop should now boot without any problems so just tuck the little plastic plug and cable in the gap where it was without pushing it back into the webcam connector OR get a replacement webcam and reconnect the plug to the new webcam ( I can’t confirm if the laptop boots or not with a different webcam as i simply disconnected it and left it)
- You now want to get the glossy bezel back into position around the lcd screen. push down along the inner edge to get the sticky tape to hold it down and then simply press the outer edges together and the little clips will snap back into place. Once done put battery back in and boot up the laptop. Your laptop should now boot with no problem.
(Information from https://h30434.www3.hp.com/t5/Notebook-B... by user jBrown 1690)
If Problem Continues
Contact Hp customer at 1(800) 474-6836 or take it too a computer repair shop
Device is Overheating
Your computer turns suddenly off whenever it overheats.
Dust in Vents or Fans
Due to computers’ dust and dirt computers can be overheated and other materials that is stuck in the vents or fan. In order to fix this problem, use a compressed air duster to clean off the fan and vents from all the dust in the computer.
Inadequate Amount of the Thermal Plate
The computer may not have contact between the heatsink and processor. It is caused by a lack of thermal paste or air between the two components. To fix this, clean off any old thermal paste then apply a new thermal paste in the center of the processor. Cautiously push the heat sink back in place to lock down the heat sink.
Trackpad
If the trackpad not responding while normal operations, it may outdated or might need replacement.
Dust on touch pad
Trackpad may not responding due to dust and it may not recognize your finger. To solve this problem just clean your trackpad with cleaning wipes.
Outdated drives
If the touchpad still isn't working, the Windows Device Manager can tell you detailed information about hardware issues and help you update drivers. For example, if a device has a yellow exclamation mark or red X next to it, this is an indicator of hardware or software issues.
Navigate to the Start Screen or press the Windows Key and type device manager, then press Enter.
Under Your PC, double-click Mice and other pointing devices.
Locate your touchpad and right-click the icon and select Update Driver Software...
Click Search automatically for updated driver software and follow the steps (if the drivers are out of date).
Information from : http://www.computerhope.com/issues/ch001...
Display
Computer starts with blank screen.
hard or forced reset on your HP Mini
To perform a hard reset on a computer with a sealed or non-removable battery, use the following steps:
Turn off the computer.
Remove the computer from any port replicator or docking station.
Disconnect all external connected peripheral devices such as USB storage devices, external displays, and printers.
Unplug the AC adapter from the computer.
For most notebooks, press and hold the Power button for 15 seconds to reset. If your notebook model is listed in the table, use the instructions specific to your PC.
If problem did not solved
Team

USF Tampa, Team 2-4, Cagle Fall 2016 Membro di USF Tampa, Team 2-4, Cagle Fall 2016
USFT-CAGLE-F16S2G4
5 Membri
10 guide realizzate
0 Commenti