Introduzione
The VR world is packed with serious contenders. The newest hardware and software solution comes from a dynamic duo: Razer, gaming peripherals giant, and Sensics, virtual reality maven. Their offering: the OSVR HDK 2. Can it hang with the platform heavyweights? We'll find out soon enough!
The future is now—find us on Facebook, Instagram, or Twitter and be the first to see it from the inside.
Cosa ti serve
-
-
Let's take a quick look at the OSVR HDK 2's specs and peripherals:
-
Head-mounted display (HMD) with dual OLED displays, 2160 x 1200 combined resolution (441 ppi), 90 Hz refresh rate
-
IR camera for 360º tracking, operating at 100 Hz
-
Belt box with surround sound audio codec and "signal boosters"
-
-
-
Normally we can't wait to open our new toys and expose their inner workings... but we also love any excuse to pull out our handy dandy infrared camera.
-
Dots everywhere! The HDK 2's stand-mounted sensor tracks this constellation of infrared (IR) LEDs from one instant to the next, in order to compute the wearer's motion and position.
-
The lone USB 3.0 port, nestled onto the side of this headset, can be used to attach accessories as they are developed.
-
-
-
Time to hunt for those hidden IR LEDs. Since the HDK 2 is built to be accessible to developers, we aren't surprised to learn the headset's gatekeepers are friendly Phillips screws.
-
But with the screws removed, the faceplate seems to be held in place by some mystical energy field. We suspect either wizardry or more likely, the Force.
-
The HDK 1.x models had some issues with cables ripping apart. The HDK 2 seems to have remedied this with a beefier cable and a ZIF connector.
-
-
-
We discover that magnets are the source of our magical bind. By wizardry we totally meant magnets... Magnets are neat, especially with interchangeable faceplates on the horizon.
-
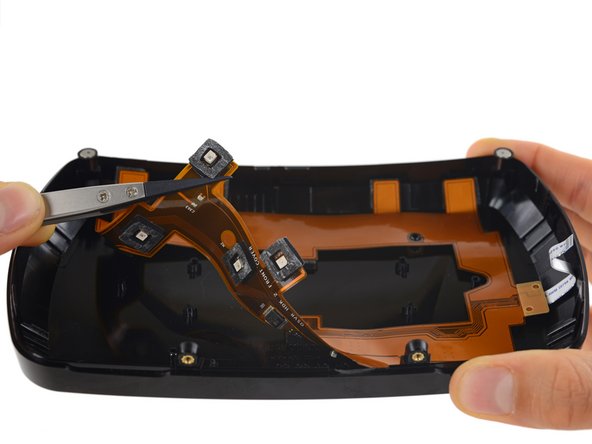
On the inside of the faceplate we find the source of (some of) those invisible lights: the IR LED array!
-
The hefty cable peels out quite easily, way less scary than some of the LED arrays we've seen.
-
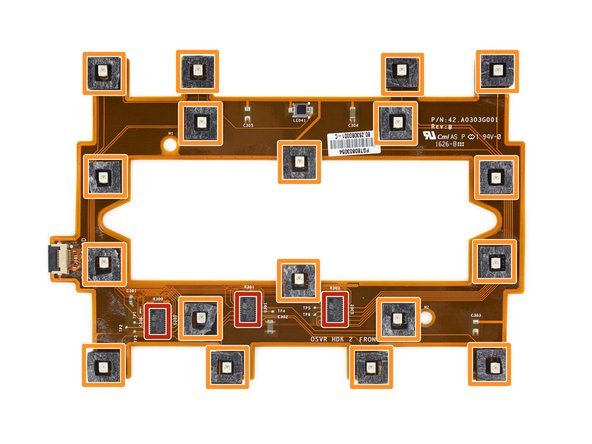
Successfully removed, we take a closer look at this ring of light:
-
Three STMicroelectronics STP16CPC26 low voltage 16-bit constant current LED sink driver
-
18 LEDs, each attached to the (IR-transparent) faceplate with some sticky, black foam tape
-
-
-
Open-source hardware means labels are a must. We're so busy admiring the organization we nearly forget about the silicon:
-
Atmel XMEGA256A3BU MCU
-
Toshiba TC358870XBG 4K HDMI to MIPI dual-DSI converter (also seen in the Rift CV1 and the Vive)
-
SMSC USB5534 4-port USB 3.0 hub controller
-
Bosch Sensortec/Hillcrest Labs BNO070 9-axis orientation sensor and sensor hub
-
Texas Instruments TPS54478 buck converters
-
Texas Instruments TPS54427 buck converter
-
Texas Instruments TXS0104E bi-directional level shifter
-
-
-
-
Speaking of labels, we found a few goodies for enterprising devs:
-
These empty pads look like they're ready to accept some ZIFs, possibly for extra USB devices.
-
Unused USB 3.0 connector
-
Cute li'l empty 5-pin socket (possibly a header for another USB 2.0 port)
-
Similarly empty 10-pin header (possibly a JTAG port for the XMEGA MCU)
-
More empty solder pads!
-
-
-
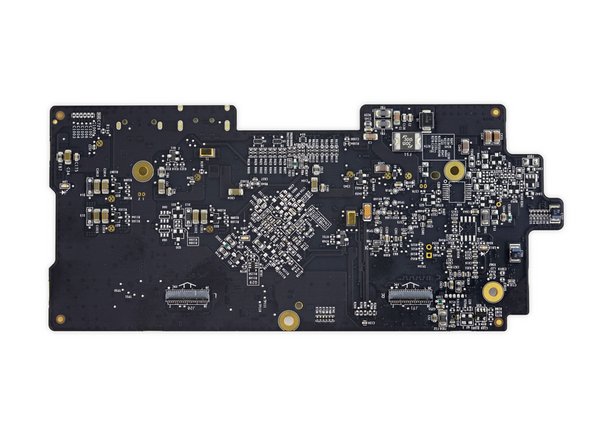
IC identification, continued:
-
Texas Instruments TPS65632 3 output AMOLED display power supply
-
Analog Devices (formerly Linear Technology) LTC4365 overvoltage/undervoltage/reverse supply protection controller
-
Diodes Incorporated AP2127K-1.8TRG1 300 mA / 1.8 V LDO regulator
-
Diodes Incorporated AP2127K-3.0TRG1 300 mA / 3.0 V LDO regulator
-
Torex Semiconductor regulator (likely)
-
Silergy DC-DC converter (likely)
-
Semtech RClamp0524P and RClamp0502A TVS diode array
-
-
-
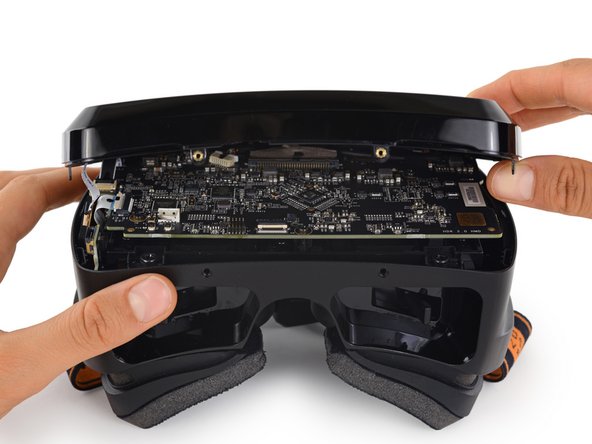
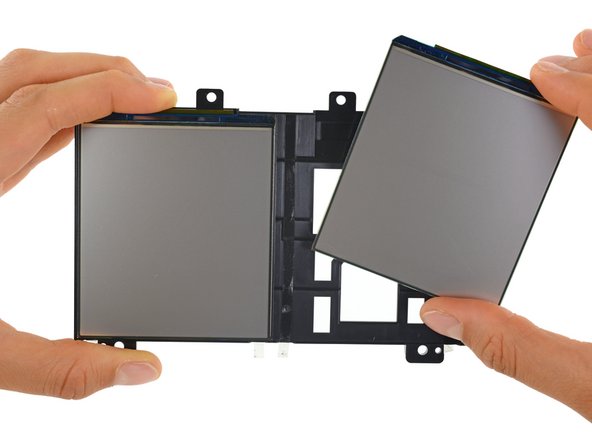
After removing four friendly Phillips screws, the display assembly lifts out of the headset with ease.
-
Improved visuals on the HDK 2 make it a contender with the big names in VR: The two 1080p OLED displays, made by AU Optronics, look similar to the Samsung displays on the HTC Vive, and boast the same 2160 x 1200 combined resolution and 90 Hz refresh rate.
-
-
-
We love watching lenses move. Like we did here. Oh and here too.
-
While the OSVR lacks IPD adjustment, it does boast one claim over the competition—those knobs allow independent eye relief adjustment. Anisometropia sufferers rejoice!
-
Focus adjustments range from +4.5 to -2 diopters, which should allow most (but not all) regular optical-enhancers to ditch their spectacles while using the OSVR.
-
-
-
The flexible foam face mask can be removed at any time, thanks to squishy pegs that pop out of the HMD with a simple tug.
-
This is especially nice if you suffer from SFS (Sweaty Face Syndrome).
-
We also take the opportunity to snag the HDK's circular peepers. While they may look reminiscent of those in ye olde Oculus, rather than the Fresnel lenses we've been seeing in devices lately, these are actually dual-element lenses, with lower chromatic aberration and no Fresnel "God rays." They are related to this earlier (HDK pre-1.3) design.
-
-
-
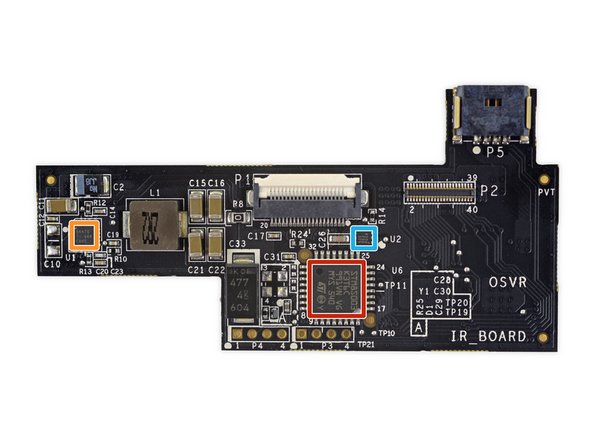
Tucked ever-so-gently along the side of the headset, we find the IR Board. We knew something had to keep all those IR LEDs under control.
-
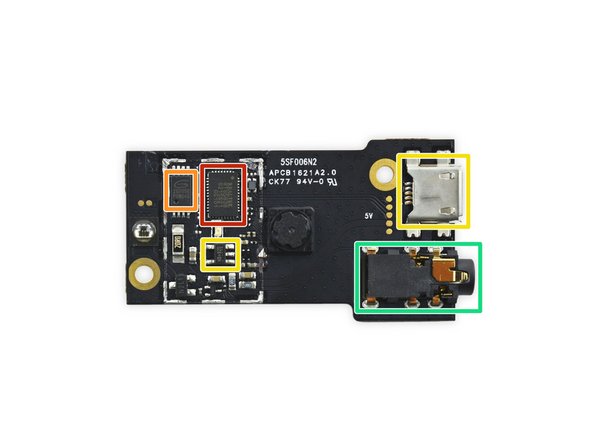
Populating the board are a few more silicon-flavored morsels:
-
STMicroelectronics STM8S003K3 8-bit MCU
-
Texas Instruments TPS54478 buck converter
-
STMicroelectronics STP16CPC26 low voltage 16-bit constant current LED sink driver
-
Vishay VSOP58438 IR remote control preampifier circuit
-
Texas Instruments TPS7A3701 1 A LDO Regulator
-
-
-
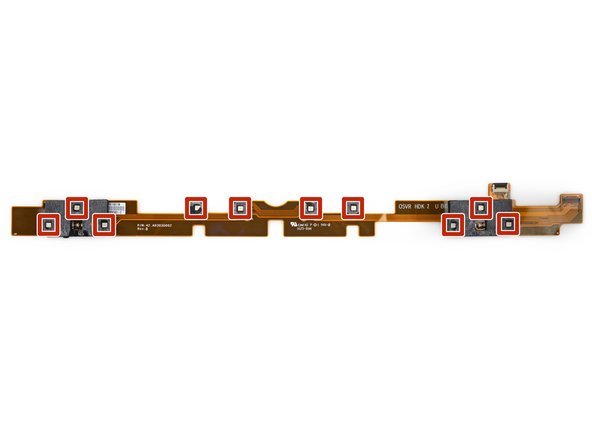
The second LED array is looooong—see the invisible measuring tape in the photo for reference—wrapping around the top and both sides of the faceplate.
-
The ribbon itself is well adhered and a bit tricky to extricate, but we managed to free the 10-LED cable sans-incident.
-
With the LED array out of the way, only two Phillips screws remain between us and the USB port.
-
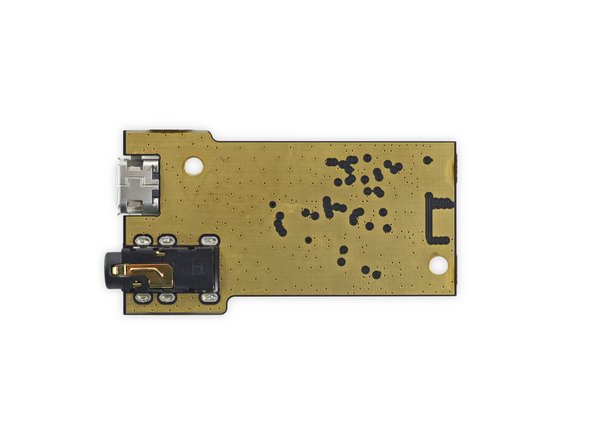
This board is just an interconnect, without any active circuitry of its own, hopefully some accessory will give its life purpose one day.
-
-
-
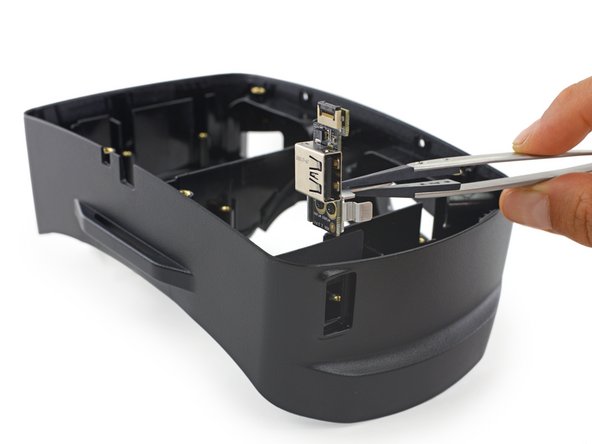
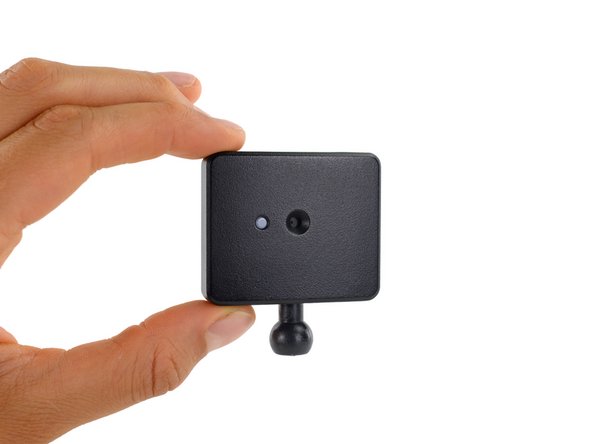
Now on to the watchful spider (or maybe the watchful complex virus?)—it's the IR-sensing camera!
-
Though the OSVR HDK 2 uses similar technology to the Oculus Rift, its camera is tiny when compared to the Rift's Constellation.
-
The camera module also features a 3.5 mm stereo jack, used for synchronizing the camera with the LEDs on the HMD.
-
-
-
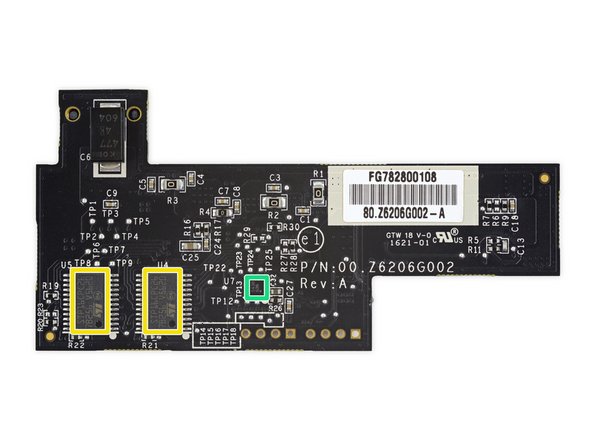
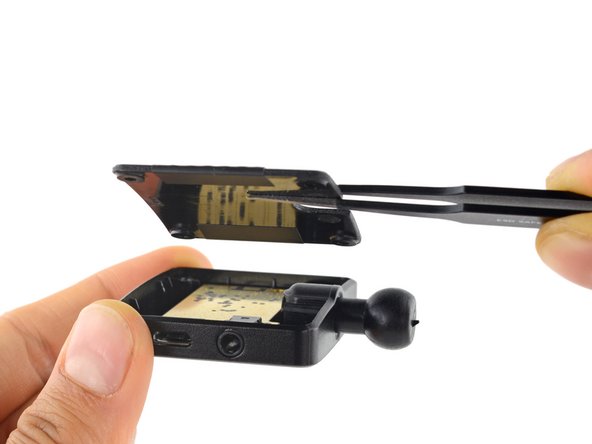
Inside the camera module we find a wee little mobo, complete with two ICs:
-
Realtek RTS5838 camera controller (likely similar to the RTS5822)
-
GigaDevice GD25D05B 512 Kb Serial NOR flash
-
Fitipower Integrated Tech FP6146-15S5G 300 mA / 1.5 V LDO Regulator
-
And it's even more complete with two ports:
-
Micro USB port
-
Sync port
-
-
-
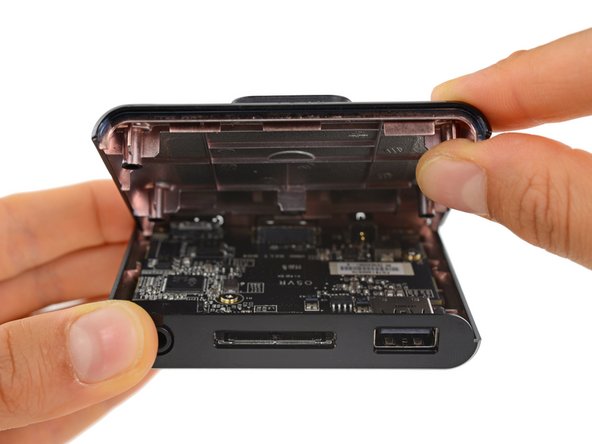
Our newest fashion accessory, the clip-on belt box, offers improved "cable management" that looks a lot like cable hoarding. Six ports populate this sucker:
-
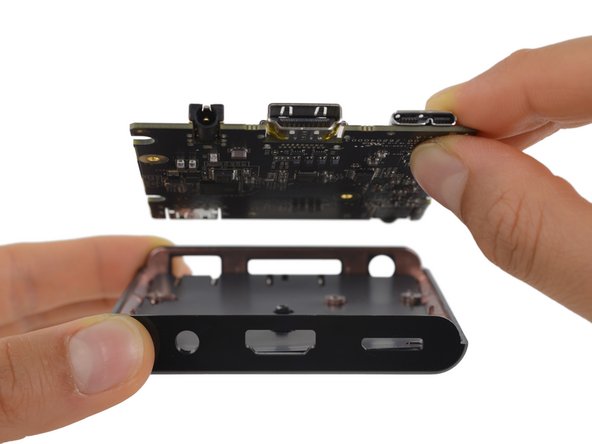
Out the bottom we have a barrel jack for the power/camera sync split cable, as well as HDMI-in and USB 3.0, for the computer connection.
-
The top sports a headphone jack, the proprietary HMD cable port, and a spare USB 3.0 port (for accessories, or maybe sweet hacks).
-
After our quick port survey, we say adios to four Phillips screws and then lay hands on the board itself. Let's see if we can find those "signal boosters" we heard about.
-
-
-
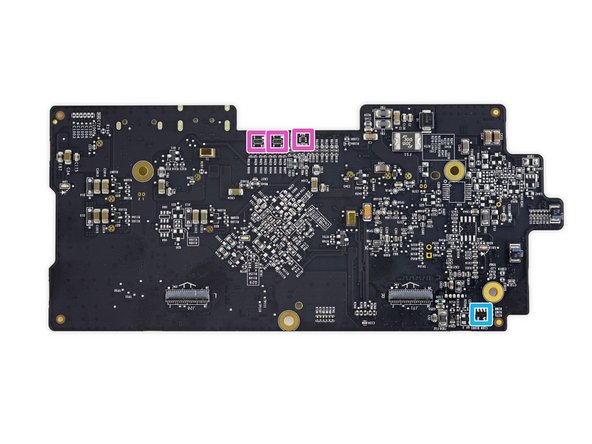
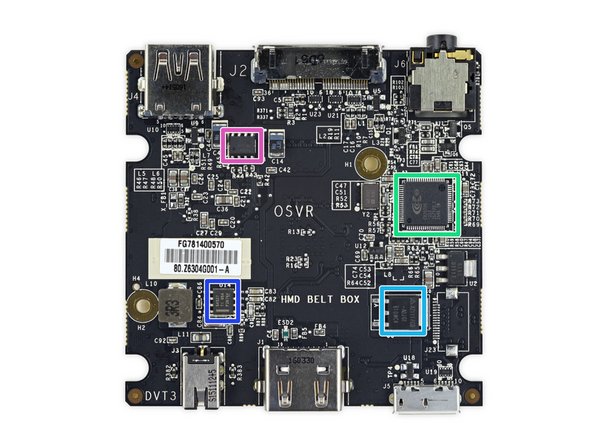
What makes our new hip accessory tick? We took a peek at the board to find out:
-
Genesys Logic, Inc. GL3522 USB 3.0 hub controller
-
Parade PS8407A jitter cleaning repeater ("Signal boosters"? Is that you?)
-
Winbond W25X05CL serial flash memory
-
Conexant CX20705 audio codec and DSP
-
BCD Semiconductors AZ1117CD low dropout linear regulator
-
Texas Instruments TPS54327 buck converter
-
Diodes Incorporated AP2186 USB power switch
-
-
-
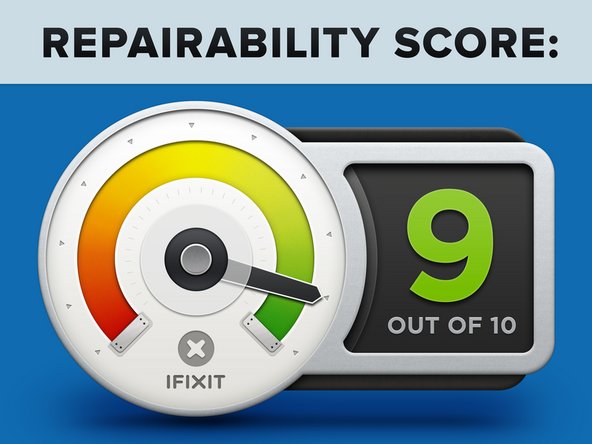
OSVR HDK 2 Repairability Score: 9 out of 10 (10 is easiest to repair)
-
Standard Phillips screws hold the headset and its components together.
-
The motherboard is easily accessible after removing the cover.
-
The cables and foam facepad are sturdy and detach easily.
-
Reconnecting the motherboard to the two display data cables underneath is tricky.
-
The two OLED screens are attached to the case with adhesive that required some prying to detach.
-


13 Commenti
Wow who's hands are featured in this ?
What an odd thing to say... I suspect they are YOUR hands...
Hello! did you teardown cables to see if theres any chips?
The two panels are AUO 3.81" low-persistence (90Hz) AMOLED, which actually provides less PPI than either the HTC Vive or the Oculus Rift CV. Also the pentile sub-pixel arrangement is different as well. Sadly the lower PPI and Pentile arrangement, along with very sharp lenses makes the screendoor effect more noticeable than the other two HMDs. The HDK2 is also many ounces more than the CV. The shining light on the HDK 2 is its $399 price, which is $200 cheaper than the CV and once the drivers are polished, including the Steam VR plug-in, this could be great entry into VR if you don't need hand controllers and room tracking. Having worked with Sensics and Razer for the past six months, I can say the are taking the OSVR initiative very serious and it is becoming a great developer and research HMD to further other types of controllers and platforms.
No chips in the cables.