Cosa ti serve
Panoramica video
Documento in evidenza
-
-
-
Locate the small push tabs on the back of the wrist straps, pushing them in to release the wrist strap.
-
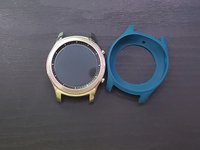
Remove any casing or housing on the watch, and clean any dust/debris.
-
(Black lines are used for privacy)
 Chiedi a FixBot
-
-
-
Using a Tri-point screwdriver, unscrew the four (4) back screws. Note: The case screws may remain in their place.
-
Using a metal jimmy, and a little bit of force, push down then lever it up to pop out the case.
-
-
-
-
Detatch the three (3) ribbons carefully with a plastic spudger. The ribbons to detach is black, yellow, & blue. You should feel a little click when re-attaching later. Note: These parts are very delicate so exercise caution!
-
-
-
Remove two Phillips head screws circled in red before the next step
-
Prying up from the corner with the red arrow, lift the motherboard and maneuver the ribbons out of the opening making sure not to tug or rip them.
-
-
-
Make sure to have the two Phillips head screws completely removed before attempting the following steps.
-
Pressing on the small black plastic area will give you leverage to pull off the motherboard gently.
-
Do NOT flip the motherboard without first detaching the battery's ribbon. The motherboard will still be connected by a ribbon. Only the battery's ribbon will be detached (Marked by the red arrow in the second photo). Using a flat tool to get underneath the ribbon will lift it up allowing you to flip the motherboard over.
-
The original battery will most likely be attached to the motherboard. A spudger will be needed to detach the battery from the motherboard. Note: Use caution, gently inserting and lifting as it allows. Use of any sharp or pointed tools can rupture the battery and will cause it to burst.
-
-
-
Insert the new battery and test for power.
-
Remember to recycle your used batteries!
-
-




To reassemble your device, follow these instructions in reverse order.
Annulla: non ho completato questa guida.
Altre 17 persone hanno completato questa guida.
Documenti allegati

7Commenti sulla guida
Id heavily consider rewriting step 4. I almost pried the board off with the screws still attached because I read from left to right on the pictures. Device is okay but I was assuming an entire unit attached with screws was coming out of a shell. Good guide otherwise, thanks
Question - Is this the same procedure for the Frontier model of the S3?
A bit of a challenge for someone at the age of 63. But it worked out. Screws should be off before lifting the mainboard (step 4).
