Introduzione
Tutorial di base per smontare l'iPhone X.
Cosa ti serve
Panoramica Video
-
-
Premi il tasto standby / riattiva e il tasto meno del volume per spegnere il telefono.
-
-
-
Utilizza il cacciavite Pentalobe per rimuovere le viti del connettore di ricarica. Riscaldare il telefono con una pistola termica renderà l'apertura del telefono più facile.
-
-
-
Rimuovi le 5 viti evidenziate nell’immagine con il cacciavite a punta triangolare.
-
Queste viti sono tutte di dimensioni diverse, quindi segnati le loro posizioni.
-
Rimuovi i connettori batteria/schermo LCD/touch screen/ricevitore/speaker con uno spudger.
It’s an OLED screen, not LCD..
need the screw sizes if anybody has them
Hi Alan, you can find the screw sizes in step 13 of our screen replacement guide.
Hello, I need help please Is the same screwdriver used for all 5 screws? that is to say the Tri Point Y000
-
-
-
Togli le 3 viti Y000 e riscalda il cavo flat con una pistola termica, poi rimuovi con cautela l'altoparlante voce.
-
-
-
-
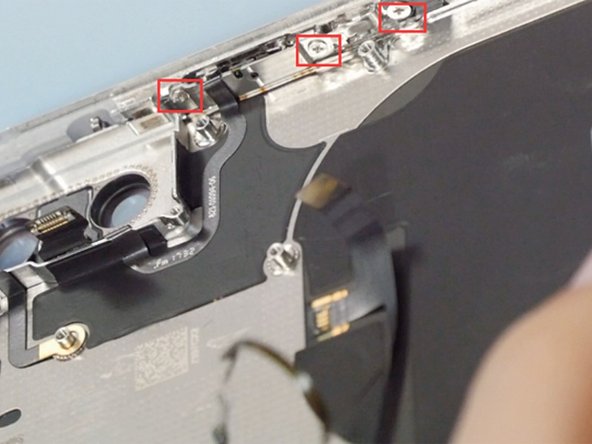
Rimuovi le 2 viti e togli la placca di metallo, rilascia i connettori della fotocamera posteriore.
-
Anche queste viti sono di dimensioni diverse
WE need a picture of all the part that need to be removed here… if the rear cameras (the square silver shapes) need to be removed before the motherboard, direction as to that is needed.
Motherboard does not need to come out yet
Notice the screw furthest left in picture. There is a connection to the front-facing cameras that need to be gently popped up to remove the antenna.
the leftmost screw in the picture is the longer one
-
-
-
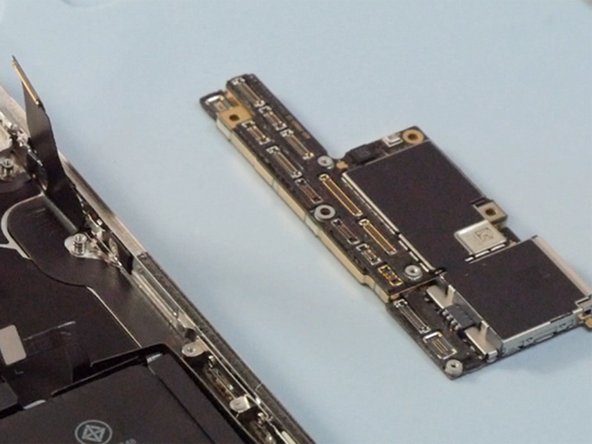
Scollega con uno spudger tutti i connettori dalla scheda madre.
-
Svita 3 viti a croce Phillips #00 dalla scheda madre per poterla rimuovere.
I feel like the last ribbon cable towards the top of the board needs to be addressed here. It's the cable right under the IR sensor for facial recognition in step five. It completely hid itself from my view and I feel like this can happen to someone else. It would be awful to destroy that cable or anything else.
I can’t get the motherboard off because of that hidden flat cable at the top of the phone! I see no way to disengage it. Am I screwed?
So, yeah. This step in particular is missing about three more steps, without which you are in danger of tearing the IR sensor. So here’s the missing info. After releasing the connectors from the board:
* remove the two Phillips screws, under the top lip of the phone chassis, holding the front camera assy in place.
* Pull the camera assy forward just enough to loosen the IR cable that lays across the board. No need to un-stick the ribbon cables from the chassis.
* use a spudger to disconnect the antenna cable from the board, directly under the IR cable.
* gently remove the laminate board while carefully pushing the ribbon connectors out of the way with a spudger.
the leftmost screw (in the picture) is longer than the rightmost one
-
-
-
Svita le 8 viti sulla piastra di supporto e rimuovi la piastra stessa facendo attenzione a non rompere il piccolo connettore collegato subito sotto al Taptic Engine.
-
Rimuovi gli altoparlanti e il Taptic Engine.
-
-
-
Stacca con le pinzette i 4 adesivi per poter rimuovere la batteria.
-
-
-
Riscaldando la camera frontale con una pistola ad aria calda sarà più facile rimuoverla.
-
-
-
Rimuovi le 4 viti sul frame mostrate nella foto.
-
Il riscaldamento del cavo flessibile della porta di ricarica ne renderà più facile la rimozione.
What size and type of screw is the one on the side that holds the interconnect cable in?
-
-
-
Svita le 7 viti nel cavo flex del Wi-Fi.
-
Il riscaldamento del cavo flessibile con una pistola termica ne renderà più facile la rimozione.
need screw description, and tiny piece placement (three)
-
-
-
Rimuovi le 3 viti del pulsante di accensione.
-
Il riscaldamento del cavo flessibile con una pistola termica ne renderà più facile la rimozione.
-


Per riassemblare il tuo dispositivo segui questi passaggi in ordine inverso.
Per riassemblare il tuo dispositivo segui questi passaggi in ordine inverso.
Annulla: non ho completato questa guida.
Altre 129 persone hanno completato questa guida.
Un ringraziamento speciale a questi traduttori:
100%


Questi traduttori ci stanno aiutando ad aggiustare il mondo! Vuoi partecipare?
Inizia a tradurre ›

25 Commenti
It's good
The iPhone X assemble video: https://youtu.be/E5jyuxgpE_g
What About the backside ? I heard that when the backside is shattered, it’s almost impossible to repair, because of the glue that holds the backside and parts together ?
Hi avdk, we don’t tear down the back glass but we will pay attention to this question. If there is a definite answer, I will reply to you .Thank you.
Mandy -
The back glass is heavily glued down, and sandwiched between the metal chassis and the rear camera cover (which are welded together). So far as we can tell, there is no practical way to replace the back glass. If it shatters, you’ll have to either live with it, or remove every component and replace the entire enclosure. If you take it to Apple, they will charge you for an out-of-warranty repair (roughly half the original retail price of the phone) and simply replace the entire phone. Check the teardown for some images of the back glass coming off.
You can replace the back glass cover of the iPhone X. We do it at work. It takes like 2 hours of heating though but its changeable.
Cristell -
Now there is a machine for remove the iPhone 8/8P/X back glass. Also there are many videos on YouTube about how to remove the back glass easily.
Mandy -
Where can I find your work surface? It looked really organized and had spots for your screwdrivers?
Hi Mike, you can get it in Etrade Supply. Here is the links you need:https://www.etradesupply.com/catalog/pro...
https://www.etradesupply.com/catalog/pro.... May this can help you!
Mandy -
What are the specs for each screw in the iPhone X?
Thank you. I love the resources that you guys put together and the detailed instructions.
While the E-Trade Supply video is fantastic, anybody tinkering with the phone may also want to have a look at the video on JerryRigEverything (https://www.youtube.com/watch?v=c97ILI7T...) to reinforce their understanding of the tear-down process.
Thank you for this. This is my first time to DIY with my iPhone. I wasn’t able to figure things out without the second video. One issue is that the tools recommended for this repair are incomplete. I ordered a toolkit that met the requirements - but it did not include the tool that has suction cups on both ends to open it easily. That wasn’t on the list. It was only in their video.
Not a complete guide to follow. Seeing other teardowns, I notice steps are out of logical order and / or missing. The descriptions lack clarity and left retracing my steps to remove parts not previously mentioned. Then there was not caution of the tweezers possibly poking the battery or by removing the volume flex cable from the wireless charging coil requires re-micro-soldering or replacing the charging coil + flex cable.
what about the bluetooth antenna
Hi,
Auf der Innenseite vom backcover, direkt unter dem Logic Board befindet sich eine schwarze klebe abschirmung.
Wozu dient diese genau? Bzw. handelt es sich dabei überhaupt um eine Art Abschirmung? Was für Auswirkungen hat es, wen bei einem komplettem back cover Tausch dieses klebe pad nicht übernommen wird? Strahlungs schutz folie? Oder doch abschirmung des logic Board bei verwendung der Induktions Ladestation?
Mfg marvin
I don't even understand some of the details in this article, but there is some amazing information for me. I am aiming to build an engaging attractive website named wordle unlimited wordle and I got some ideas after reading this article. Thank you.
What type of heat gun do you use and what temperature is needed?