Introduzione
Utilizzare questa guida per installare o sostituire la memoria RAM.
Cosa ti serve
-
Attrezzo utilizzato in questo passaggio:iMac Intel 21.5" Cardboard Service Wedge$4.99
-
Attrezzo utilizzato in questo passaggio:Plastic Cards$2.99
-
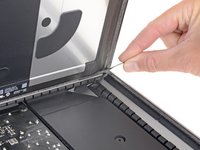
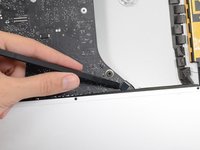
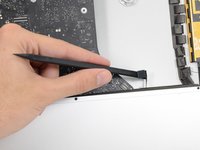
A partire dall'angolo superiore destro dell'iMac, inserire una scheda di plastica fra il display e il telaio.
-
-
-
-
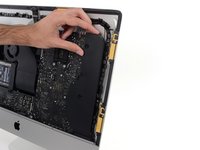
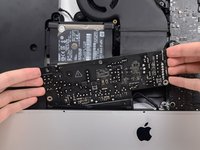
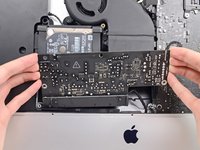
Rimuovi le seguenti cinque viti a croce Phillips che tengono in posizione la staffa di supporto inferiore:
-
Quattro viti da 3,2 mm
-
Una vite da 1,7 mm
-
-
-
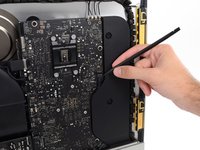
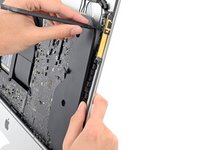
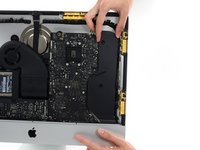
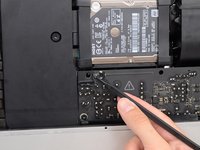
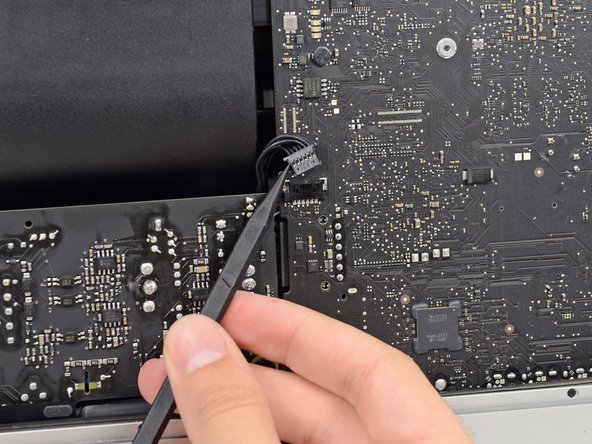
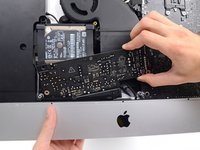
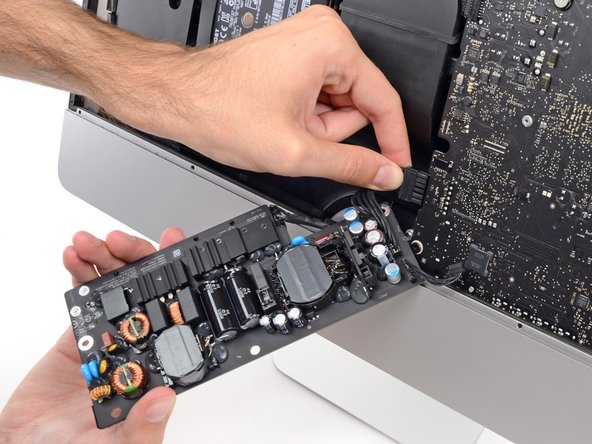
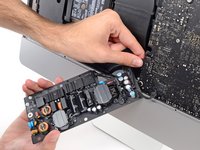
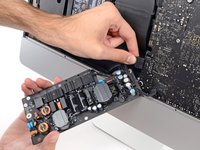
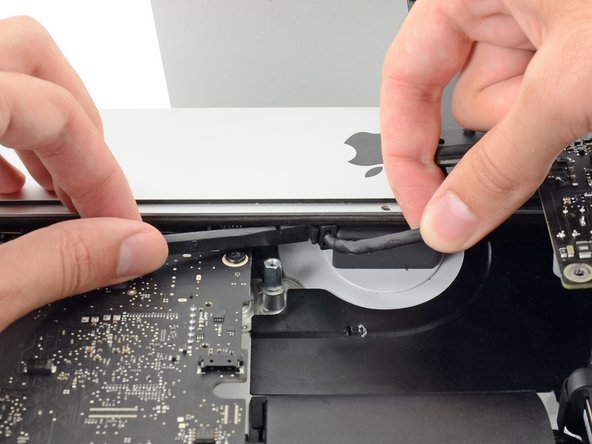
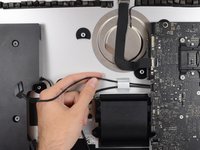
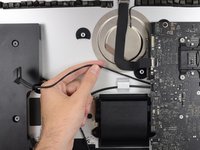
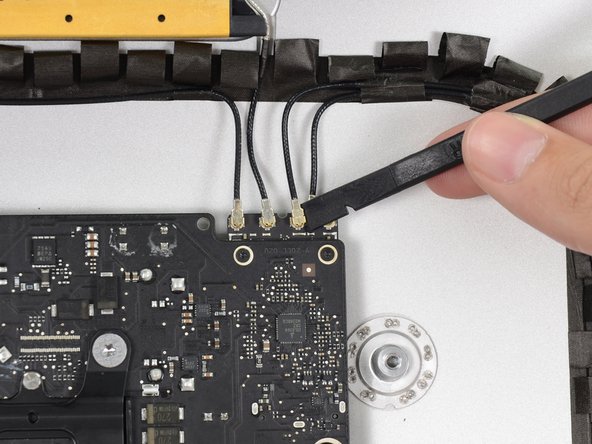
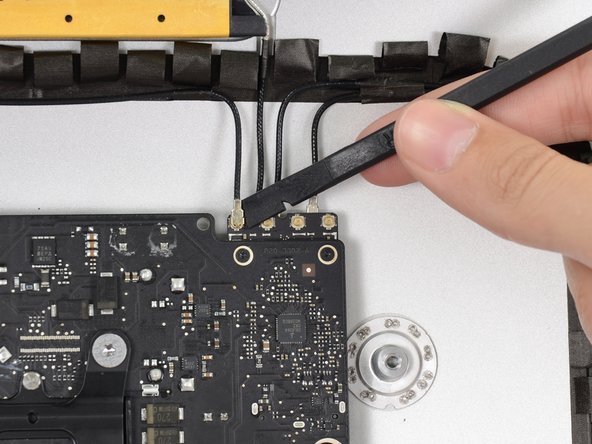
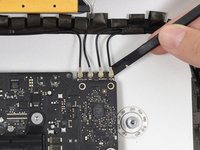
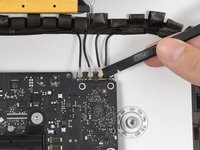
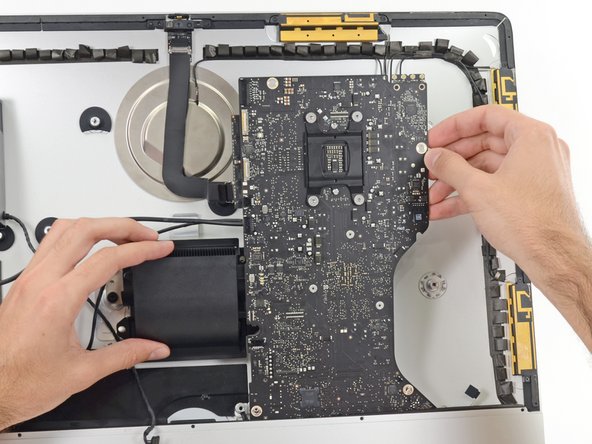
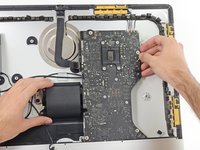
Usa uno spudger per rilasciare il connettore del cavo dello speaker destro dalla sua presa sulla scheda madre.
-
Tira il connettore verso il basso per sfilarlo dalla sua presa.
-
-
-
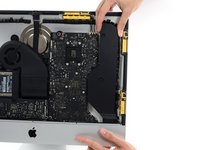
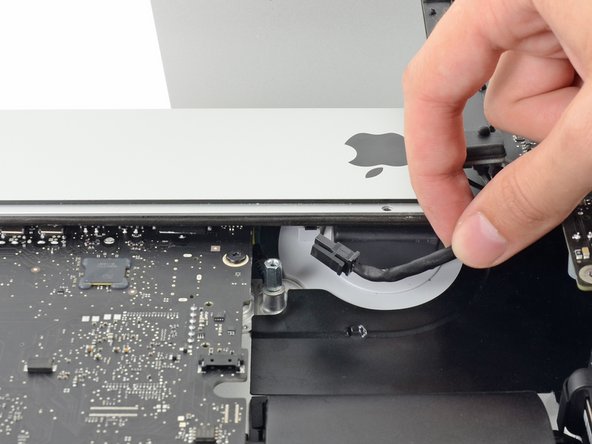
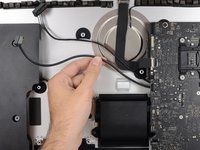
Tira lo speaker destro verso l'alto per un paio di centimetri, verso la parte superiore dell'iMac.
-
Tira lo speaker verso l'alto e rimuovilo dall'iMac. Questo passaggio può richiedere della forza: usa entrambe le mani e fai ondeggiare lo speaker avanti e indietro lo speaker per rimuoverlo.
-
-
-
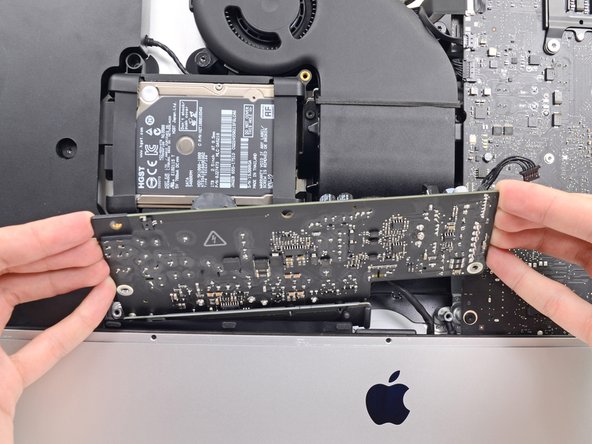
Rimuovi le seguenti viti che mantengono al loro posto le staffe di bloccaggio che fissano il disco rigido alla scocca posteriore:
-
Due viti Torx T10 da 21 mm sulla parte sinistra della staffa del disco rigido.
-
Una vite Torx T10 da 9 mm.
-
Una vite Torx T10 da 27 mm.
-
-
-
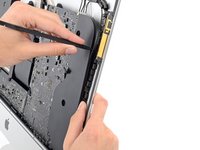
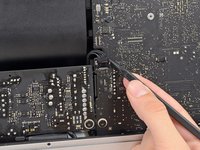
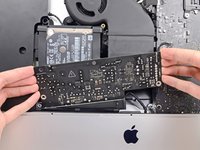
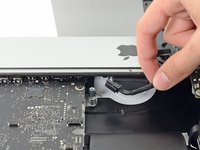
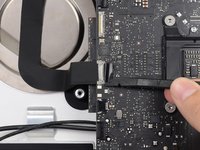
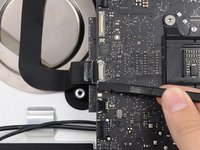
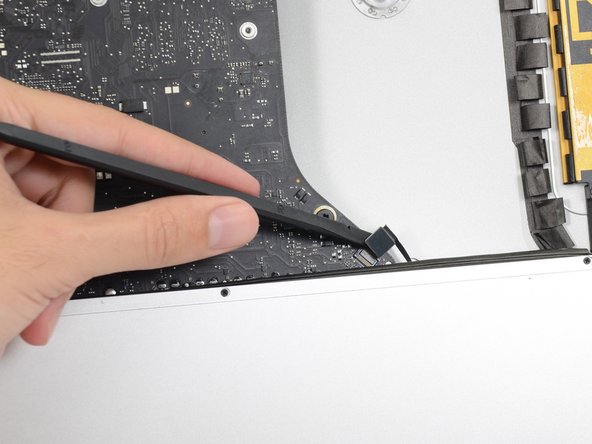
Usa la punta di uno spudger per spingere entrambi i lati del connettore del cavo del tasto di accensione e guidalo delicatamente fuori dalla sua presa.
-
-
-
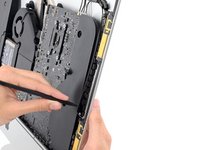
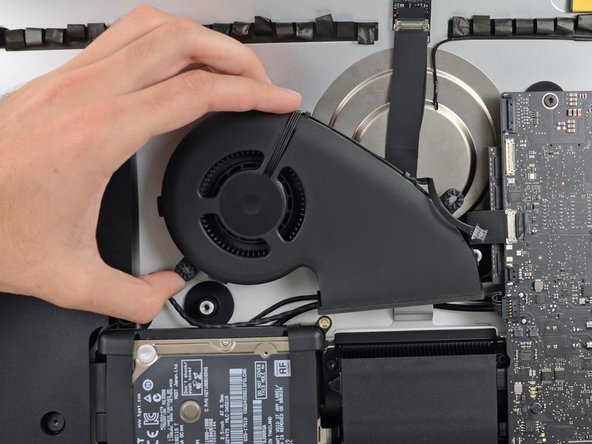
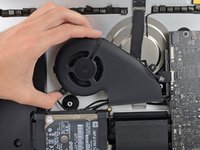
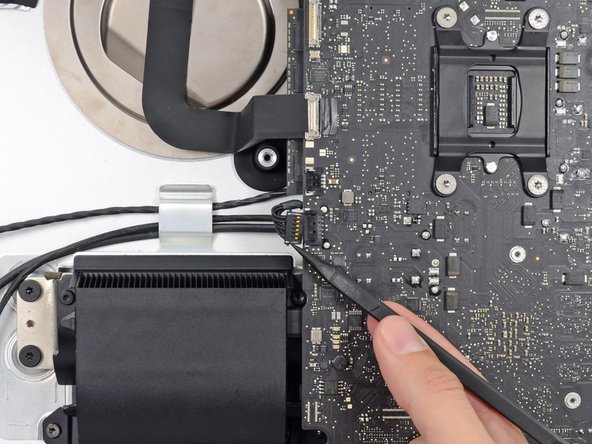
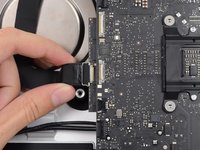
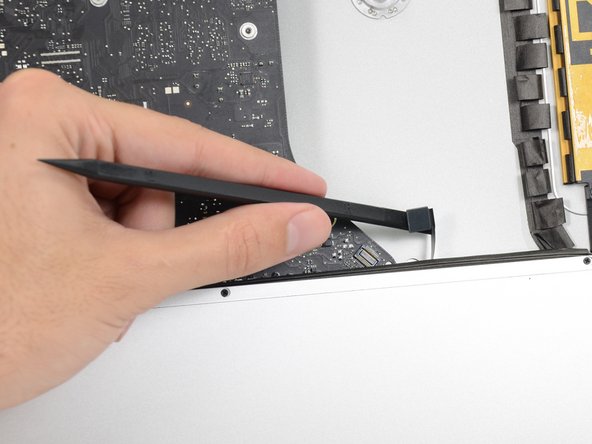
Tira delicatamente il connettore del cavo della ventola per sfilarlo dalla sua presa sulla scheda madre.
-
-
-
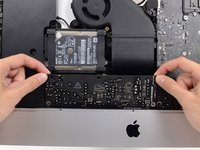
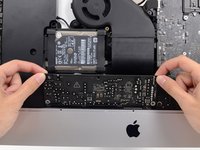
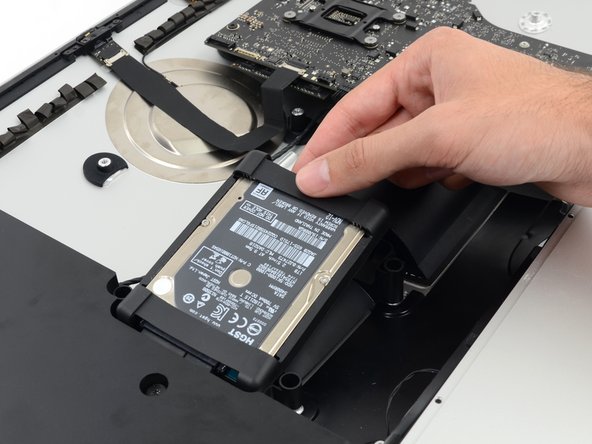
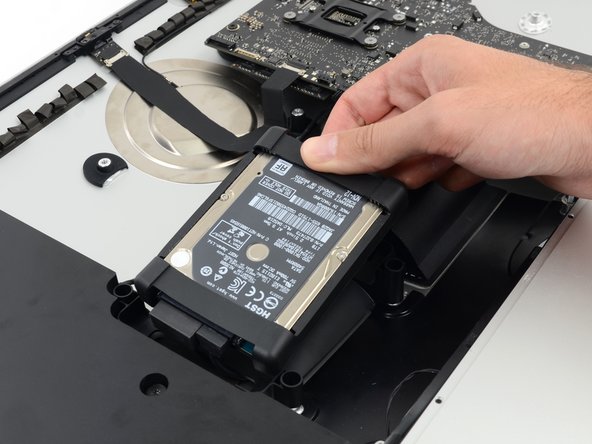
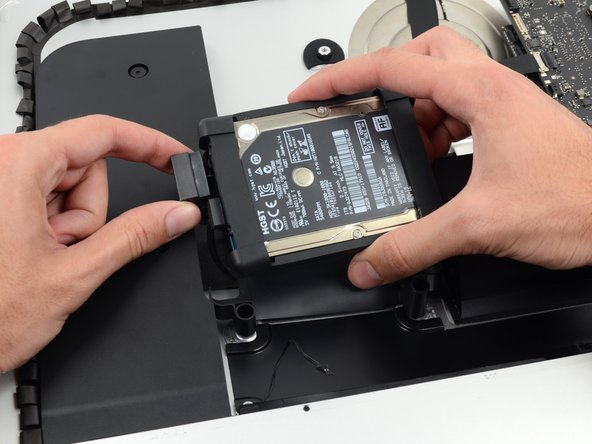
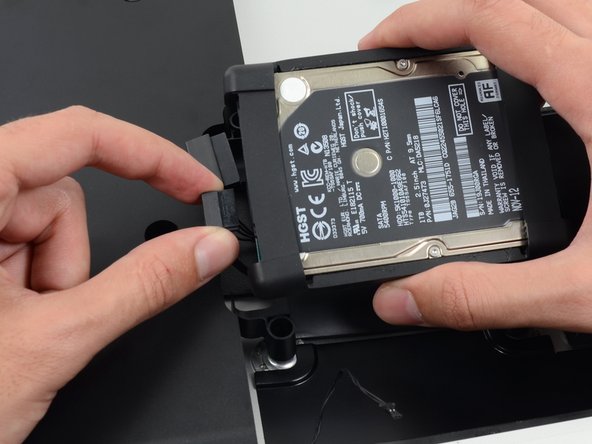
Solleva l'hard drive dal bordo più vicino alla scheda logica ed estrailo leggermente dalla sua sede.
-
-
-
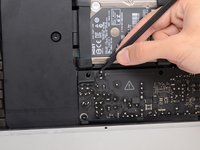
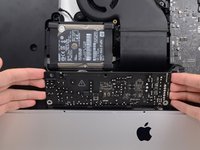
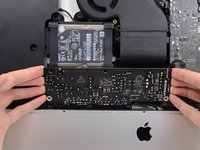
Svita la vite Torx T10 da 7,2 mm che fissa il carrello del disco rigido alla copertura posteriore.
-
-
-
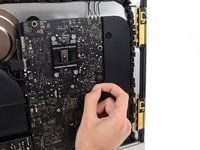
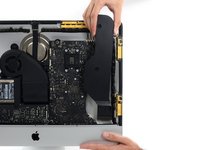
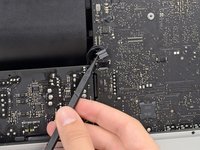
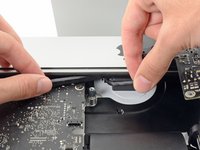
Premi entrambi i lati del connettore del cavo dello speaker sinistro con la punta di uno spudger e guidalo delicatamente fuori dalla sua presa.
-
-
-
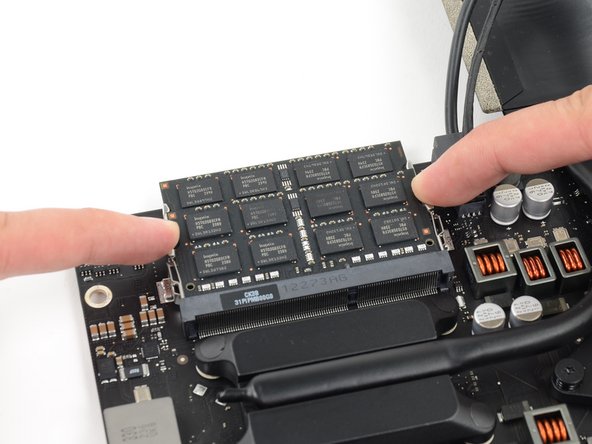
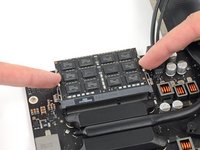
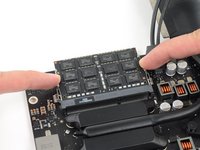
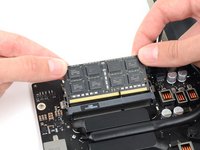
Sganciare le linguette sui lati del modulo RAM, premendole contemporaneamente in senso opposto al modulo stesso.
-
Grab the top left and right corners of the RAM module and carefully pull it straight out of its socket.
-


Non c'è conclusione.
Non c'è conclusione.
Annulla: non ho completato questa guida.
Altre 141 persone hanno completato questa guida.
Un ringraziamento speciale a questi traduttori:
100%

Nina Steinhaeuser ci sta aiutando ad aggiustare il mondo! Vuoi partecipare?
Inizia a tradurre ›


18 Commenti
I used the iMac Opening Tool just as shown starting in step 2 to separate the tape. DISASTER! The screen cracked! I used the tool slowly and carefully and despite this, the screen cracked. I should have simply used a guitar pick. That said, I decided to see if I could upgrade the 8GB RAM to 16GB RAM WITHOUT removing the logic board all performing all of these steps. I found I could simply remove the FAN assembly as shown in step 43. This makes enough room to reach behind the logic board and unclip the 2 memory modules. I installed 2 8GB modules (1600MHz DDR3L SO-DIMM PC12800 204 Pin) without much trouble. I used a plastic stick to reach behind the logic board and unclip the existing memory modules, then carefully inserted the new ones and clipped them into place. This is much easier than performing all of these steps.
Hi There, I am interested in going in and upgrading my RAM to 16. Did you do all the steps ups to 43? Remove the power supply? Did you remove the hard Drive? I take it you had to do step 53 as well and remove the iSight camera cable first? I may try it your way, I hate to have to unplug 98% of everything to do this. Thanks for the tip.
I added extra RAM by following step 1-23, then skipping to do just 41-43 and then reach the RAM from the back of the logic board. It was difficult to reach but possible.
Mikael -
Wow, thanks. That was much easier. I unscrewed the corner Torx screw holding the mobo down for just a touch of flex.
Used a couple of screw drivers to pull the tabs out
It helps if you have done a bunch of memory upgrades so you have a feel for how to get the chips in.
cyadmark -
Thanks for the tips here.I used a guitar pick and some credit cards as suggested, and to worked fine. I also followed Mikael’s suggestion :
“I added extra RAM by following step 1-23, then skipping to do just 41-43 and then reach the RAM from the back of the logic board. It was difficult to reach but possible.”
which worked fine for me too. Thanks for the suggestion. Have ordered tools & adhesive from ifixit anyway cos the site & its community showed me how to do it all anyway