Salta al contenuto principale
Unisciti alla Community delle riparazioni - Crea un account

bObi Pet Screen Replacement

Cosa ti serve

    1. bObi Pet Screen  Replacement, Turn bObi Pet Off: passo 1, immagine 1 di 3 bObi Pet Screen  Replacement, Turn bObi Pet Off: passo 1, immagine 2 di 3 bObi Pet Screen  Replacement, Turn bObi Pet Off: passo 1, immagine 3 di 3
      • Before we get started, turn bObi Pet OFF and flip her over onto a flat surface.

      • Next, remove bObi Pet's dustbin. Grip the small tab on the back of the bin, and pull to remove.

      Chiedi a FixBot

      Aggiungi Commento

    2. bObi Pet Screen  Replacement, Remove the Front Wheel: passo 2, immagine 1 di 2 bObi Pet Screen  Replacement, Remove the Front Wheel: passo 2, immagine 2 di 2
      • Grip the front wheel and pull straight up, using the screwdriver for leverage.

      • The wheel will pop out and you will see two screws beneath it.

      • There is a larger screw set deeper in the wheel compartment. Use the screwdriver to remove it.

      • Remember to keep all screws and parts removed from bObi Pet safely aside during the repair. They may be needed for re-assembly.

      Chiedi a FixBot

      Aggiungi Commento

    3. bObi Pet Screen  Replacement, Remove the Dustbin's Holders: passo 3, immagine 1 di 3 bObi Pet Screen  Replacement, Remove the Dustbin's Holders: passo 3, immagine 2 di 3 bObi Pet Screen  Replacement, Remove the Dustbin's Holders: passo 3, immagine 3 di 3
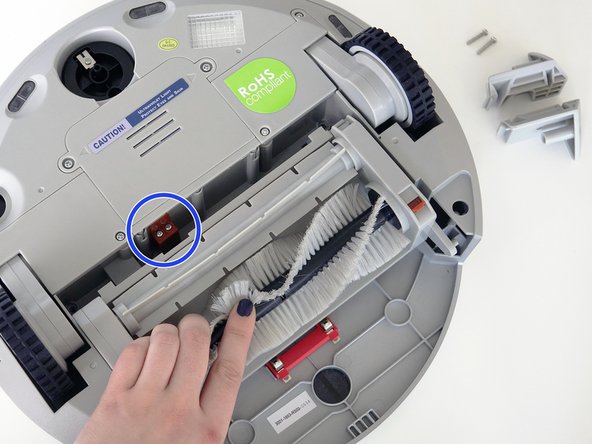
      • Remove the screws on both sides of bObi Pet’s dustbin. Then, remove the corner pieces that were held down by the screws.

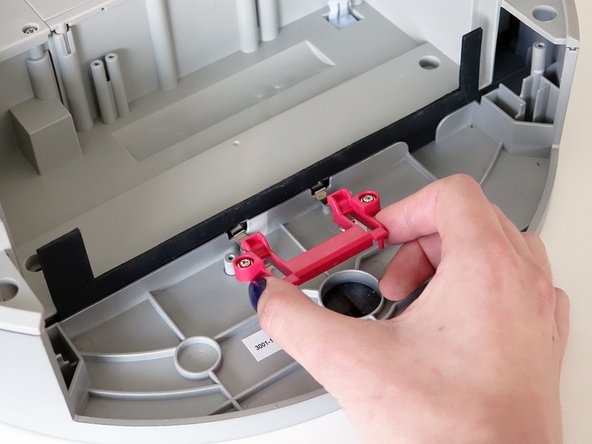
      • Grip the brush compartment and pull down to reveal two screws on a red fastener.

      • Remove them with the screwdriver.

      Chiedi a FixBot

      Aggiungi Commento

    4. bObi Pet Screen  Replacement, Remove the Main Brush Attachment: passo 4, immagine 1 di 3 bObi Pet Screen  Replacement, Remove the Main Brush Attachment: passo 4, immagine 2 di 3 bObi Pet Screen  Replacement, Remove the Main Brush Attachment: passo 4, immagine 3 di 3
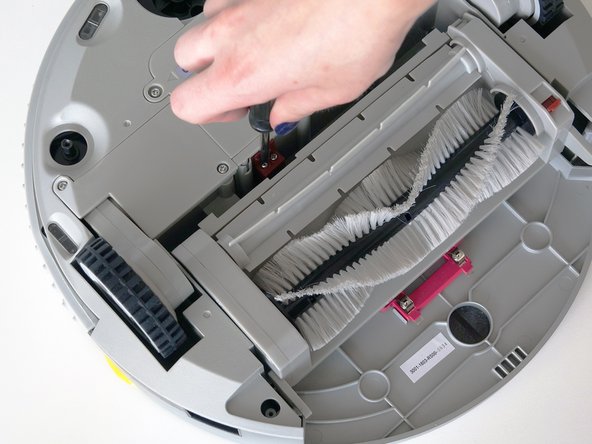
      • Pull the brush compartment up until the fastener is freed from bObi Pet. Then, detach the brush compartment's circuit plug and set it aside.

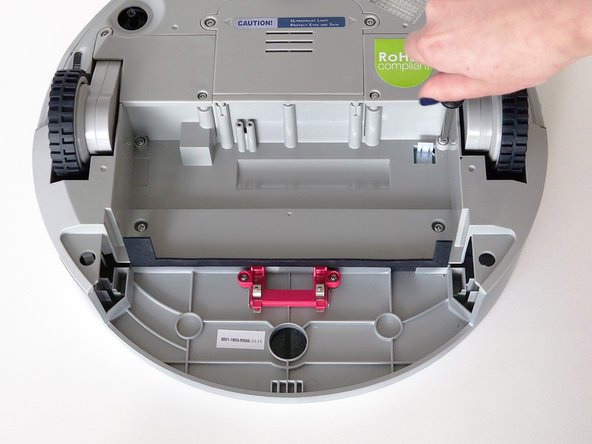
      • Remove the 4 screws located beneath the brush compartment.

      Chiedi a FixBot

      Aggiungi Commento

    5. bObi Pet Screen  Replacement, Remove the Cover Screws: passo 5, immagine 1 di 2 bObi Pet Screen  Replacement, Remove the Cover Screws: passo 5, immagine 2 di 2
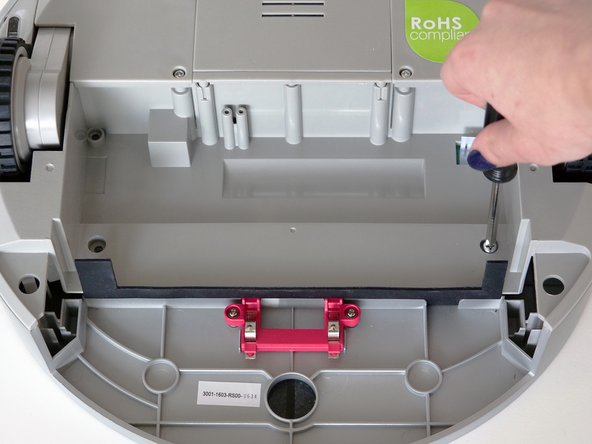
      • Remove the 2 screws on the dustbin’s red fastener.

      • Remove the fastener and set it aside for reassembly.

      • The cover is no longer secured, so carefully flip bObi Pet onto her wheels.

      Chiedi a FixBot

      Aggiungi Commento

    6. bObi Pet Screen  Replacement, Detach the Cover: passo 6, immagine 1 di 3 bObi Pet Screen  Replacement, Detach the Cover: passo 6, immagine 2 di 3 bObi Pet Screen  Replacement, Detach the Cover: passo 6, immagine 3 di 3
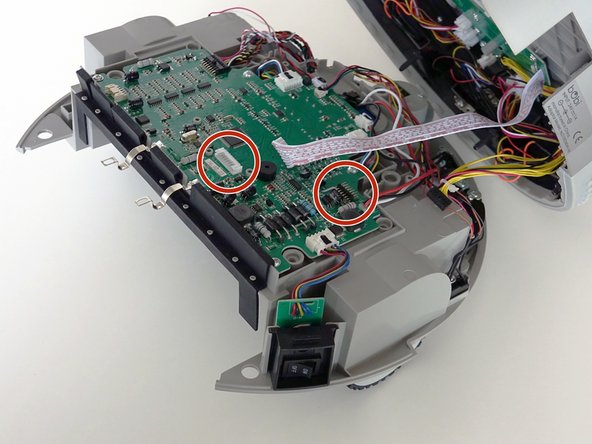
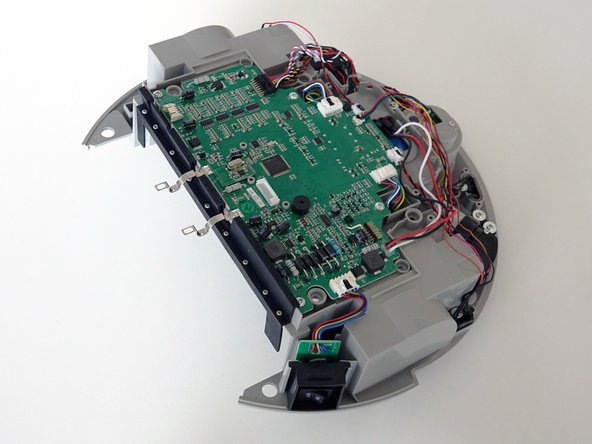
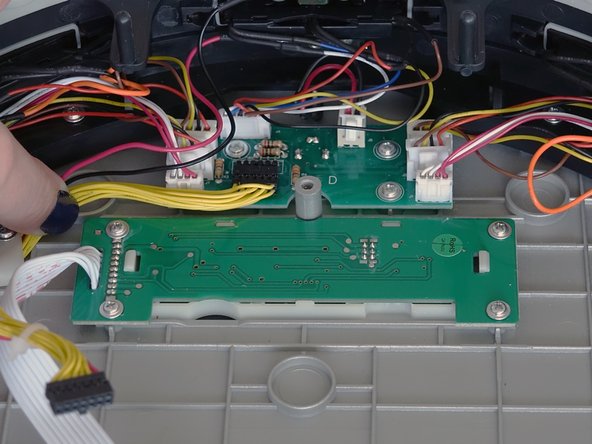
      • Lift the cover to reveal the main board underneath.

      • Remove the two circuit plugs connecting the lid to the mainboard.

      • bObi Pet's cover is entirely separated, and you may now access any of her internal parts for replacement.

      Chiedi a FixBot

      Aggiungi Commento

    1. bObi Pet Screen  Replacement, Remove the Screen: passo 7, immagine 1 di 3 bObi Pet Screen  Replacement, Remove the Screen: passo 7, immagine 2 di 3 bObi Pet Screen  Replacement, Remove the Screen: passo 7, immagine 3 di 3
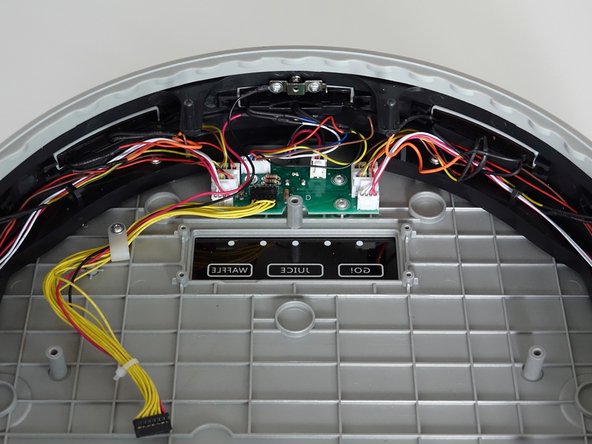
      • Remove the four screws holding bObi Pet's screen.

      • Then, lift it straight up and out to make space for the replacement.

      Chiedi a FixBot

      Aggiungi Commento

    2. bObi Pet Screen  Replacement, Place the New Screen: passo 8, immagine 1 di 3 bObi Pet Screen  Replacement, Place the New Screen: passo 8, immagine 2 di 3 bObi Pet Screen  Replacement, Place the New Screen: passo 8, immagine 3 di 3
      • Lay the new screen in the open space on bObi Pet's lid.

      • Align the screw holes on the screen with the screw posts in bObi Pet and push down until it lies flat.

      • Install all four screws, and you'll be ready to close bObi Pet. See the following instructions: Assemble bObi Pet Post-Repair

      Chiedi a FixBot

      Aggiungi Commento

Conclusione

To reassemble bObi Pet, see this tutorial: Assemble bObi Pet Post-Repair

Annulla: non ho completato questa guida.

Chelsea

Membro da: 09/24/14

2.278 Reputazione

31 guide realizzate

0Commenti sulla guida

Aggiungi Commento

Visualizza statistiche:

Ultime 24 ore: 2

Ultimi 7 giorni: 6

Ultimi 30 giorni: 27

Tutti i Tempi: 290