Introduzione
If there is damage to the camera of your ZTE Maven 3 z835, follow this guide with the given steps in an earnest manner. You may need to replace the camera if its images appear blurry and disoriented, or if there are apparent cracks on the camera itself. This guide mainly applies to the back camera which is 5 Mega Pixels.
The front camera on the phone can be found in the frontal left area of the device.
For this guide, you will need to utilize a pry tool, a Phillips #00 screwdriver, and tweezers. You will need to follow these steps closely since any damage done to the hardware within the device can make it more difficult to fix.
Cosa ti serve
-
-
Locate the small indent on the back right bottom corner of the phone.
-
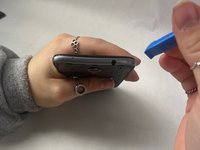
Put the pry tool or your fingertip inside the small gap on the bottom right of the back of the phone and pop up the cover.
-
Continue to go around the phone until the cover is completely off the back of the pull and put it aside.
 Chiedi a FixBot
-
-
-
Locate the battery in the middle of the back of the phone.
-
Push in and up on the battery to remove it from its slot.
-
Put the battery aside.
-
-
-
-
Use a Phillips #00 screwdriver to remove twelve 2 mm screws along the back outer edges of the phone.
-
-
-
There’s a 13th 2 mm screw with a lock sticker over it on the bottom right corner. Insert the #00 Phillips screwdriver in the middle, breaking the sticker, and take the screw out.
-
-
-
Slide the pry tool into the middle of the connection between the screen and the back of the phone.
-
Once in, slide the pry tool around the phone, separating the screen and the back of the phone.
-
The detached piece is the midframe, and you can place it aside when detached.
-
-
Strumento utilizzato in questo passaggio:Tweezers$4.99
-
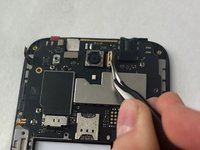
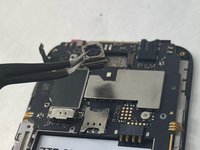
Detach the ribbon cable connecting the camera in the top middle of the phone.
-
Using this same method, grab the tweezers and insert the replacement camera.
-





To reassemble your device, follow these instructions in reverse order.
Annulla: non ho completato questa guida.
Un'altra persona ha completato questa guida.

Team

UMass Dartmouth, Team 3-1, Konn Fall 2023 Membro di UMass Dartmouth, Team 3-1, Konn Fall 2023
UMASSD-KONN-F23S3G1
3 Membri
20 guide realizzate
