Salta al contenuto principale

ZTE Awe Screen Replacement

Cosa ti serve

  1. ZTE Awe Screen Replacement, Detach the mid frame: passo 1, immagine 1 di 1
    • Use the Phillips Head 00 screw driver to unscrew the seven 0.1mm screws from the phone's mid frame.

  2. ZTE Awe Screen Replacement, Separate the mid frame and the digitizer: passo 2, immagine 1 di 3 ZTE Awe Screen Replacement, Separate the mid frame and the digitizer: passo 2, immagine 2 di 3 ZTE Awe Screen Replacement, Separate the mid frame and the digitizer: passo 2, immagine 3 di 3
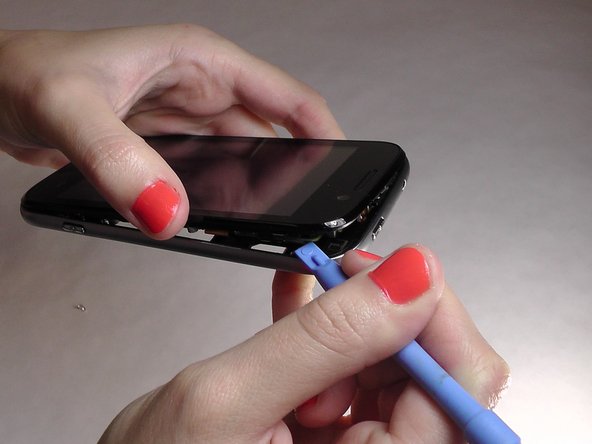
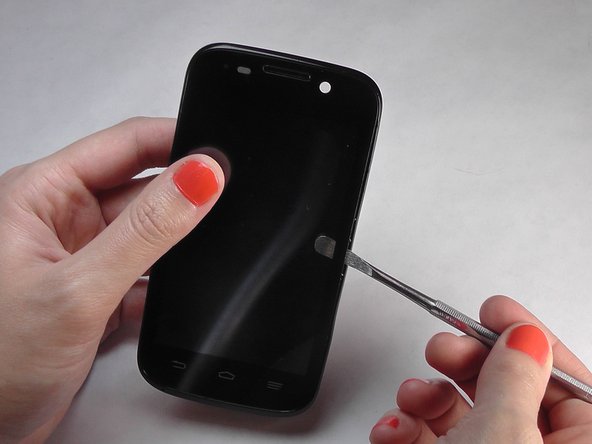
    • Wedge the flat end of the spudger between the mid frame and the digitizer.

  3. ZTE Awe Screen Replacement, Expose the motherboard: passo 3, immagine 1 di 2 ZTE Awe Screen Replacement, Expose the motherboard: passo 3, immagine 2 di 2
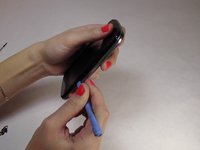
    • Gently pry the mid frame away from the rest of the phone to expose the motherboard.

  4. ZTE Awe Screen Replacement, Remove the ribbon wires: passo 4, immagine 1 di 3 ZTE Awe Screen Replacement, Remove the ribbon wires: passo 4, immagine 2 di 3 ZTE Awe Screen Replacement, Remove the ribbon wires: passo 4, immagine 3 di 3
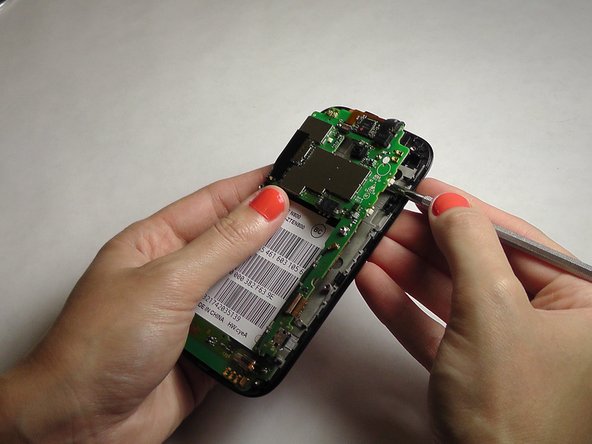
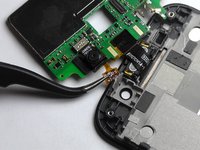
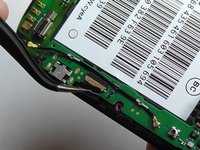
    • Use the tweezers to remove the four ribbon wires on the sides of the device.

  5. ZTE Awe Screen Replacement, Orient the motherboard: passo 5, immagine 1 di 1
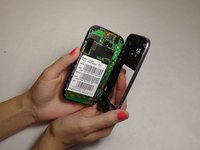
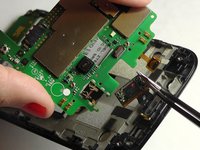
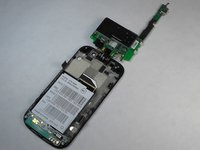
    • Orient the motherboard to expose the mid frame.

  6. ZTE Awe Screen Replacement, Remove the connector: passo 6, immagine 1 di 3 ZTE Awe Screen Replacement, Remove the connector: passo 6, immagine 2 di 3 ZTE Awe Screen Replacement, Remove the connector: passo 6, immagine 3 di 3
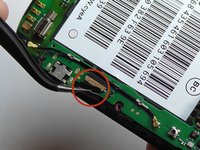
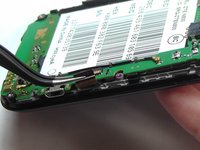
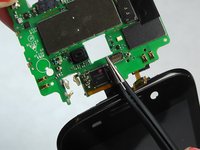
    • Remove the connector to free the motherboard from the screen.

  7. ZTE Awe Screen Replacement, Remove the cover: passo 7, immagine 1 di 1
    • Remove the back cover from the phone.

  8. ZTE Awe Screen Replacement, Remove battery: passo 8, immagine 1 di 1
    • Pry the battery up and out of the phone.

  9. ZTE Awe Screen Replacement: passo 9, immagine 1 di 3 ZTE Awe Screen Replacement: passo 9, immagine 2 di 3 ZTE Awe Screen Replacement: passo 9, immagine 3 di 3
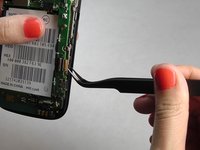
    • Gently wedge the spudger in between the glass screen and the mid frame.

  10. ZTE Awe Screen Replacement, Separate the motherboard from the screen: passo 10, immagine 1 di 2 ZTE Awe Screen Replacement, Separate the motherboard from the screen: passo 10, immagine 2 di 2
    • Carefully pry the screen away from the motherboard.

  11. ZTE Awe Screen Replacement, Remove the ribbons: passo 11, immagine 1 di 3 ZTE Awe Screen Replacement, Remove the ribbons: passo 11, immagine 2 di 3 ZTE Awe Screen Replacement, Remove the ribbons: passo 11, immagine 3 di 3
    • Be careful when removing the ribbon wires. They are delicate.

  12. ZTE Awe Screen Replacement, Remove the remaining ribbons: passo 12, immagine 1 di 3 ZTE Awe Screen Replacement, Remove the remaining ribbons: passo 12, immagine 2 di 3 ZTE Awe Screen Replacement, Remove the remaining ribbons: passo 12, immagine 3 di 3
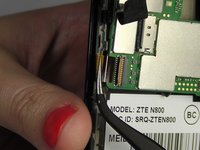
    • Remove the remaining two ribbon wires from their connectors.

  13. ZTE Awe Screen Replacement, Expose the digitizer: passo 13, immagine 1 di 3 ZTE Awe Screen Replacement, Expose the digitizer: passo 13, immagine 2 di 3 ZTE Awe Screen Replacement, Expose the digitizer: passo 13, immagine 3 di 3
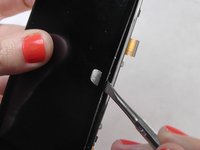
    • Wedge the plastic spudger between the screen and the digitizer.

    • Gently pry apart the screen from the digitizer.

Conclusione

To reassemble your device, follow these instructions in reverse order.

Altre 12 persone hanno completato questa guida.

Jennifer DeMeo

Membro da: 10/07/14

1.035 Reputazione

5 Guide realizzate

Team

USF Tampa, Team 1-2, Leahy Fall 2014 Membro di USF Tampa, Team 1-2, Leahy Fall 2014

USFT-LEAHY-F14S1G2

4 Membri

10 Guide realizzate

0 Commenti

Aggiungi Commento

Visualizza Statistiche:

Ultime 24 Ore: 0

Ultimi 7 Giorni: 0

Ultimi 30 Giorni: 5

Tutti i Tempi: 14,169