Introduzione
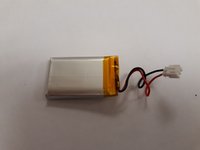
This guide is designed to explain how to replace the battery in the ZD-N208 Plus Wireless Controller. The Z-DN Plus contains a rechargeable lithium polymer battery, which generally can be found online or in electronic stores. They retail for around $20 USD. The guide will outline how to disconnect the battery from the controller in order to replace it with a new battery. Note, if you are having trouble starting your controller it is suggested that you attempt other troubleshooting options to find potential issues before replacing the battery, as your troubles may not be caused by a broken battery.
Cosa ti serve
-
-
Remove the seven 12mm JIS #00 screws that hold the back panel in place.
 Chiedi a FixBot
-
-
-
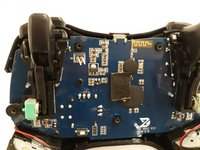
Lift up on the back panel of the ZD-N Plus to remove it from the rest of the controller.
-
-
-
-
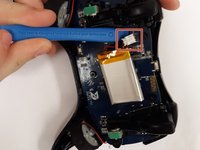
Use an opening tool to pry the battery from its original position.
-
-
-
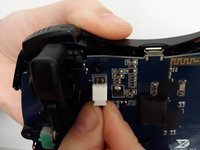
Use an opening tool to pry the connector away from the two metallic prongs.
-


To reassemble your device, follow these instructions in reverse order.

Team

Grand Valley State University, Team S4-G1, DeVasto Fall 2019 Membro di Grand Valley State University, Team S4-G1, DeVasto Fall 2019
GVSU-DEVASTO-F19S4G1
4 Membri
7 guide realizzate