Salta al contenuto principale
Unisciti alla Community delle riparazioni - Crea un account

Xbox Controller S Buttons Replacement Guide

Cosa ti serve

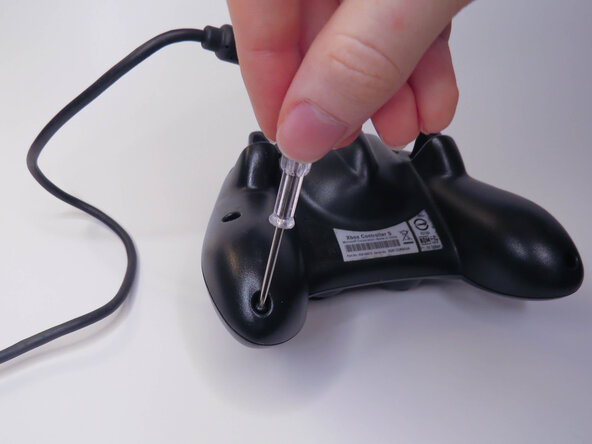
  1. Xbox Controller S Buttons Replacement Guide, Backplate: passo 1, immagine 1 di 2 Xbox Controller S Buttons Replacement Guide, Backplate: passo 1, immagine 2 di 2
    • Remove the six visible 8mm Phillips screws with a #1 Phillips screwdriver.

    Chiedi a FixBot

    Aggiungi Commento

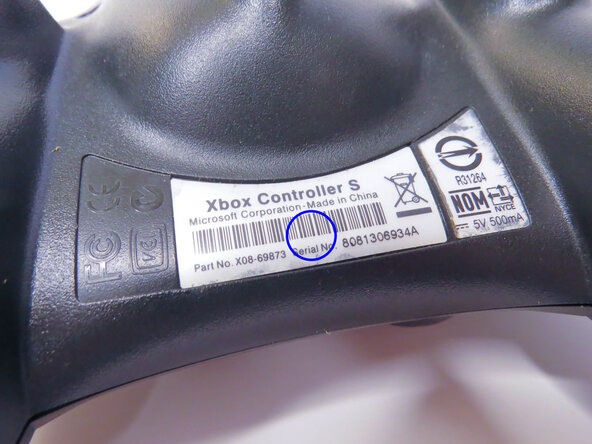
  2. Xbox Controller S Buttons Replacement Guide: passo 2, immagine 1 di 2 Xbox Controller S Buttons Replacement Guide: passo 2, immagine 2 di 2
    • Peel back the barcode sticker to reveal the seventh Phillips screw and remove it.

    Chiedi a FixBot

    Aggiungi Commento

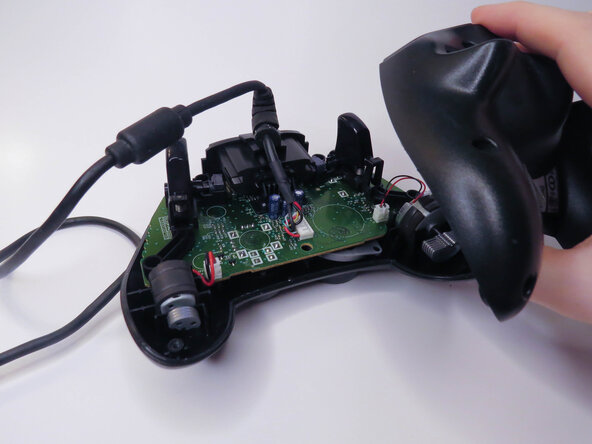
  3. Xbox Controller S Buttons Replacement Guide: passo 3, immagine 1 di 3 Xbox Controller S Buttons Replacement Guide: passo 3, immagine 2 di 3 Xbox Controller S Buttons Replacement Guide: passo 3, immagine 3 di 3
    • Carefully lift the backplate off of the controller.

    • Make sure to hold the frontplate to prevent the buttons from falling out.

    Chiedi a FixBot

    Aggiungi Commento

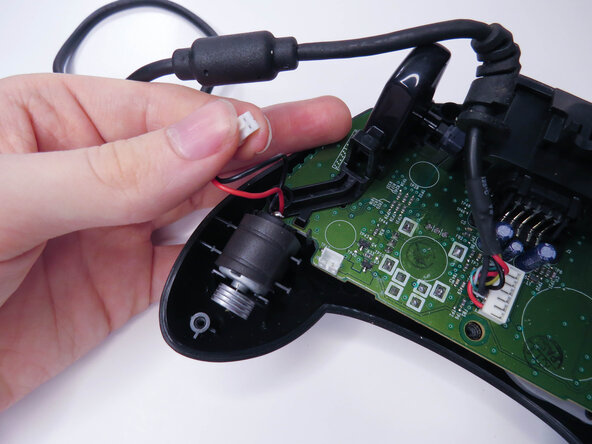
  4. Xbox Controller S Buttons Replacement Guide, Vibration Motors: passo 4, immagine 1 di 3 Xbox Controller S Buttons Replacement Guide, Vibration Motors: passo 4, immagine 2 di 3 Xbox Controller S Buttons Replacement Guide, Vibration Motors: passo 4, immagine 3 di 3
    • Unplug the two vibration motors and lift them out of the case, being sure not to pull on the wires.

    Chiedi a FixBot

    Aggiungi Commento

  5. Xbox Controller S Buttons Replacement Guide, Logic Board: passo 5, immagine 1 di 2 Xbox Controller S Buttons Replacement Guide, Logic Board: passo 5, immagine 2 di 2
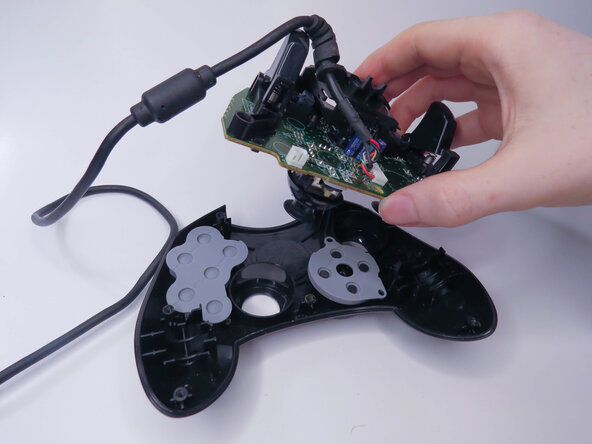
    • Lift the logic board out of the controller.

    Chiedi a FixBot

    Aggiungi Commento

  6. Xbox Controller S Buttons Replacement Guide, Rubber Pads: passo 6, immagine 1 di 3 Xbox Controller S Buttons Replacement Guide, Rubber Pads: passo 6, immagine 2 di 3 Xbox Controller S Buttons Replacement Guide, Rubber Pads: passo 6, immagine 3 di 3
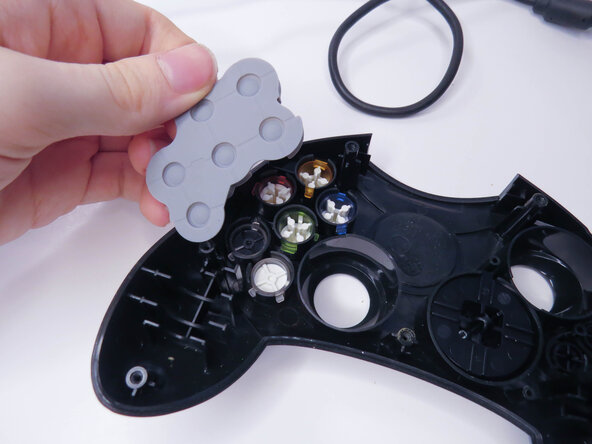
    • Remove the rubber pads.

    Chiedi a FixBot

    Aggiungi Commento

  7. Xbox Controller S Buttons Replacement Guide, Buttons: passo 7, immagine 1 di 3 Xbox Controller S Buttons Replacement Guide, Buttons: passo 7, immagine 2 di 3 Xbox Controller S Buttons Replacement Guide, Buttons: passo 7, immagine 3 di 3
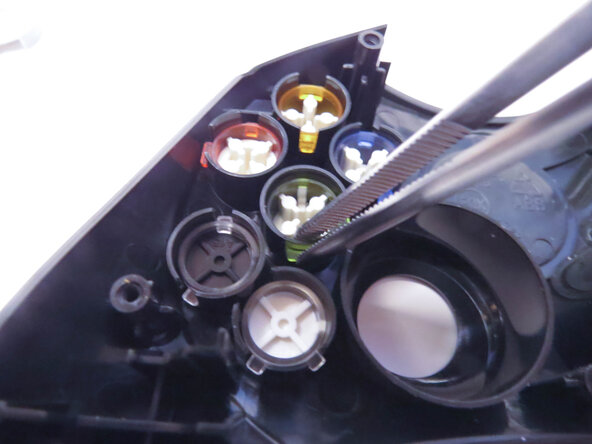
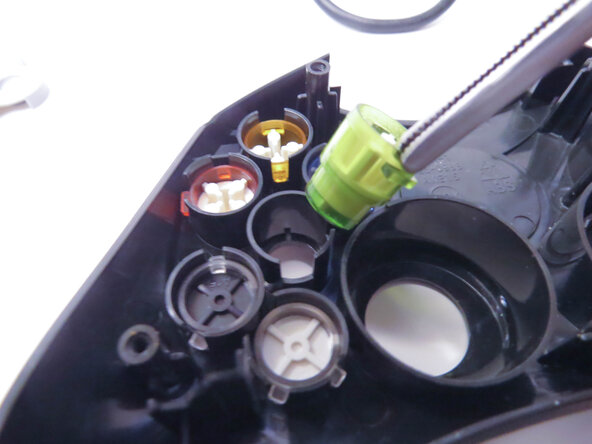
    • Remove the A, B, X, Y, White, and Black buttons with a pair of tweezers.

    • Remove the Back and Start buttons.

    • When putting the buttons back in, make sure to align the notches with the case.

    Chiedi a FixBot

    Aggiungi Commento

  8. Xbox Controller S Buttons Replacement Guide, D-Pad: passo 8, immagine 1 di 3 Xbox Controller S Buttons Replacement Guide, D-Pad: passo 8, immagine 2 di 3 Xbox Controller S Buttons Replacement Guide, D-Pad: passo 8, immagine 3 di 3
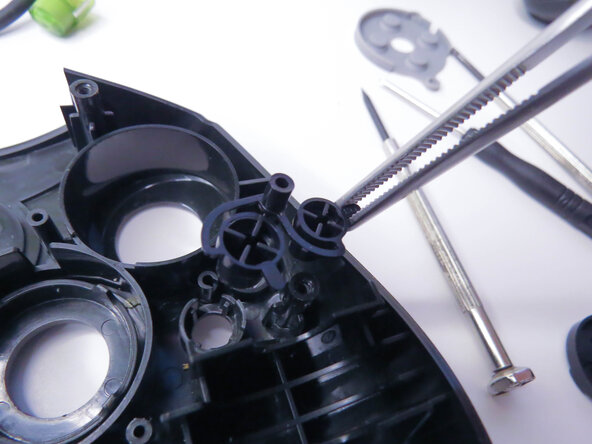
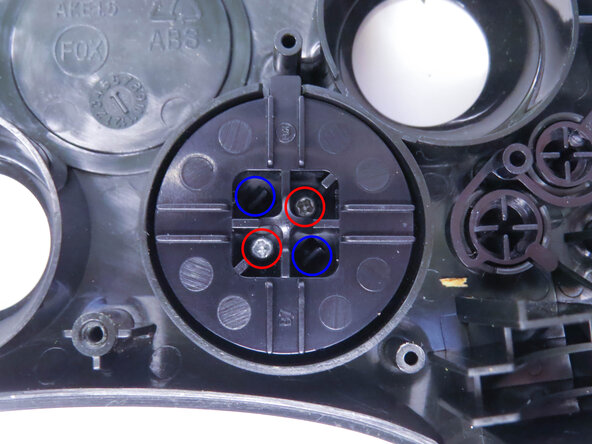
    • Unscrew the the two 7mm Phillips screws.

    • Separate the D-pad by pushing the two clips in with a pair of tweezers.

    Chiedi a FixBot

    Aggiungi Commento

  9. Xbox Controller S Buttons Replacement Guide: passo 9, immagine 1 di 1
    • Separate the two halves of the D-pad.

    • The front half of the D-pad will fall when you take the back half out, be sure to catch it.

    Chiedi a FixBot

    Aggiungi Commento

Conclusione

To reassemble your device, follow these instructions in reverse order, being careful to line everything back up.

Annulla: non ho completato questa guida.

burntpizza

Membro da: 11/17/25

169 Reputazione

Una guida realizzata

0Commenti sulla guida

Aggiungi Commento

Visualizza statistiche:

Ultime 24 ore: 0

Ultimi 7 giorni: 21

Ultimi 30 giorni: 73

Tutti i Tempi: 430