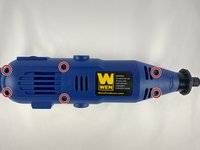
Salta al contenuto principale

Wen 2307 Power Switch Replacement

Cosa ti serve

  1. Wen 2307 Power Switch Replacement, Front Panel: passo 1, immagine 1 di 1
    • Unscrew the locking sleeve.

  2. Wen 2307 Power Switch Replacement: passo 2, immagine 1 di 1
    • Remove the hanging clip.

  3. Wen 2307 Power Switch Replacement: passo 3, immagine 1 di 2 Wen 2307 Power Switch Replacement: passo 3, immagine 2 di 2
    • Unscrew the six 8mm PH2 screws.

  4. Wen 2307 Power Switch Replacement: passo 4, immagine 1 di 1
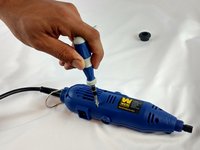
    • While pressing the spindle lock button, unscrew the collet nut and remove it along with the brass collet.

  5. Wen 2307 Power Switch Replacement: passo 5, immagine 1 di 1
    • To remove the front panel, pry the device apart while holding the device with the other hand.

    • The front panel should come out easily.

  6. Wen 2307 Power Switch Replacement, Power Switch: passo 6, immagine 1 di 1
    • Firmly grasp and lift out power switch.

  7. Wen 2307 Power Switch Replacement: passo 7, immagine 1 di 1
    • Firmly grasp and disconnect cables.

    • Make sure to mark your cable positions so you do not reverse them when putting back together.

Conclusione

To reassemble your device, follow these instructions in reverse order.

Altre 2 persone hanno completato questa guida.

Team

USF Tampa, Team 12-1, Eyestone Spring 2016 Membro di USF Tampa, Team 12-1, Eyestone Spring 2016

USFT-EYESTONE-S16S12G1

4 Membri

6 Guide realizzate

0 Commenti

Aggiungi Commento

Visualizza Statistiche:

Ultime 24 Ore: 1

Ultimi 7 Giorni: 3

Ultimi 30 Giorni: 22

Tutti i Tempi: 965