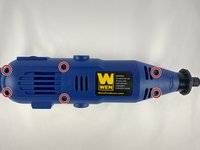
Salta al contenuto principale

Wen 2307 Fan Replacement

Cosa ti serve

  1. Wen 2307 Fan Replacement, Front Panel: passo 1, immagine 1 di 1
    • Unscrew the locking sleeve.

  2. Wen 2307 Fan Replacement: passo 2, immagine 1 di 1
    • Remove the hanging clip.

  3. Wen 2307 Fan Replacement: passo 3, immagine 1 di 2 Wen 2307 Fan Replacement: passo 3, immagine 2 di 2
    • Unscrew the six 8mm PH2 screws.

  4. Wen 2307 Fan Replacement: passo 4, immagine 1 di 1
    • While pressing the spindle lock button, unscrew the collet nut and remove it along with the brass collet.

  5. Wen 2307 Fan Replacement: passo 5, immagine 1 di 1
    • To remove the front panel, pry the device apart while holding the device with the other hand.

    • The front panel should come out easily.

  6. Wen 2307 Fan Replacement, Speed Adjustment Assembly: passo 6, immagine 1 di 1
    • Remove the connected wiring from the circuit board.

  7. Wen 2307 Fan Replacement: passo 7, immagine 1 di 1
    • Remove the single 4mm screw retaining the circuit board.

  8. Wen 2307 Fan Replacement: passo 8, immagine 1 di 1
    • Gently pry the circuit board from the back piece.

  9. Wen 2307 Fan Replacement, Motor: passo 9, immagine 1 di 1
    • Gently pull motor assembly out of the panel.

  10. Wen 2307 Fan Replacement: passo 10, immagine 1 di 1
    • Motor separates into two pieces.

  11. Wen 2307 Fan Replacement, Fan: passo 11, immagine 1 di 1
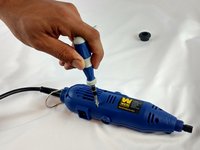
    • The fan assembly is attached to the rotor beam, it can be disassembled to change the fan by simply pulling off the pieces.

Conclusione

To reassemble your device, follow these instructions in reverse order.

Altre 2 persone hanno completato questa guida.

Team

USF Tampa, Team 12-1, Eyestone Spring 2016 Membro di USF Tampa, Team 12-1, Eyestone Spring 2016

USFT-EYESTONE-S16S12G1

4 Membri

6 Guide realizzate

0 Commenti

Aggiungi Commento

Visualizza Statistiche:

Ultime 24 Ore: 1

Ultimi 7 Giorni: 1

Ultimi 30 Giorni: 8

Tutti i Tempi: 483