Salta al contenuto principale

Vtech InnoTab 3S Camera Replacement

Cosa ti serve

  1. Vtech InnoTab 3S Camera Replacement, Rear Panel: passo 1, immagine 1 di 3 Vtech InnoTab 3S Camera Replacement, Rear Panel: passo 1, immagine 2 di 3 Vtech InnoTab 3S Camera Replacement, Rear Panel: passo 1, immagine 3 di 3
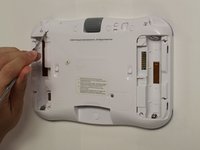
    • While holding the battery compartment locks down, slide the two battery doors outwards from the sides of the device.

    • Remove the batteries from the device.

  2. Vtech InnoTab 3S Camera Replacement: passo 2, immagine 1 di 2 Vtech InnoTab 3S Camera Replacement: passo 2, immagine 2 di 2
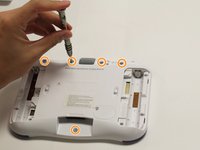
    • Remove six 7 mm screws from the interior of the battery compartment using a Phillips #1 screwdriver.

  3. Vtech InnoTab 3S Camera Replacement: passo 3, immagine 1 di 3 Vtech InnoTab 3S Camera Replacement: passo 3, immagine 2 di 3 Vtech InnoTab 3S Camera Replacement: passo 3, immagine 3 di 3
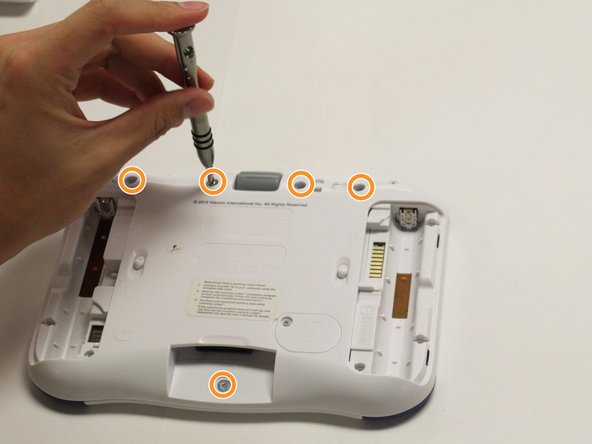
    • Using a nylon spudger, remove the five caps that hide the screws.

    • Potential for device damage: Be careful not to scrape the plastic from the device using the spudger.

    • When removing the caps, hold the spudger vertical to the board to make removal easier. Also try to push in with your spudger pointing towards the bottom of the device.

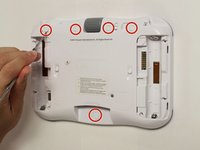
    • Remove the five 5 mm Phillips #1 screws from the rear panel of the device.

  4. Vtech InnoTab 3S Camera Replacement: passo 4, immagine 1 di 1
    • Carefully remove the rear panel from the front panel of the device.

    • Once the rear panel is removed, you'll be able to see the motherboard and other components within the Vtech InnoTab 3s.

  5. Vtech InnoTab 3S Camera Replacement, Camera: passo 5, immagine 1 di 2 Vtech InnoTab 3S Camera Replacement, Camera: passo 5, immagine 2 di 2
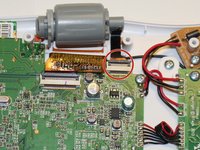
    • Using the tip of your finger, carefully pull the clip upwards to release the camera connection from the motherboard.

    • The connection between the motherboard and the camera is located at the near the top of the device.

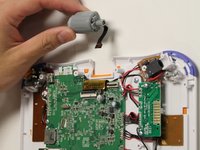
    • Remove the camera and the connecting wire from the the clip and attach the replacement cameras connection to the latch on the motherboard.

    • Carefully lower the latch until you hear a click to secure the new camera to the device.

    • Pulling or tugging on the connection between the camera and the circuit board may cause damage to the connection.

Conclusione

To reassemble your device, follow these instructions in reverse order.

Altre 2 persone hanno completato questa guida.

Team

USF Tampa, Team 8-2, Eyestone Fall 2015 Membro di USF Tampa, Team 8-2, Eyestone Fall 2015

USFT-EYESTONE-F15S8G2

4 Membri

9 Guide realizzate

4 Commenti

Where do you get the replacement camera? I can't find them online.

rongennero - Replica

I just did this whole thing...hoping it was a reset to the camera or something, but no, you need a replacement camera. Might be helpful to add that to the PARTS NEEDED part at the top, instead of saying "no parts required." UUGHHHH!

jpimash - Replica

Where can i buy the camera?

Stephan Meyer - Replica

kind of useless to post a replacement guide without suggesting a source for that replacement!!

Glen Fletcher - Replica

Aggiungi Commento

Visualizza Statistiche:

Ultime 24 Ore: 0

Ultimi 7 Giorni: 3

Ultimi 30 Giorni: 9

Tutti i Tempi: 1,970