Introduzione
If your back case is cracked or broken this guide will show you how it is removed and replaced.
Cosa ti serve
-
-
Remove the battery cover.
-
Remove the AAA batteries from the calculator.
 Chiedi a FixBot
-
-
-
Remove the 5mm Philips #00 screw holding backup battery cover.
-
Remove the backup battery cover.
-
-
-
-
Use plastic opening tool to remove the backup battery. Place the tool in the small cut-out next to the battery and pry the battery out.
-
-
-
Unscrew the six 7.5mm T6 screws on the back case. You will need to use a screwdriver with a long and skinny head.
-
-
-
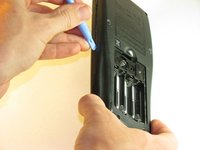
Pry back case off. Insert the plastic opening tool in the track for the protective cover and pry the halves of the case apart.
-


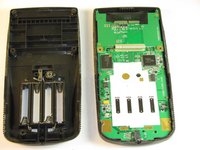
To reassemble your device, follow these instructions in reverse order.
Annulla: non ho completato questa guida.
Altre 8 persone hanno completato questa guida.

Team

Cal Poly, Team 18-37, Regan Fall 2012 Membro di Cal Poly, Team 18-37, Regan Fall 2012
CPSU-REGAN-F12S18G37
5 Membri
5 guide realizzate
