Introduzione
Stanco di poter giocare solo in 2D con il tuo 3DS? Sostituisci lo schermo superiore e torna a giocare in 3D.
Cosa ti serve
-
Attrezzo utilizzato in questo passaggio:Phillips #00 Screwdriver$5.49
-
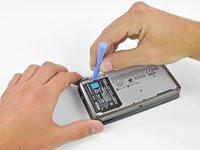
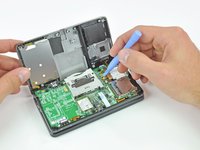
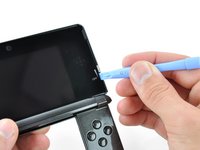
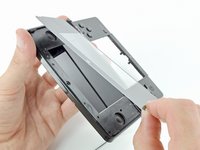
Usa un cacciavite Phillips PH00 per allentare le quattro viti lungo la parte superiore della cover posteriore.
-
-
-
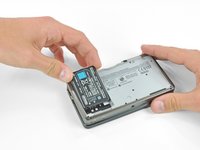
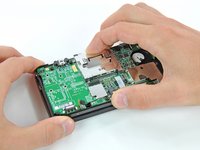
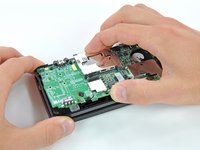
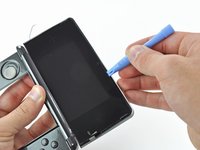
Afferra il bordo superiore della cover posteriore con l'altra mano in modo che non ritorni al suo posto da sola.
-
Tira la cover verso l'alto per rimuoverla dal dispositivo.
-
-
-
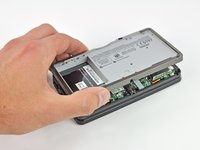
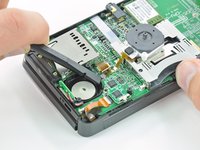
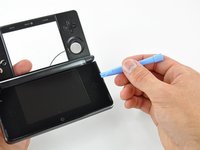
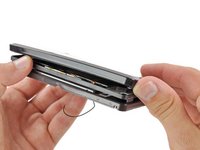
Infila uno strumento di apertura in plastica nella fessura nella scocca inferiore sopra la batteria.
-
Fai leva con lo strumento di apertura in plastica per sollevare la batteria.
-
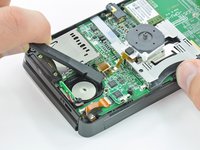
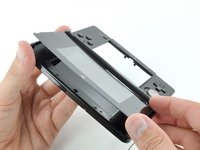
Afferra il bordo superiore della batteria e sollevalo dalla scocca inferiore.
-
-
-
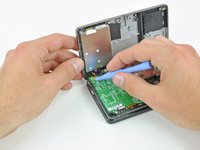
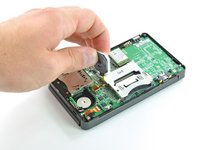
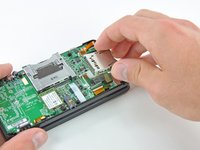
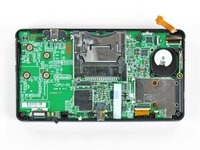
Usa un cacciavite JIS #00 per rimuovere le nove viti nere da 6,3 mm dal case inferiore.
-
Usa un cacciavite JIS #00 per rimuovere la vite argentata da 2,4 mm sopra lo slot della cartuccia di gioco.
-
-
-
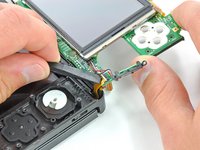
Svita le due viti a croce Phillips da 7,7 mm che fissano il retro della levetta analogica alla scheda madre.
-
-
-
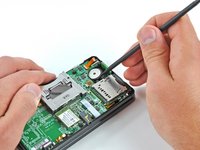
Svita le due viti a croce Phillips da 4,5 mm che fissano la scheda del lettore SD alla scheda madre.
-
-
-
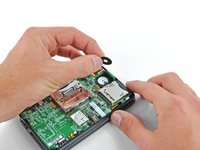
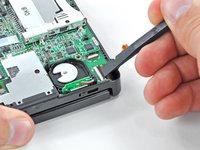
Infila la parte piatta di uno spudger tra la scheda del lettore SD e la scheda madre.
-
Solleva lentamente per allentare la scheda SD dallo schermo RF sotto di essa. Se sollevi troppo rapidamente, potresti strappare lo schermo o rompere i suoi punti di saldatura.
-
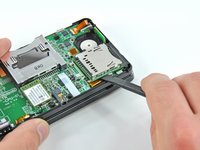
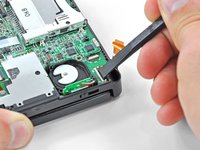
Passa lo spudger lungo i lati della scheda SD per liberarla dall'adesivo che la tiene in posizione.
-
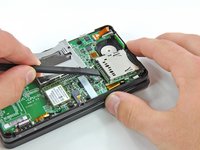
Una volta liberata, solleva la scheda del lettore SD dalla scheda madre.
-
-
-
Infila la parte piatta di uno spudger sotto un angolo della scheda WiFi e solleva la scheda dalla scheda madre.
-
-
-
Attrezzo utilizzato in questo passaggio:Tweezers$4.99
-
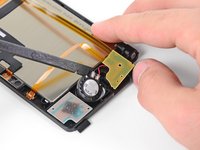
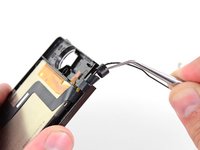
Afferra il cavo a nastro del microfono con un paio di pinzette vicno al microfono stesso.
-
Tira il microfono verso l'alto per sfilarlo dalla scocca superiore.
-
-
Attrezzo utilizzato in questo passaggio:Tweezers$4.99
-
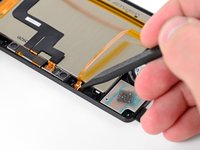
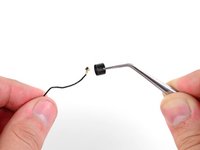
Prima di continuare con lo smontaggio, usa delle pinzette per rimuovere il diffusore in plastica trasparente del LED della connessione WiFi. Questa piccola componente può cadere da sola ed è difficile da ritrovare.
-
-
-
Svita le sei viti a croce Phillips da 3,6 mm che fissano la cornice posteriore dello schermo a quella anteriore.
-
-
-
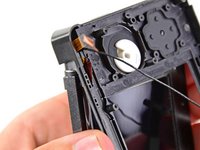
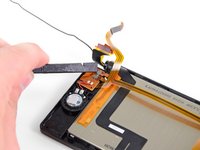
Rimuovi il regolatore della profondità 3D dalla cornice anteriore dello schermo.
-
-
-
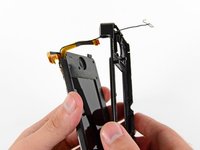
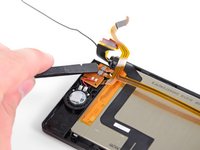
Fai scorrere con cura il cavo a nastro del gruppo dello speaker attraverso la fessura nella cornice dello schermo superiore.
-
-
Attrezzo utilizzato in questo passaggio:Tweezers$4.99
-
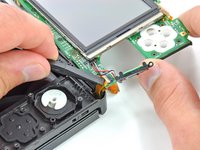
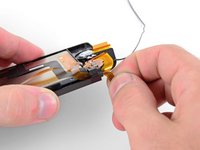
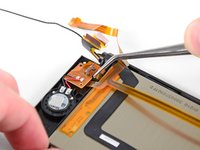
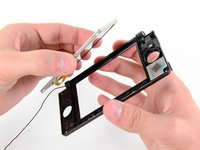
Usa la parte piatta di uno spudger o un'unghia per ruotare verso l'alto le alette di bloccaggio sui connettori ZIF dei cavi a nastro della barriera di parallasse.
-
Usa un paio di pinzette in metallo per scollegare i due cavi a nastro.
-
-
-
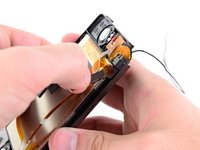
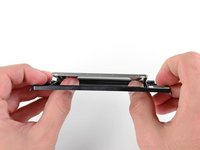
Delicatamente avvolgi insieme i cavi a nastro dello schermo superiore e della fotocamera e infilali nell'apertura della cerniera.
-
-
Attrezzo utilizzato in questo passaggio:Tweezers$4.99
-
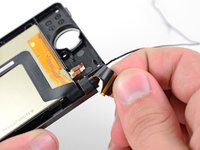
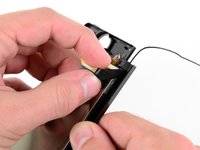
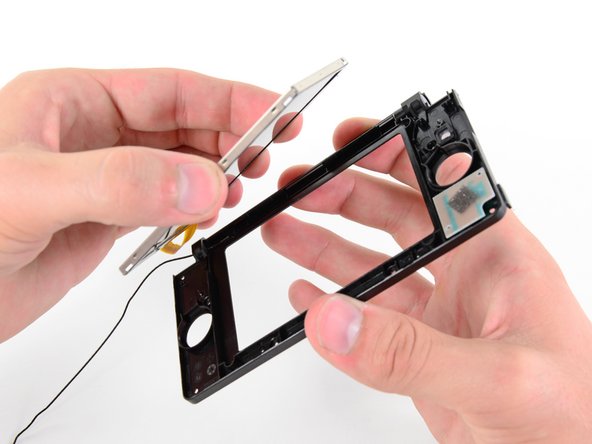
Usa un paio di pinzette in metallo per rimuovere l'anello in metallo nero della cerniera dalla cornice dello schermo superiore.
-
Tira attentamente i cavi a nastro della fotocamera e dello schermo superiore attraverso la loro fessura nella cornice.
-
-
-
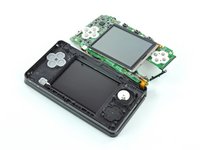
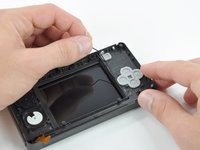
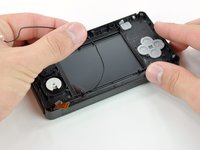
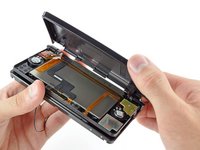
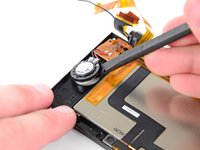
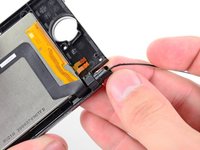
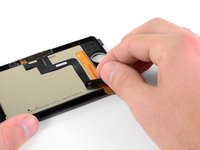
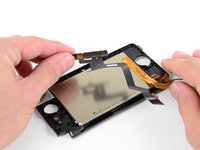
Usa i pollici per spingere, dalla sua parte frontale, lo schermo superiore per farlo uscire dalla cornice dello schermo.
-
Rimuovi lo schermo superiore.
-


Per rimontare il dispositivo, segui le istruzioni in ordine inverso.
Annulla: non ho completato questa guida.
Altre 75 persone hanno completato questa guida.
Un ringraziamento speciale a questi traduttori:
100%

Questi traduttori ci stanno aiutando ad aggiustare il mondo! Vuoi partecipare?
Inizia a tradurre ›

23Commenti sulla guida
Thanks very much for this. After two different electronic repair shops had refused to replace the broken top screen in the 3DS which our daughter had borrowed from a friend, I reluctantly decided try it myself, having studied this guide a couple of times.
It took me over 4 hours, almost an hour of which was just getting the 3 ribbon cables out through the hinge and back in again. It was incredibly satisfying to power it up again and have everything work. Without this detailed guide and photographs, I would certainly have given up.
Use good quality screwdrivers!
This is one of the hardest repairs for this console too, great job doing it on your own. I've been fixing electronics for a while and this one is still scaring me lol
All the commentors talking about how they stripped the screws are obviously not using the correct screwdriver - they're phillips #00 screws and they come out easily. You don't need to buy an expensive speciality screwdriver, just do it properly. Make sure the driver grips the screw properly, apply a moderate amount of pressure, and turn it slowly. It isn't hard at all. The only thing I can think is that everyone stripping the screws is using one of those screwdrivers with the head shaped like an 8 pointed star. Those will strip screws easily and are easy to mistake for the usual + shaped screwdriver. The one I used comes from a Black & Decker precision screwdriver set. I think it was £7 from Homebase.
Dear colleagues of gaming
My son dropped the 3DS, and this is the result:
https://www.dropbox.com/s/0t5p5enpdu1d6g...
can you tell me your opinion, is the substitution of the lcd necessary and/or sufficient? The glass (external) is not broken.
Thank you