Introduzione
Con l'utilizzo del Nintendo Switch Pro Controller (modello HAC-001), solitamente le levette analogiche iniziano a creparsi o rompersi. Anche se le levette non smettono di funzionare, forniscono la comodità d'uso del controller. Questa guida ti aiuterà con la sostituzione delle levette analogiche, ma non con il potenziometro delle levette.
Cosa ti serve
-
-
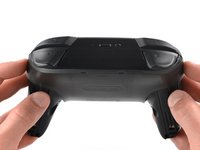
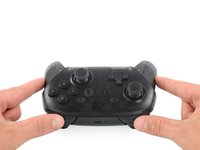
Gira il controller in modo che l'etichetta con il modello sia rivolta verso l'alto.
-
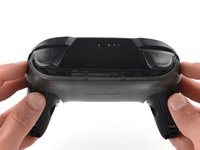
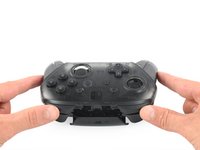
Usa un cacciavite JIS #00 per rimuovere le due viti nere a testa piatta da 8,4 mm che trattengono i manici, posizionate alle estremità degli stessi.
-
-
-
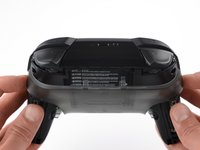
Rimuovi attentamente le coperture dei manici tirandole via dal corpo del controller.
-
-
-
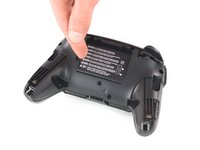
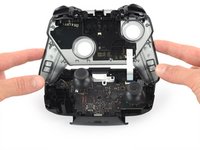
Usa un cacciavite JIS #00 per rimuovere le quattro viti argento da 6,8 mm che trattengono la copertura posteriore in plastica trasparente.
-
-
-
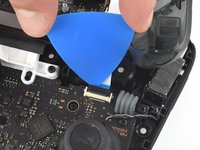
Prestando attenzione, fai leva sulla copertura in plastica trasparente per rimuoverla.
-
-
-
-
Rimuovi la copertura in plastica trasparente.
-
-
-
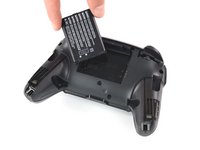
Rimuovi la batteria a ioni di litio facendo leva sul suo bordo sinistro con un'unghia o uno strumento per l'apertura in plastica.
-
-
-
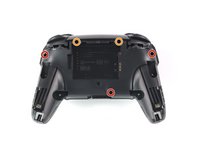
Usa un cacciavite a croce Phillips per svitare le cinque viti da 5 mm dal retro del controller.
-
Le due viti del case sopra le impugnature e la vite singola della custodia sotto l’alloggiamento della batteria hanno una sede poco profonda. Queste tre viti possono essere facilmente rimosse.
-
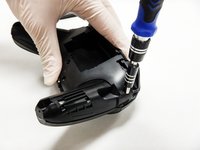
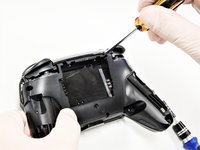
Le due viti del case adiacenti ai pulsanti sulle spalle ZR e ZL hanno una sede profonda. Usa una prolunga o un cacciavite Phillips con un gambo più lungo per raggiungere queste viti.
the 2 screws up at the top are unreachable with the standard fixit kit just a heads up
Seconded. the screws are located too deep below the plastic slot, and the bit holding bulge is too wide for the small aperture (similarly with the flexible extension). the bit length is too shallow to reach.
An alternative driver with a much narrower & longer shaft is required, which will likely not come with interchangeable bits.
I would say it is possible to reach the top left screw, just not the top right - there is a gap in the top left that allows you to slightly bend the standard driver outward to turn it while still making adequate contact.
An update: I was actually able to remove the top right one in a really hacky way - inserting the Phillips #0 bit into the #4 hex bit, and then using that in the standard driver. This added just enough length to successfully reach and make full contact with the screw!
Using the #4 hex bit as an extension was the exact "hack" I needed to get rid of the drift finally. Thank you. You're a lifesaver.
Das #4 Hex Bit als Verlängerung für das Kreuzschlitz Bit zu nutzen ist zwar etwas eng, aber es erspart einem wirklich einen zusätzlichen Schraubendreher.
-
-
-
Rimuovi delicatamente la copertura in plastica dal controller.
Didn't realize there is adhesive holding the front cover onto the unit. It's located inside of the handles. Just a bit of force there helped, just be careful of the cable.
-
-
-
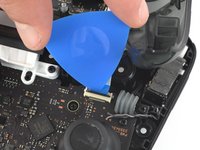
Usa la punta di un plettro per aprire l'aletta nera sul connettore ZIF spingendola verso l'alto.
Having just completed this repair, I noted that this ribbon cable can disconnect on either side. It is easier to disconnect and reconnect from the other side than what is shown in my experience.
@acestronautical is right! much easier to remove the ribbon cable from the button board, connect to the base board and then connect back to the button board. Thank you @acestronautical
-
-
Attrezzo utilizzato in questo passaggio:Tweezers$4.99
-
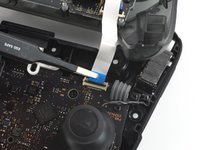
Usa le dita o un paio di pinzette a punta arrotondata per scollegare il cavo di interconnessione dal suo connettore.
You don't need to disconnect this as long as you are fine with keeping it close by so as not to rip the ribbon cable.
-
-
-
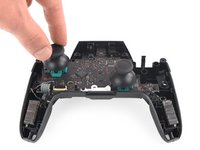
Facendo una leggera forza, sfila le due levette analogiche dal controller.
-


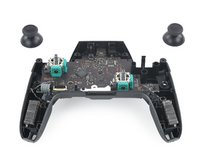
Per rimontare il tuo dispositivo, segui le istruzioni in ordine inverso.
Per rimontare il tuo dispositivo, segui le istruzioni in ordine inverso.
Annulla: non ho completato questa guida.
Altre 26 persone hanno completato questa guida.
Un ringraziamento speciale a questi traduttori:
100%
Daniele Carminati ci sta aiutando ad aggiustare il mondo! Vuoi partecipare?
Inizia a tradurre ›

Team

Cal Poly, Team S11-G2, Regan Fall 2019 Membro di Cal Poly, Team S11-G2, Regan Fall 2019
CPSU-REGAN-F19S11G2
5 Membri
43 Guide realizzate
3 Commenti
Where can I get the replacement caps?
do you know where to find a replacement cap? If so can you give me link, thanks!
You really don't need to disconnect the ZIF to replace the caps. It might make things a tiny bit easier, but is best not to mess with it AT ALL if you're only replacing the caps. As messing it up, or not connecting it properly when you're putting it back together can lead to ALL your face buttons and D-pad not working.
Be carefull, these screws are super easy to strip even with the right tools.
Lukas Eberharter - Replica
I tried editing these instructions after I had trouble with stripping screws, but it doesn't seem to take. The issue is that these are JIS and not Phillips screws. They are VERY similar looking but a Phillips head screwdriver will strip the screws.
Isaac Webb - Replica
I tried using a Philips #00 screwdriver but it didn’t work
vincent ingrassia - Replica
Don't even think about trying Phillips. There are some other guides online that say you'll be fine, but they're wrong. Even one attempt with Phillips WILL strip these, and you will never, ever get this controller open once that happens. Even with JIS they're really hard to get out and really easy to strip.
Luke T. Allen - Replica