Introduzione
Segui i passi di questa guida per aggiornare o sostituire l'hard drive nell'iMac Intel 21.5" EMC 2889. Nota che se stai aggiornando il tuo disco, dovrai clonare il tuo hard drive attuale su quello sostitutivo prima di eseguire questo aggiornamento, per mantenere i tuoi file e il sistema operativo.
Cosa ti serve
-
Attrezzo utilizzato in questo passaggio:iMac Intel 21.5" Cardboard Service Wedge$4.99
-
Prima di iniziare a lavorare sull'iMac, scollega il computer dall'alimentazione e tieni premuto il pulsante di alimentazione per 10 secondi per scaricare i condensatori dell'alimentatore.
-
-
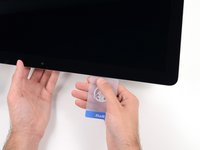
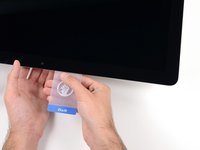
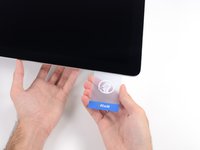
Attrezzo utilizzato in questo passaggio:Plastic Cards$2.99
-
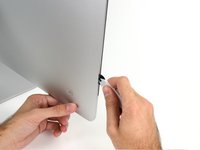
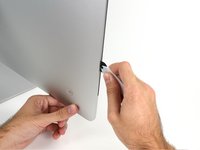
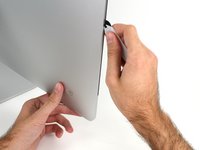
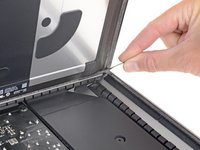
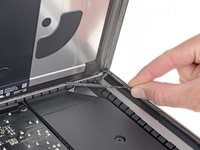
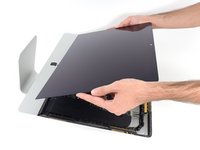
A partire dall'angolo superiore destro dell'iMac, inserire una scheda di plastica fra il display e il telaio.
-
-
-
-
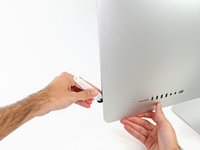
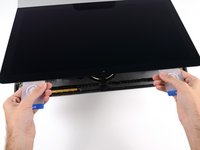
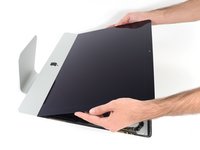
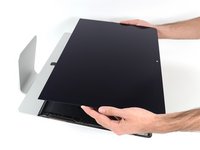
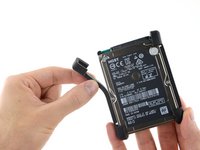
Mantieni lo schermo con uno mano mentre con l'altra stacchi il cavo di alimentazione dello schermo .
-
-
-
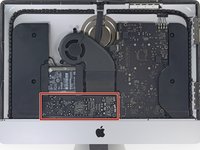
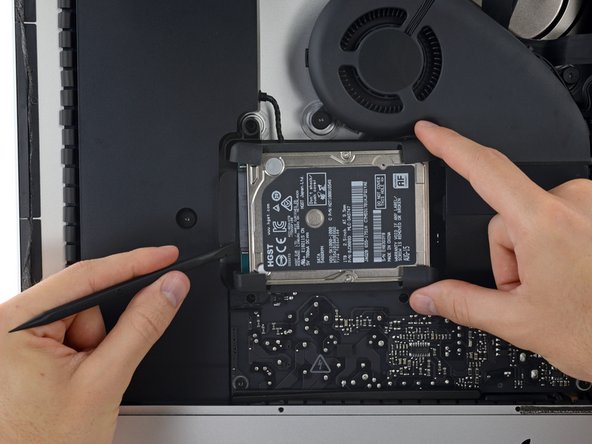
Rimuovi le seguenti viti Torx T10 che tengono ancorato il supporto del'hard drive sull'iMac:
-
Due viti da 21 mm
-
Una vite da 9 mm
-
Una vite da 27 mm
-
-
-
Solleva l'hard drive dal bordo più vicino alla scheda logica e tiralo leggermente fuori dal suo alloggiamento.
-
-
-
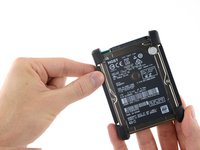
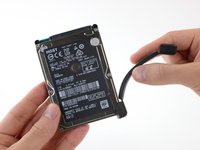
Stacca la protezione gommata da un lato del tuo disco fisso.
-
Ripeti l'operazione dall'altro lato del disco fisso.
-


Per rimontare il dispositivo, segui queste istruzioni in ordine inverso e usa la nostra guida per le strisce adesive per rincollare il display di vetro.
Per rimontare il dispositivo, segui queste istruzioni in ordine inverso e usa la nostra guida per le strisce adesive per rincollare il display di vetro.
Annulla: non ho completato questa guida.
Altre 75 persone hanno completato questa guida.
Un ringraziamento speciale a questi traduttori:
100%

Sara Balestra ci sta aiutando ad aggiustare il mondo! Vuoi partecipare?
Inizia a tradurre ›


11 Commenti
Well done and thank you for this very precise description to access the hard drive. After that, reconnecting the hard drive or SSD is difficult because the very short SATA connector wires do not allow it to be presented well in the axis of the drive connector and it is impossible to hold it firmly with your fingers. Space is very small.
Totally! I ended up hooking my angled tweezers behind the connector to push it into the drive. Alignment was still a bit tricky.
Cy L -
Thank you SO MUCH for this guide. I bought my iMac used from someone who was upgrading to a newer SSD model, and once I got it home and reset, I was understood all too well why he upgraded. So I ordered the kit here and followed these directions. With my iPad propped up next to the iMac on my table, I was able to follow it right through. As others have commented, the drive cable is very short, but I held back the rubber bumpers until I got it connected, and then everything else went smoothly. Now my iMac is like a new machine (minus the newer Thunderbolt ports and other newer amenities). Thanks again!
I was just looking at the dismal trade in options for all my old apple products, and just assumed Id be buying a new computer every 2-3 yrs at retail whenever apple decided mine was out of date, but after stumbling on this site i love the mission, and am actually excited to try some of these articles on my old products and maybe learn a few things. Thank you for all this work its awesome and appreciated.