Introduzione
Sostituire il dissipatore richiede la rimozione della scheda madre e l'applicazione di nuova pasta termica.
Cosa ti serve
-
-
Rimuovi le dieci viti seguenti, che fissano il case inferiore a quello superiore:
-
Tre viti con testa a croce Phillips da 13,5 (14,1) mm.
-
Sette viti con testa a croce da 3 mm.
-
-
-
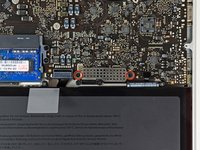
Usa l'estremità di uno spudger per rimuovere il connettore della batteria dal suo zoccolo sulla scheda logica.
-
-
-
Svita le tre viti Torx T6 da 3,4 mm che fissano la ventola sinistra alla scheda madre.
-
-
-
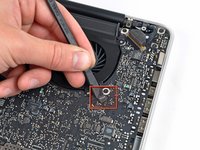
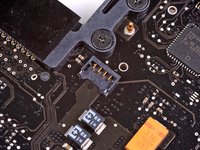
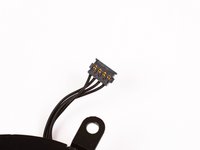
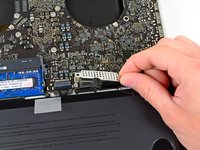
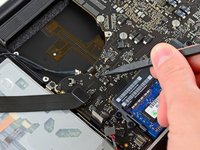
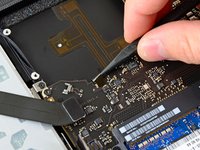
Usa la parte piatta di uno spudger per scollegare il connettore della ventola destra dalla sua presa sulla scheda madre.
-
-
-
-
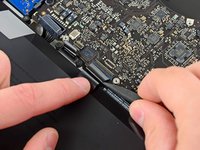
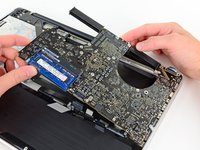
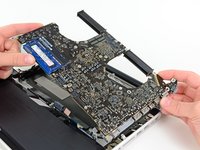
Solleva attentamente il gruppo della scheda madre dal suo bordo sinistro per rimuoverla dal case superiore, stando attento al cavo del lettore CD e le porte I/O che possono impigliarsi durante la rimozione.
-
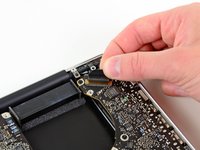
Se necessario, usa la parte piatta di uno spudger per separare il microfono dal case superiore.
-
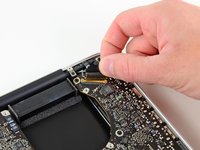
Tira via il lato delle porte I/O dal bordo del case superiore e rimuovi il gruppo della scheda madre.
-
-
-
Svita le sei viti a croce Phillips #1 che fissano il dissipatore alla scheda madre.
-


Per rimontare il tuo dispositivo, segui le istruzioni in ordine inverso.
Per rimontare il tuo dispositivo, segui le istruzioni in ordine inverso.
Annulla: non ho completato questa guida.
Altre 63 persone hanno completato questa guida.
Un ringraziamento speciale a questi traduttori:
100%

Questi traduttori ci stanno aiutando ad aggiustare il mondo! Vuoi partecipare?
Inizia a tradurre ›

13 Commenti
Has anyone replaced the paste on the 2 smaller square heat sinks that are over the IO controller and thunderbolt chips?
In case anyone is wondering, you can find k5-pro on Amazon if you need to replace the thick gunk on the other 2 big chips (IO controller and thunderbolt I think). Didn't realize until I was putting the plates back on that there is quite a gap between the chip and the heat sink. Took me days of asking on forums to find out about the K5 stuff. :D
I removed and super clean on my MacBook Pro 15" Unibody Early 2011 I use Arctic MX-4 on both side. Test running with my Apple 27 inch screen it shut down again overheat even both fans are running, I removed bottom cover and small support to let cool air. Start again same problems I disconnect cable thunderbolt from 27” screen bottom not cover now no problem running on 15 “ screen but still felt it less heat then was too hot. Do you think that Heat Sink need Replacement could be the problem ?
Thanks, John
@alpinejwh The heat sink has no moving parts and usually won’t need servicing/replacement as long as the vents are clean and clear of obstruction. If anything, my guess would be an error in the procedure. I’d probably go back and re-check everything and reapply the thermal paste. Make sure you’re following the application instructions for your particular processor type. Make sure the heat sink screws are correctly tightened and none of the springs are missing. Good luck!
This procedure totally worked for me. I did not replace the heat sink just the paste. The machine works well but I realize this problem could crop up again from what I am reading about these particular MacBooks. Thanks Walter!