Introduzione
Usa questa guida per sostituire il display dello Huawei P9 Lite.
Cosa ti serve
-
-
Usa un plettro di apertura per far scattare le clip di fissaggio della cover posteriore, iniziando dall'angolo inferiore.
-
Percorri il bordo in senso antiorario e stacca una ad una le linguette di plastica.
-
-
-
Torci il plettro di apertura per far leva sotto la cover posteriore liberandola dall'adesivo.
Most of the adhesive is around the fingerprint cell and on the battery itself. You can slowly pull the back cover from its side but make sure not to break it. Push the mediator or a longer piece of plastic under the back cover to slowly destroy the adhesive.
Slowly, slowly wins the day. Nicolas is right and comes off a charm. The most nerve wracking part of this longish repair.
-
-
-
Una volta che la cover posteriore è libera dall'adesivo, puoi facilmente rimuoverla con la mano.
Hi! Im so sad! At the begginig of the operation i ve broken the white seal/connector that in one side is connected to the board and the other side is "glued" to the battery. Can someone help me? how can i solve this?? There is no image displayed on the screen. but there is vibration, sound, notifications... can someone help me please???
What you broke is handling the NFC, and doesn’t have anything to do with the display. You probably damaged the ribbon right below the battery, since that’s what links the display to the motherboard.
Polaris -
Oups ! L’antenne NFC était solidement collée à l’intérieur de la coque et j’ai donc déchiré sa nappe en ouvrant la coque. Heureusement, je n’utilise pas les fonctions NFC et, à part cela, tout a l’air de fonctionner normalement.
-
-
-
Rimuovi le seguenti viti dalla parte inferiore del telefono:
-
Tre viti Phillips #00 da 2,9 mm
-
Quattro viti Phillips #00 da 3,8 mm
-
Ora puoi afferrare l'unità altoparlante e toglierla.
-
-
-
Svita le nove viti Phillips #00 che tengono in posizione la piastra metallica.
Qu’est ce qu’un “indicateur d’eau”?
Une petite pastille qui change de couleur au contact de l’eau. Les fabricants s’en servent pour nullifier la garantie : si ta pastille indique que de l’eau s’est infiltré, tu devra payer ta réparation.
Polaris -
Are all the screws the same size ?
yes they are
Adam M -
-
-
-
-
Usa uno spudger per disconnettere il sensore di impronte digitali dalla scheda madre.
-
Stacca il cavo flessibile dell'antenna NFC che aderisce alla piastra metallica.
can we just remove NFC antenna and dont want to install int back?
Note there are two plastic tabs at the top of the shield plate. Unlock them with a mediator, the plate will come easily after that.
Buongiorno,
va sostituita l'intera piastra metallica contenente il sensore impronte e la fotocamera, oppure il sensore é estraibile dalla piastra?
Grazie
LUIGI
Yes, it is possible to remove just the fingerprint sensor from the motherboard shield. Remove the small metal plate on the inside of the shield covering the sensor and push the fingerprint sensor through from the other side.
-
-
-
Disconnetti il cavo flessibile della scheda madre da entrambi i lati e tiralo via.
-
-
-
Stacca l'antenna NFC dalla batteria.
-
Stacca il connettore della batteria.
-
-
-
Fai scorrere lo spudger sotto la batteria dalla posizione illustrata nell'immagine e inizia lentamente a staccare la cella.
-
Prima di riassemblare il telefono, sostituisci le vecchie strisce adesive con del nastro biadesivo o strisce adesive pretagliate.
Bonjour j'ai réalisé toutes les etapes mais mon telephone ne se charge plus.que faire ?
Bonjour ! Alors deux options sont possibles :
1) la batterie était complètement vide et cela prend du temps avant que le téléphone s’allume et affiche que la batterie est en train de charger.
2) vérifiez que les connexions des nappes à l’intérieur, surtout celle de cette étape. Cette nappe relie en effet le circuit inférieur au supérieur, fait donc le lien entre la batterie et le port de recharge.
Bonne chance !
Claire (iFixit EU)
Super !
J’ai réussi. Le plus pénible sont les différents endroits collés.
Particulièrement sous la batterie… et l’antenne NFC ! Qu’on ne peut pas recoller ! (jai mis du scotch, j’espère que ça ira…)
A priori, le sèche-cheveux aide un peu pour ramollir la colle sous la batterie.
J’ai pu aussi enlever de la colle en soulevant l’autre côté (doucement). Prendre son temps est essentiel ^^
Par contre pas remis de l’adhésif dessous comme indiqué.
The battery i removed yesterday had way more adhesive on the under side than in the above pic. I ended up having to get the old battery fairly warm before the adhesive would release. A tip if you are doing this is to use an old credit card cut in to narrow strips and insert them in to the gap where the adhesive release. That way the battery shouldn’t re-stick before you remove it.
-
-
-
Usa l'estremità piatta di uno spudger per disconnettere il cavo flessibile del display.
-
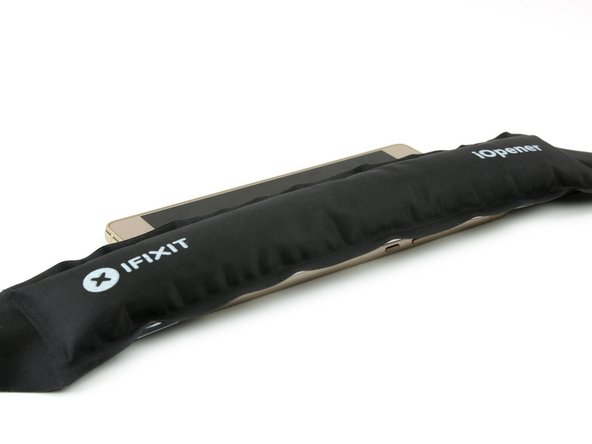
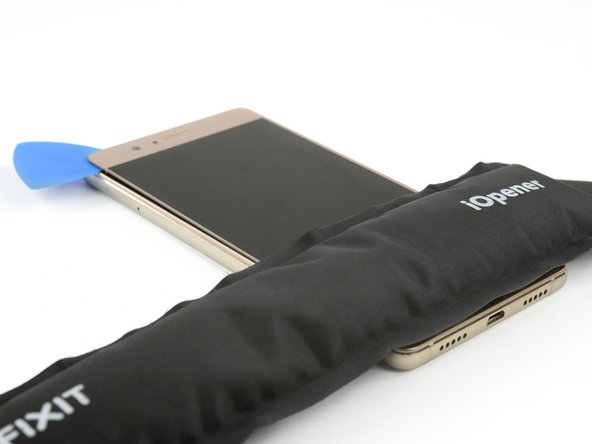
Rovescia il telefono e usa un iOpener per ammorbidire l'adesivo sul bordo del display.
-
-
-
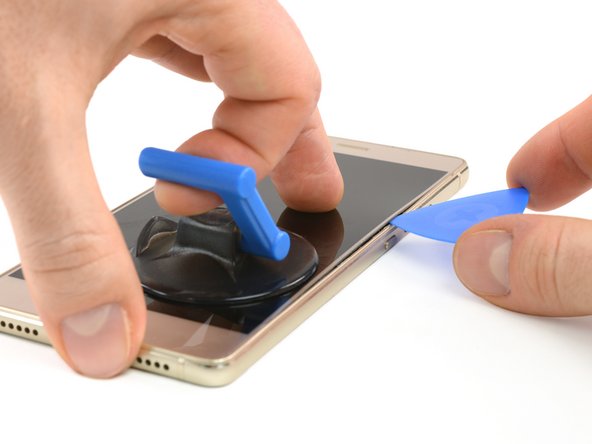
Usa una ventosa per sollevare lievemente il display e creare una fessura.
-
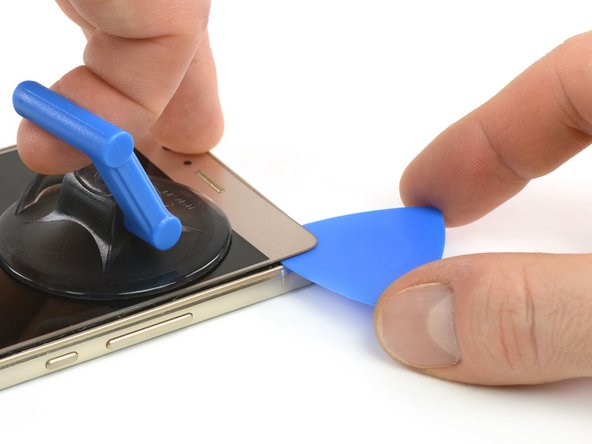
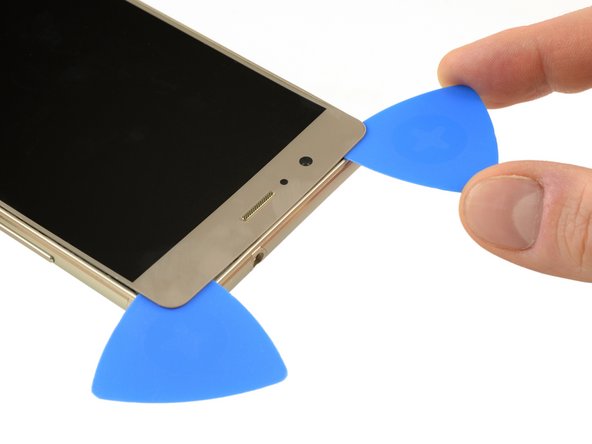
Inserisci solo la punta di un plettro di apertura nella fessura e fallo scorrere con regolarità lungo il bordo verso la parte superiore. Può essere necessario passarlo alcune volte avanti e indietro.
-
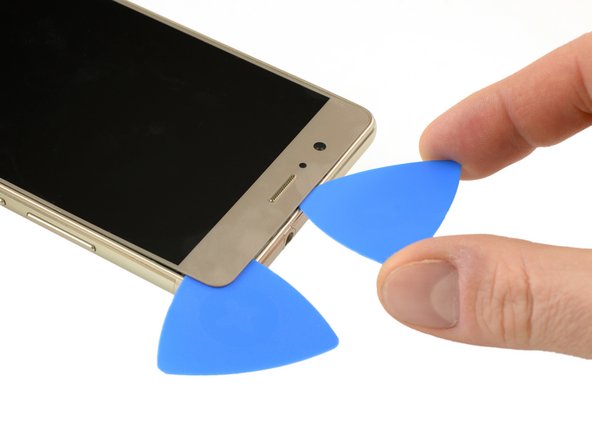
Cerca di superare l'angolo sotto la parte superiore del display. Se necessario, riposiziona la ventosa.
-
Lascia il plettro di apertura sotto il display per evitare che l'adesivo si possa riattaccare.
-
-
-
Quando hai terminato il lavoro lungo i bordi del display, prendi una ventosa e solleva la parte superiore del display dal telaio.
-
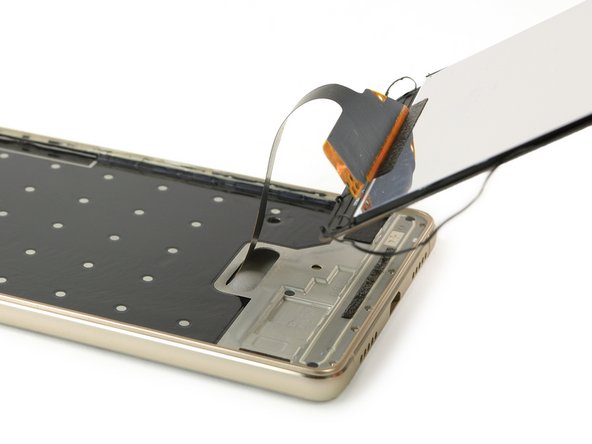
Con un'azione lenta ma regolare, apri la parte inferiore del display a cerniera separando l'adesivo.
-
Ora puoi far passare il cavo flessibile del display attraverso la feritoia nel telaio.
割れがある場合はかなり剥がしにくい。画面を温め、マイナスドライバーの極細で抉った所、フレーム周りの白い枠ごと剥がそうとしたたため枠が折れてしまった。ここは注意して欲しい。特に撮影レンズ付近は接着が強めにしてあるため最後に剥がすのが良いと思う。順番はサイド→下→上部がベストと感じた。はがした後にきづいたが、撮影レンズ裏、ディスプレイフレックスケーブル等の穴から押せばディスプレイが浮きやすいのではないかと感じた。
アドバイス、ありがとうございました!
-


Per rimontare il tuo dispositivo, segui queste istruzioni in ordine inverso.
Per rimontare il tuo dispositivo, segui queste istruzioni in ordine inverso.
Annulla: non ho completato questa guida.
Altre 26 persone hanno completato questa guida.
Un ringraziamento speciale a questi traduttori:
100%

albertob ci sta aiutando ad aggiustare il mondo! Vuoi partecipare?
Inizia a tradurre ›

Team

3 Commenti
About release battery ... fishing braided line works better :) battery taken without any destruction.
Grazie a questa guida ho potuto sostituire batteria e schermo da me. Grazie!
Non si può sostituire solo il vetro? X forza anche lcd?
What could you use instead of an opening pick??
Alfredo - Replica
Like, could a guitar pick wor? Or anything else?
Alfredo - Replica
A guitar pick will also do.
Tobias Isakeit -
what can still be used besides guitar pick
Tarshia Thompson - Replica
I had a hard time to open the back cover by opening pick. Then I used little, really little knife at first, and I continue to opening back cover using opening pick.
Andy B - Replica
Heating up aroud the finger sensor to loosen the square adhesive tape ..
Hishamchohan - Replica
If you do not have any picks, You can also adapt an old credit or utility card by cutting it in to thirds. Then with some fine emery or sand paper, rub a sharp point on the one edge of the card. This will help you get access to the clips that hold the rear cover on. The one i did yesterday had quite a lot of adhesive around the edge & around the finger print sensor. Another tip with an old credit card is to cut it in to narrow strips to insert in to where you have separated the cover from the frame to stop it getting stuck to the adhesive again.
gazza667 - Replica