Introduzione
Sostituisci il cervello del tuo 3DS con una nuova scheda madre.
Cosa ti serve
-
Attrezzo utilizzato in questo passaggio:Phillips #00 Screwdriver$5.49
-
Usa un cacciavite Phillips PH00 per allentare le quattro viti lungo la parte superiore della cover posteriore.
-
-
-
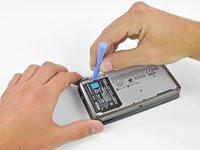
Infila uno strumento di apertura in plastica nella fessura nella scocca inferiore sopra la batteria.
-
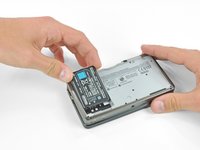
Fai leva con lo strumento di apertura in plastica per sollevare la batteria.
-
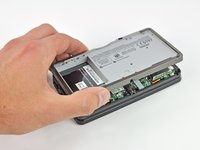
Afferra il bordo superiore della batteria e sollevalo dalla scocca inferiore.
-
-
-
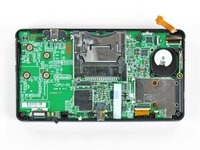
Usa un cacciavite JIS #00 per rimuovere le nove viti nere da 6,3 mm dal case inferiore.
-
Usa un cacciavite JIS #00 per rimuovere la vite argentata da 2,4 mm sopra lo slot della cartuccia di gioco.
-
-
-
Svita le due viti a croce Phillips da 7,7 mm che fissano il retro della levetta analogica alla scheda madre.
-
-
-
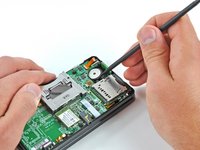
Svita le due viti a croce Phillips da 4,5 mm che fissano la scheda del lettore SD alla scheda madre.
-
-
-
-
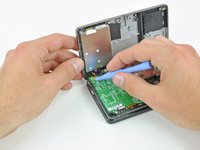
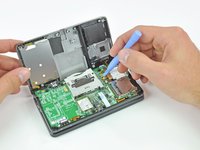
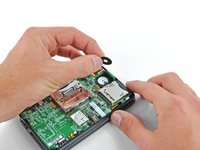
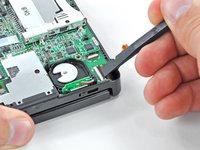
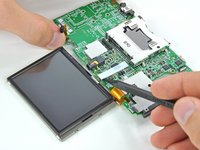
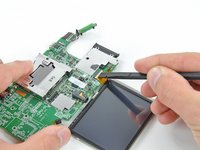
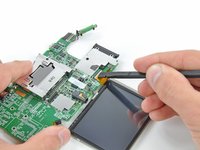
Infila la parte piatta di uno spudger tra la scheda del lettore SD e la scheda madre.
-
Solleva lentamente per allentare la scheda SD dallo schermo RF sotto di essa. Se sollevi troppo rapidamente, potresti strappare lo schermo o rompere i suoi punti di saldatura.
-
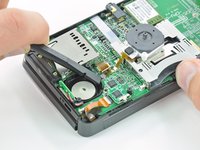
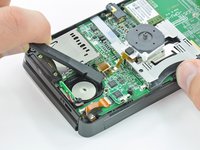
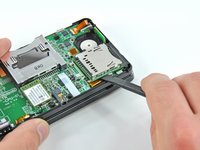
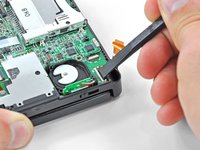
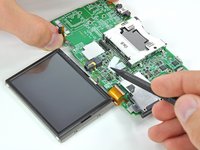
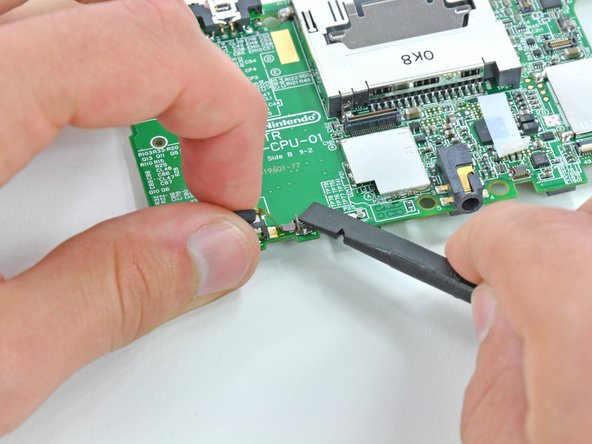
Passa lo spudger lungo i lati della scheda SD per liberarla dall'adesivo che la tiene in posizione.
-
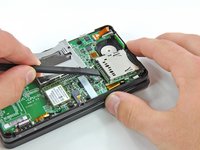
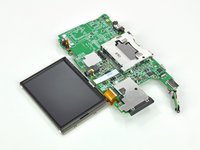
Una volta liberata, solleva la scheda del lettore SD dalla scheda madre.
-
-
-
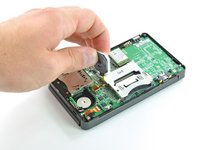
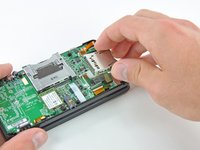
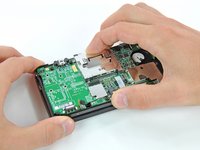
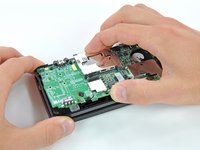
Infila la parte piatta di uno spudger sotto un angolo della scheda WiFi e solleva la scheda dalla scheda madre.
-
-
Attrezzo utilizzato in questo passaggio:Tweezers$4.99
-
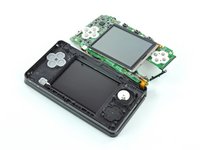
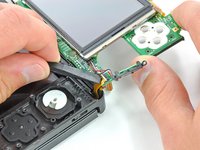
Afferra il cavo a nastro del microfono con un paio di pinzette vicno al microfono stesso.
-
Tira il microfono verso l'alto per sfilarlo dalla scocca superiore.
-
-
-
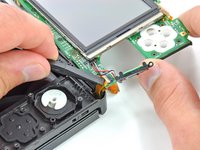
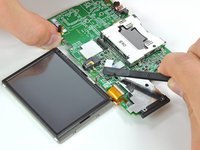
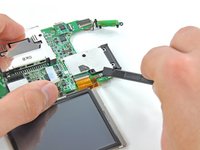
Usa la punta di uno spudger o le dita per staccare il nastro adesivo bianco che copre il connettore del cavo a nastro dello schermo touch.
-
-
-
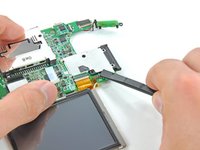
Usa la parte piatta di uno spudger o un'unghia per sollevare l'aletta di bloccaggio che trattiene il cavo a nastro del microfono nella presa ZIF.
-
-
-
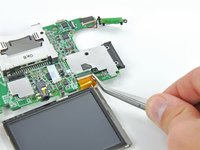
Usa la parte piatta di uno spudger per sollevare il connettore del tasto del volume e toglierlo dalla sua presa presente sulla scheda madre.
-


Per riassemblare il tuo dispositivo, segui queste istruzioni in ordine inverso.
Per riassemblare il tuo dispositivo, segui queste istruzioni in ordine inverso.
Annulla: non ho completato questa guida.
Altre 38 persone hanno completato questa guida.
Un ringraziamento speciale a questi traduttori:
100%
Agnese di Gregorio ci sta aiutando ad aggiustare il mondo! Vuoi partecipare?
Inizia a tradurre ›

12 Commenti
This guide seriously helped me get a broken 3DS and replace the motherboard to make it a working one. Thank you for doing this guide, you are awesome. :)
I can't thank you enough for this guide! My 3 year old submerged my 8yr olds coveted 3DS in the toilet yesterday...I frantically took it apart as soon as I found it (knew not to turn it on) and wisely took pics on my phone as I frantically took apart each piece to get it dried....was however up all night dreading my ability to put it back together again...until I found this awesome step by step guide. Won't try to put it back together for another few days, but I will update my post and let you know if I got it working again:) Thanks so much!
I need help!
My 3DS is acting alone directional up!
I opened the device and realized that there is a short between TP85 and ground !
I need to know what CI is responsible for the control functions !
Thanks!
The control functions are on the back of the motherboard facing the lower screen. It is the 4 white buttons right below the huge gap where the circular pad goes
Excellent guide. This is an incredibly frustrating device to take apart and get back together.
Probably the toughest part is the ribbon cables. They're positively tiny and some of them force you to insert them without much space to work. The best strategy I've found is to use a small poking tool like a pen cap clip to nudge them very patiently into place. First one corner in the socket so it doesn't fly back out, then nudge it along and get the other corner. Then straighten it out to line up perfectly. Being extremely patient and gentle are key -- if you even slightly bend a corner without damaging the wires, it becomes infinitely harder to get it in successfully. Most of the ribbons have small notches you can use to help you push them in and judge how far in they are.
Also if the wifi antenna wire gets loose when you're putting it back together, you'll have to undo everything to get it back into the right spot.