Salta al contenuto principale

Sony Vaio Fit SVF14A190X Motherboard Replacement

Cosa ti serve

  1. Sony Vaio Fit SVF14A190X Motherboard Replacement, Battery Replacement: passo 1, immagine 1 di 1
    • Make sure the battery is drained or the computer is turned off.

    • Use the Phillips head screw driver to remove the eleven 6 mm screws.

    • Use the Phillips head screw driver to remove the one 4 mm screw securing the CD drive.

  2. Sony Vaio Fit SVF14A190X Motherboard Replacement: passo 2, immagine 1 di 3 Sony Vaio Fit SVF14A190X Motherboard Replacement: passo 2, immagine 2 di 3 Sony Vaio Fit SVF14A190X Motherboard Replacement: passo 2, immagine 3 di 3
    • Insert the plastic opening tool into the slit of the CD drive.

    • Then pull it outwards.

    • Grab the CD drive with your hand.

    • Take the CD drive all the way out.

  3. Sony Vaio Fit SVF14A190X Motherboard Replacement: passo 3, immagine 1 di 3 Sony Vaio Fit SVF14A190X Motherboard Replacement: passo 3, immagine 2 di 3 Sony Vaio Fit SVF14A190X Motherboard Replacement: passo 3, immagine 3 di 3
    • Insert the plastic opening tool into the slit between the back cover and the rest of the computer.

    • Move the plastic opening tool around all sides of the device.

    • Peel off the back cover.

  4. Sony Vaio Fit SVF14A190X Motherboard Replacement: passo 4, immagine 1 di 2 Sony Vaio Fit SVF14A190X Motherboard Replacement: passo 4, immagine 2 di 2
    • Use the Phillips head screw driver to remove the four 7 mm screws.

    • Lift the battery out with your hand.

  5. Sony Vaio Fit SVF14A190X Motherboard Replacement, RAM Replacement: passo 5, immagine 1 di 1
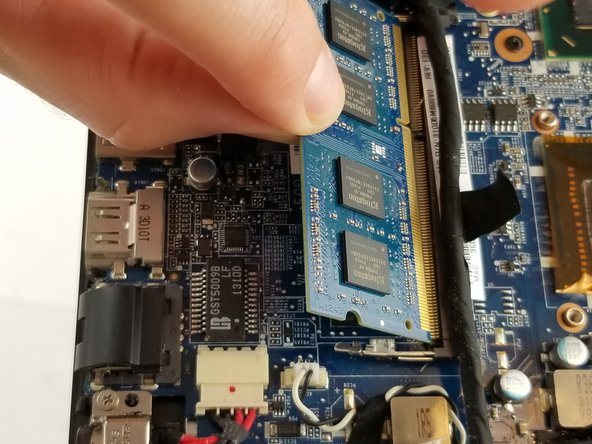
    • The RAM is a small rectangular component located on the opposite side of the lab top from where you pulled out the CD disc drive.

  6. Sony Vaio Fit SVF14A190X Motherboard Replacement: passo 6, immagine 1 di 3 Sony Vaio Fit SVF14A190X Motherboard Replacement: passo 6, immagine 2 di 3 Sony Vaio Fit SVF14A190X Motherboard Replacement: passo 6, immagine 3 di 3
    • Push down on the metal prongs encircled to allow the RAM component to spring up diagonally from the lab top.

    • When the RAM is sprung up, pull it out in the same direction it is currently at, to remove it from the lab top.

  7. Sony Vaio Fit SVF14A190X Motherboard Replacement, Fan Replacement: passo 7, immagine 1 di 1
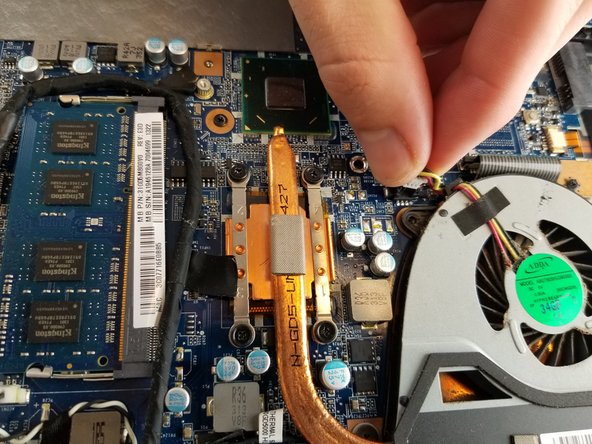
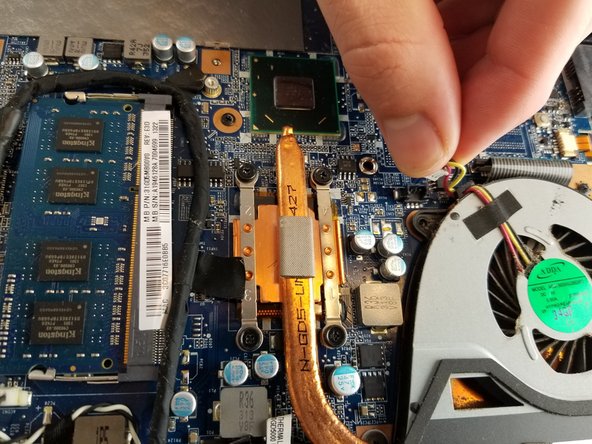
    • Use the Phillips head screw driver to remove the two 5 mm screws on the fan.

    • Loosen the four screws with the Phillips head screw driver on the copper cooling component. These screws will not come all of the way out.

  8. Sony Vaio Fit SVF14A190X Motherboard Replacement: passo 8, immagine 1 di 3 Sony Vaio Fit SVF14A190X Motherboard Replacement: passo 8, immagine 2 di 3 Sony Vaio Fit SVF14A190X Motherboard Replacement: passo 8, immagine 3 di 3
    • Gently grab the base of the fan wire connection.

    • Pull the base of the wire connection from the motherboard to disconnect the wires.

  9. Sony Vaio Fit SVF14A190X Motherboard Replacement: passo 9, immagine 1 di 3 Sony Vaio Fit SVF14A190X Motherboard Replacement: passo 9, immagine 2 di 3 Sony Vaio Fit SVF14A190X Motherboard Replacement: passo 9, immagine 3 di 3
    • Once the prior two steps have been completed, obtain the plastic opening tool.

    • Gently place the plastic opening tool underneath the fan and separate the fan from the device by sliding the tool along the bottom of the fan.

    • Once separated, you can now lift the fan out by hand.

  10. Sony Vaio Fit SVF14A190X Motherboard Replacement, Hard Drive Replacement: passo 10, immagine 1 di 3 Sony Vaio Fit SVF14A190X Motherboard Replacement, Hard Drive Replacement: passo 10, immagine 2 di 3 Sony Vaio Fit SVF14A190X Motherboard Replacement, Hard Drive Replacement: passo 10, immagine 3 di 3
    • Use the Phillips head screw driver to remove four 4mm screws located on both sides of the hard drive.

  11. Sony Vaio Fit SVF14A190X Motherboard Replacement: passo 11, immagine 1 di 2 Sony Vaio Fit SVF14A190X Motherboard Replacement: passo 11, immagine 2 di 2
    • Use a plastic opening tool to lift the hard drive up to the point where it can be grabbed.

    • Pull the hard drive horizontally to separate it from it's connection.

  12. Sony Vaio Fit SVF14A190X Motherboard Replacement, Motherboard Replacement: passo 12, immagine 1 di 1
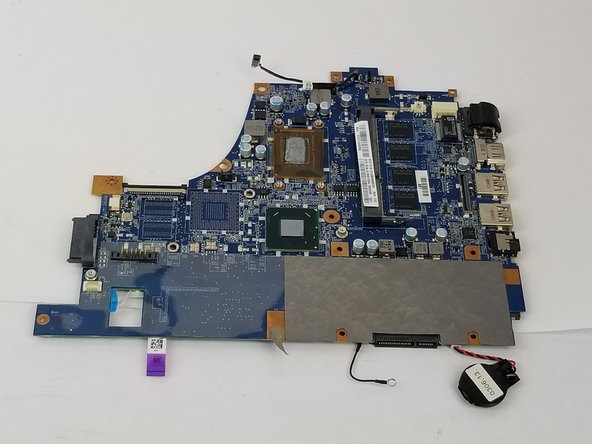
    • With all of the before mentioned components removed, you can now start removing your motherboard. We recommend taking a picture of the back of the motherboard to keep track of which screws go where.

    • Use the Phillips head screw driver to remove the highlighted eleven 4 mm screws from the motherboard.

    • Use the Phillips head screw driver to remove two 8 mm screws and keep them separate.

    • The two 4 mm screws can be removed now using the Phillips head screw driver, or later. Make sure to keep separate from other similar screws.

  13. Sony Vaio Fit SVF14A190X Motherboard Replacement: passo 13, immagine 1 di 3 Sony Vaio Fit SVF14A190X Motherboard Replacement: passo 13, immagine 2 di 3 Sony Vaio Fit SVF14A190X Motherboard Replacement: passo 13, immagine 3 di 3
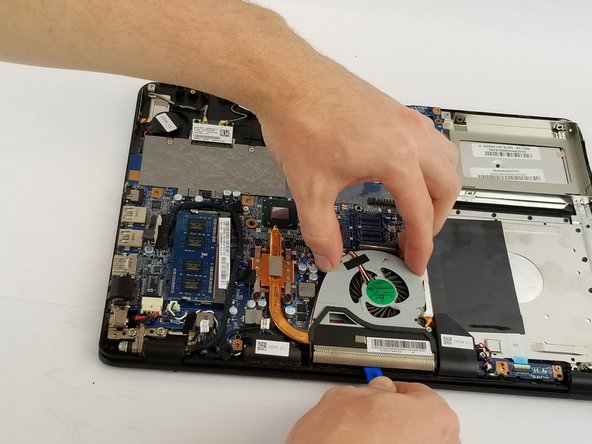
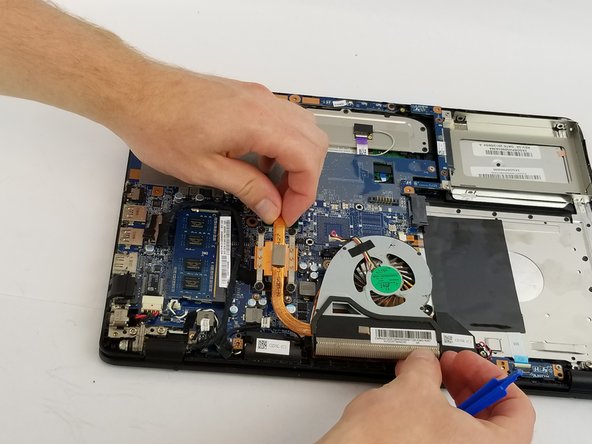
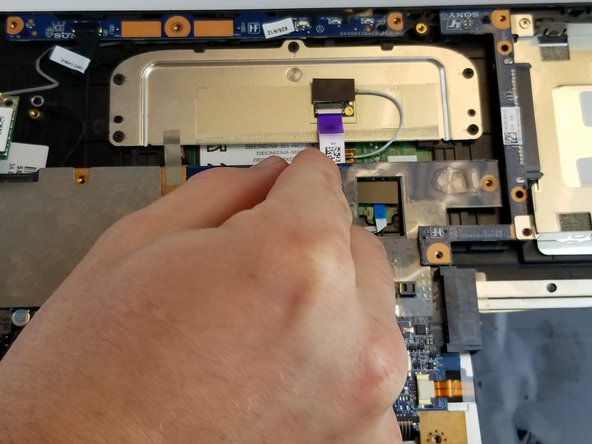
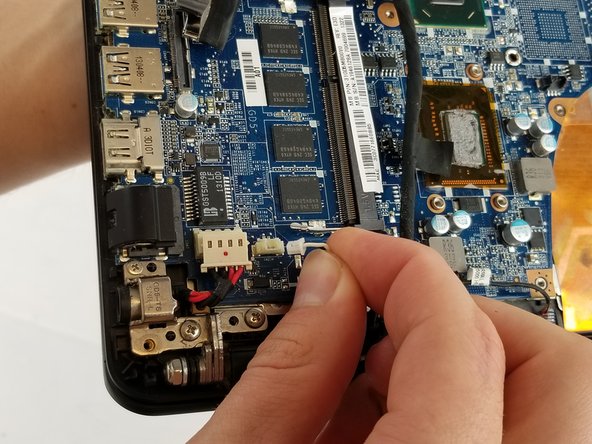
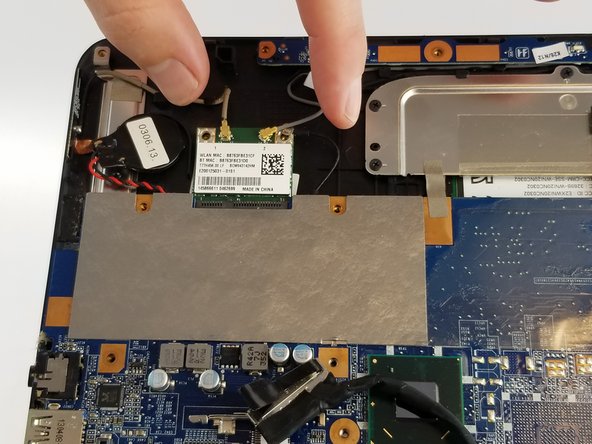
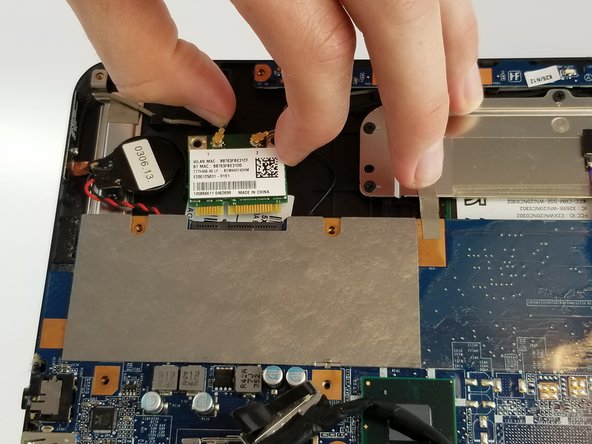
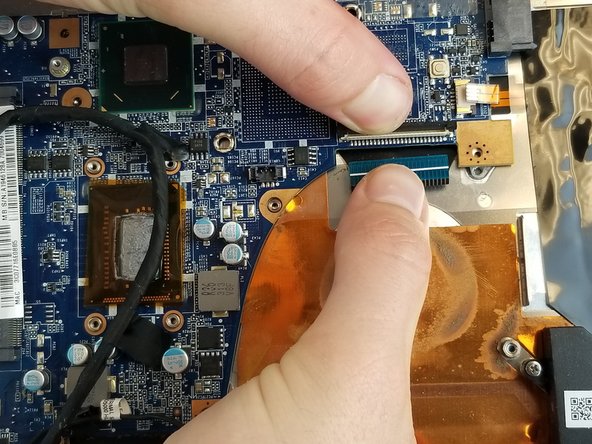
    • Once the all screws have been removed, you can start removing connections from the motherboard. Begin with the highlighted connections.

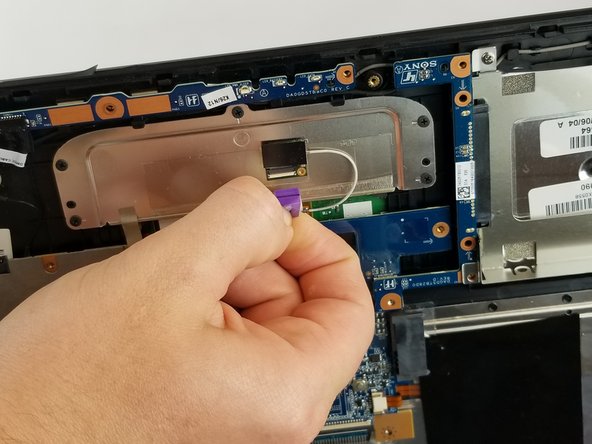
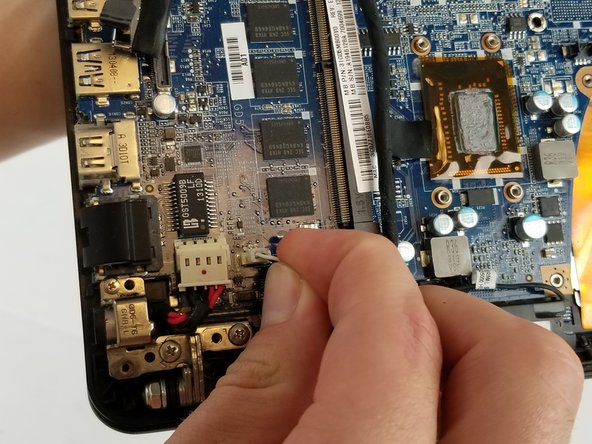
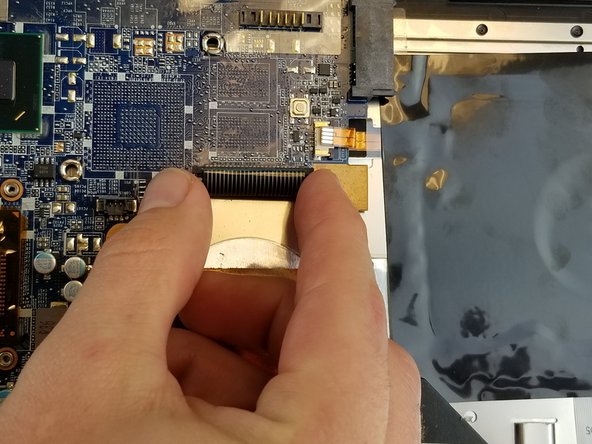
    • The following connections have plastic tabs coming off of them. Simply grab the tab with two fingers, or tweezers if the tab is difficult to access, and carefully pull the connection straight out.

  14. Sony Vaio Fit SVF14A190X Motherboard Replacement: passo 14, immagine 1 di 3 Sony Vaio Fit SVF14A190X Motherboard Replacement: passo 14, immagine 2 di 3 Sony Vaio Fit SVF14A190X Motherboard Replacement: passo 14, immagine 3 di 3
    • The following three highlighted connections simply pull out. Grasp the plastic connector with two fingers, or tweezers if necessary, and gently pull them from their connections.

  15. Sony Vaio Fit SVF14A190X Motherboard Replacement: passo 15, immagine 1 di 3 Sony Vaio Fit SVF14A190X Motherboard Replacement: passo 15, immagine 2 di 3 Sony Vaio Fit SVF14A190X Motherboard Replacement: passo 15, immagine 3 di 3
    • If you did not remove the two 4 mm Phillips head screws in step 12, remove them now using the Phillips head screw driver.

    • With the screws removed, grasp the connection on the sides and pull it straight out.

  16. Sony Vaio Fit SVF14A190X Motherboard Replacement: passo 16, immagine 1 di 3 Sony Vaio Fit SVF14A190X Motherboard Replacement: passo 16, immagine 2 di 3 Sony Vaio Fit SVF14A190X Motherboard Replacement: passo 16, immagine 3 di 3
    • The following two connections have small hinges holding the connections in. Loosen the connections by lifting the hinges, then gently pull the connections out.

  17. Sony Vaio Fit SVF14A190X Motherboard Replacement: passo 17, immagine 1 di 2 Sony Vaio Fit SVF14A190X Motherboard Replacement: passo 17, immagine 2 di 2
    • Once all of your connections have been removed, grasp the motherboard by the corners and gently lift it from the laptop. It should come out easily.

Conclusione

To reassemble your device, follow these instructions in reverse order.

Un'altra persona ha completato questa guida.

Neal Trosper

Membro da: 02/13/18

171 Reputazione

1 Guida realizzata

Team

USF Tampa, Team S11-G3, Cheng Spring 2018 Membro di USF Tampa, Team S11-G3, Cheng Spring 2018

USFT-CHENG-S18S11G3

4 Membri

11 Guide realizzate

0 Commenti

Aggiungi Commento

Visualizza Statistiche:

Ultime 24 Ore: 1

Ultimi 7 Giorni: 1

Ultimi 30 Giorni: 7

Tutti i Tempi: 1,052