Salta al contenuto principale

Questa guida ha delle modifiche più recenti. Passa all'ultima versione non verificata.

Sonos One Power Adapter Replacement

Cosa ti serve

  1. Sonos One Power Adapter Replacement, Protective Cover: passo 1, immagine 1 di 3 Sonos One Power Adapter Replacement, Protective Cover: passo 1, immagine 2 di 3 Sonos One Power Adapter Replacement, Protective Cover: passo 1, immagine 3 di 3
    • Disconnect all power cords.

    • Remove the rubber foot and plastic screw guard on the bottom of the device using a plastic opening tool.

    • Note: the rubber foot and plastic screw guard can be removed as one piece to make reassembly easier

  2. Sonos One Power Adapter Replacement: passo 2, immagine 1 di 3 Sonos One Power Adapter Replacement: passo 2, immagine 2 di 3 Sonos One Power Adapter Replacement: passo 2, immagine 3 di 3
    • Remove the four 10mm Torx T10 screws from the bottom of the speaker.

  3. Sonos One Power Adapter Replacement: passo 3, immagine 1 di 2 Sonos One Power Adapter Replacement: passo 3, immagine 2 di 2
    • Remove the bottom cover by squeezing the protective cover slightly while pushing up with your fingers.

  4. Sonos One Power Adapter Replacement: passo 4, immagine 1 di 3 Sonos One Power Adapter Replacement: passo 4, immagine 2 di 3 Sonos One Power Adapter Replacement: passo 4, immagine 3 di 3
    • The protective cover clip is very thin and deforms easily.

    • Remove the single 8mm Torx T10 screw and protective cover clip.

  5. Sonos One Power Adapter Replacement: passo 5, immagine 1 di 2 Sonos One Power Adapter Replacement: passo 5, immagine 2 di 2
    • Slide the protective cover upwards to remove.

  6. Sonos One Power Adapter Replacement, Control Panel & Microphone: passo 6, immagine 1 di 3 Sonos One Power Adapter Replacement, Control Panel & Microphone: passo 6, immagine 2 di 3 Sonos One Power Adapter Replacement, Control Panel & Microphone: passo 6, immagine 3 di 3
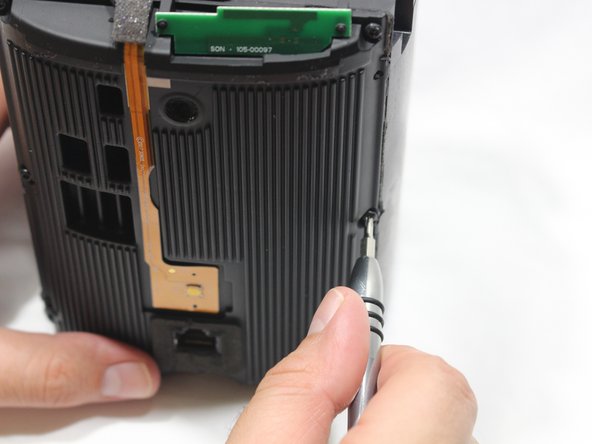
    • Use the pointed end of a spudger to remove the covers that hide the screws.

    • Remove the four 9mm Torx T8 screws from around the perimeter of the control panel.

  7. Sonos One Power Adapter Replacement: passo 7, immagine 1 di 2 Sonos One Power Adapter Replacement: passo 7, immagine 2 di 2
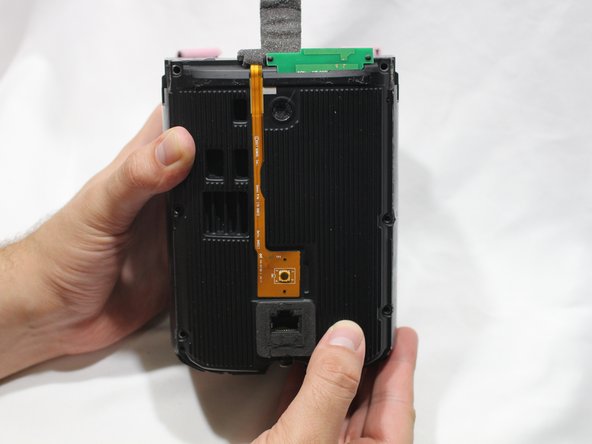
    • With the front of the unit facing you, lift the control panel up using your thumbs.

    • There's a ribbon cable attaching the control panel to the speaker so work slowly.

  8. Sonos One Power Adapter Replacement: passo 8, immagine 1 di 3 Sonos One Power Adapter Replacement: passo 8, immagine 2 di 3 Sonos One Power Adapter Replacement: passo 8, immagine 3 di 3
    • Use a spudger to flip up the retaining flap on the control panel ribbon cable ZIF socket.

    • Pull the control panel ribbon cable out of its socket.

  9. Sonos One Power Adapter Replacement: passo 9, immagine 1 di 2 Sonos One Power Adapter Replacement: passo 9, immagine 2 di 2
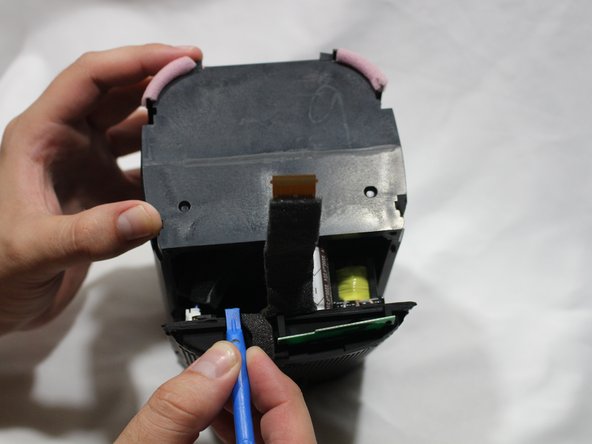
    • Pull the control panel away from the speaker to separate.

  10. Sonos One Power Adapter Replacement, Power Adapter Receptacle: passo 10, immagine 1 di 3 Sonos One Power Adapter Replacement, Power Adapter Receptacle: passo 10, immagine 2 di 3 Sonos One Power Adapter Replacement, Power Adapter Receptacle: passo 10, immagine 3 di 3
    • Remove the six 9mm Torx T8 screws from the motherboard panel.

  11. Sonos One Power Adapter Replacement: passo 11, immagine 1 di 2 Sonos One Power Adapter Replacement: passo 11, immagine 2 di 2
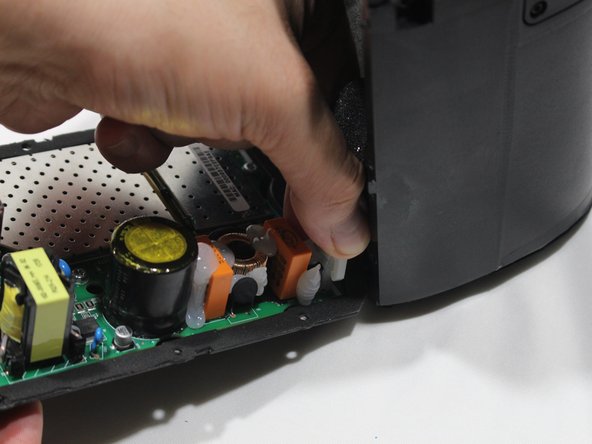
    • Using a plastic opening tool, separate the motherboard from the speaker.

  12. Sonos One Power Adapter Replacement: passo 12, immagine 1 di 3 Sonos One Power Adapter Replacement: passo 12, immagine 2 di 3 Sonos One Power Adapter Replacement: passo 12, immagine 3 di 3
    • Using your thumb, disconnect the speaker cable from the motherboard.

  13. Sonos One Power Adapter Replacement: passo 13, immagine 1 di 3 Sonos One Power Adapter Replacement: passo 13, immagine 2 di 3 Sonos One Power Adapter Replacement: passo 13, immagine 3 di 3
    • Disconnect the power adapter plug from the motherboard using your thumb.

  14. Sonos One Power Adapter Replacement: passo 14, immagine 1 di 3 Sonos One Power Adapter Replacement: passo 14, immagine 2 di 3 Sonos One Power Adapter Replacement: passo 14, immagine 3 di 3
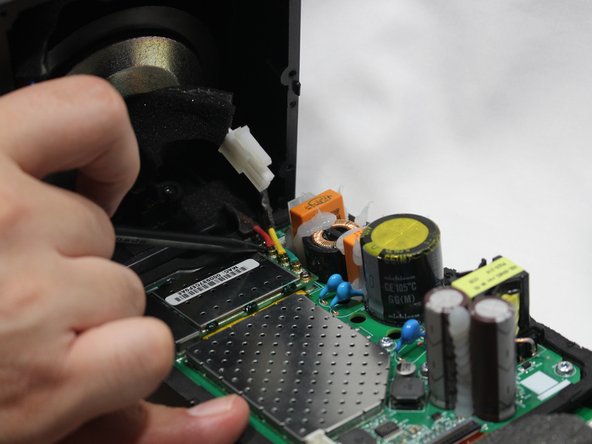
    • Using the pointed end of the spudger, disconnect the red, green, and yellow cables connecting the WiFi transmitter/receiver.

  15. Sonos One Power Adapter Replacement: passo 15, immagine 1 di 2 Sonos One Power Adapter Replacement: passo 15, immagine 2 di 2
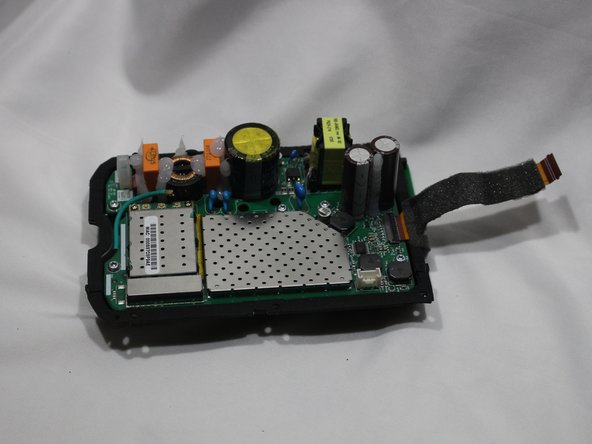
    • Remove the motherboard panel from the speaker housing.

  16. Sonos One Power Adapter Replacement: passo 16, immagine 1 di 3 Sonos One Power Adapter Replacement: passo 16, immagine 2 di 3 Sonos One Power Adapter Replacement: passo 16, immagine 3 di 3
    • The woofer is highly magnetic, making removal of the metal screws sometimes difficult.

    • Remove the two 9mm Torx T8 screws from the power adapter plug.

    • Remove the power adapter receptacle from its housing slot.

Conclusione

To reassemble your device, follow these instructions in reverse order.

Altre 6 persone hanno completato questa guida.

Marcus Glowa

Membro da: 02/14/18

848 Reputazione

5 Guide realizzate

Team

USF Tampa, Team S2-G1, Nance Spring 2018 Membro di USF Tampa, Team S2-G1, Nance Spring 2018

USFT-NANCE-S18S2G1

3 Membri

6 Guide realizzate

0 Commenti

Aggiungi Commento

Visualizza Statistiche:

Ultime 24 Ore: 2

Ultimi 7 Giorni: 30

Ultimi 30 Giorni: 111

Tutti i Tempi: 7,167