Salta al contenuto principale
Unisciti alla Community delle riparazioni - Crea un account

Snowboard Binding Strap Replacement

Cosa ti serve

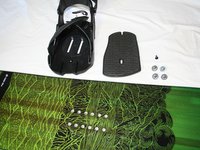
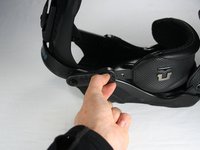
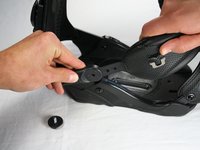
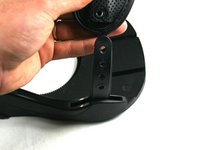
  1. Snowboard Binding Strap Replacement, Binding: passo 1, immagine 1 di 3 Snowboard Binding Strap Replacement, Binding: passo 1, immagine 2 di 3 Snowboard Binding Strap Replacement, Binding: passo 1, immagine 3 di 3
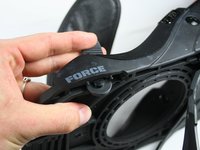
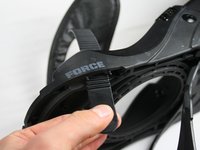
    • Release the binding straps by lifting up on the buckle and pulling towards the direction of the end of the ladder.

    • Not all binding straps will release the same way. If you are having trouble releasing your binding straps, please refer to your owner's manual.

    Chiedi a FixBot

    Aggiungi Commento

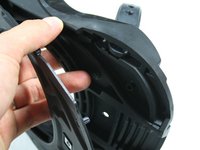
  2. Snowboard Binding Strap Replacement: passo 2, immagine 1 di 2 Snowboard Binding Strap Replacement: passo 2, immagine 2 di 2
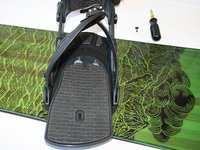
    • Move the straps and the highback plate out of the way in order to have clear access to the foot pad screw.

    • The highback plate is the vertical support plate located on the heel side of the binding.

    Chiedi a FixBot

    Aggiungi Commento

  3. Snowboard Binding Strap Replacement: passo 3, immagine 1 di 2 Snowboard Binding Strap Replacement: passo 3, immagine 2 di 2
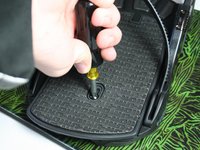
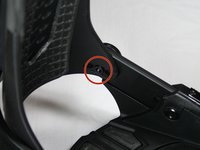
    • Use a #2 Phillips screwdriver to remove the panhead, 10mm wide, M4 x 12mm screw located in the middle of the foot pad.

    Chiedi a FixBot

    Aggiungi Commento

  4. Snowboard Binding Strap Replacement: passo 4, immagine 1 di 3 Snowboard Binding Strap Replacement: passo 4, immagine 2 di 3 Snowboard Binding Strap Replacement: passo 4, immagine 3 di 3
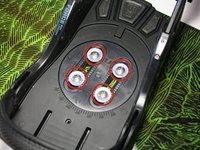
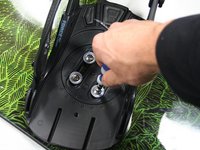
    • Use a #2 Phillips screwdriver to remove the four ovalhead M6 x 12mm screws that attach the base plate of the binding to the board.

    • Lift or slide the binding off the board and set the screws aside.

    Chiedi a FixBot

    Aggiungi Commento

  5. Snowboard Binding Strap Replacement, Binding Strap: passo 5, immagine 1 di 3 Snowboard Binding Strap Replacement, Binding Strap: passo 5, immagine 2 di 3 Snowboard Binding Strap Replacement, Binding Strap: passo 5, immagine 3 di 3
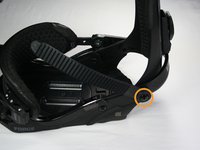
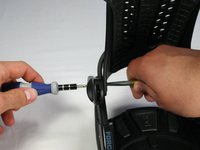
    • Use a 5.5mm flathead screwdriver to anchor the backing bracket located on the inside of the binding.

    • Using a Phillips #2 screwdriver, unscrew the countersunk ovalhead M4 x 16mm screw connecting the heel strap ladder to the binding.

    Chiedi a FixBot

    Aggiungi Commento

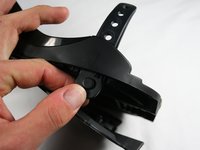
  6. Snowboard Binding Strap Replacement: passo 6, immagine 1 di 2 Snowboard Binding Strap Replacement: passo 6, immagine 2 di 2
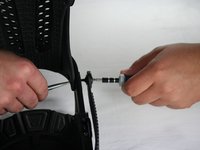
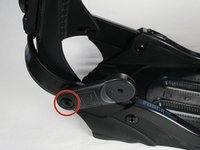
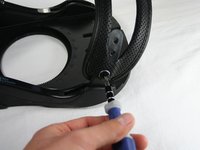
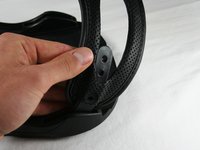
    • Unscrew the 10mm long thumb screw connecting the heel strap with its binding connector.

    • Pull the heel strap apart from its binding connector.

    Chiedi a FixBot

    Aggiungi Commento

  7. Snowboard Binding Strap Replacement: passo 7, immagine 1 di 3 Snowboard Binding Strap Replacement: passo 7, immagine 2 di 3 Snowboard Binding Strap Replacement: passo 7, immagine 3 di 3
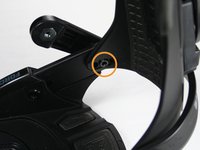
    • Use a 5.5mm flathead screwdriver to anchor the backing bracket located on the inside of the binding.

    • Using a Phillips #2 screwdriver, locate and unscrew the countersunk ovalhead M4 x 16mm screw holding the heel strap connector to the binding.

    Chiedi a FixBot

    Aggiungi Commento

  8. Snowboard Binding Strap Replacement: passo 8, immagine 1 di 2 Snowboard Binding Strap Replacement: passo 8, immagine 2 di 2
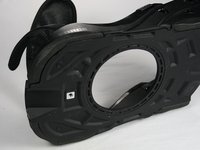
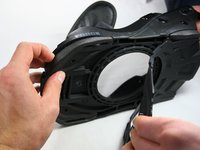
    • Flip the binding so that the bottom is accessible.

    • Using your hands, pry off the plastic bottom covering starting at the toe end.

    • The bottom may still remain attached on the heel edge. There is no need to completely remove it.

    Chiedi a FixBot

    Aggiungi Commento

  9. Snowboard Binding Strap Replacement: passo 9, immagine 1 di 3 Snowboard Binding Strap Replacement: passo 9, immagine 2 di 3 Snowboard Binding Strap Replacement: passo 9, immagine 3 di 3
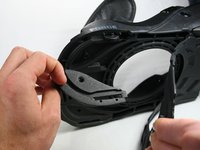
    • Remove the corner foam coverings by grabbing one edge and lifting up.

    • Slide out the toe strap ladder.

    Chiedi a FixBot

    Aggiungi Commento

  10. Snowboard Binding Strap Replacement: passo 10, immagine 1 di 3 Snowboard Binding Strap Replacement: passo 10, immagine 2 di 3 Snowboard Binding Strap Replacement: passo 10, immagine 3 di 3
    • Using a Phillips #2 screwdriver, unscrew the button head M4 x 10mm screw holding the toe strap with its connector.

    • Slide the toe strap off of the toe strap connector.

    Chiedi a FixBot

    Aggiungi Commento

  11. Snowboard Binding Strap Replacement: passo 11, immagine 1 di 2 Snowboard Binding Strap Replacement: passo 11, immagine 2 di 2
    • Turn the binding on its side and slide out the toe strap connector.

    Chiedi a FixBot

    Aggiungi Commento

Conclusione

To reassemble your device, follow these instructions in reverse order.

Annulla: non ho completato questa guida.

Un'altra persona ha completato questa guida.

Team

Cal Poly, Team 17-4, Forte Winter 2014 Membro di Cal Poly, Team 17-4, Forte Winter 2014

CPSU-FORTE-W14S17G4

5 Membri

11 guide realizzate

0Commenti sulla guida

Aggiungi Commento

Visualizza statistiche:

Ultime 24 ore: 4

Ultimi 7 giorni: 30

Ultimi 30 giorni: 73

Tutti i Tempi: 51,343