Questa traduzione è stata generata automaticamente e non è stata ancora revisionata da una persona. Parli questa lingua? Dai un’occhiata.

Smontaggio Seagate Backup Plus Hub

Alan Nishioka e 4 altri collaboratori
Ultimo aggiornamento il 16 ago 2026
Visualizzazioni: 48.757
Visualizza statistiche:
- Ultime 24 ore:
- 13
- Ultimi 7 giorni:
- 74
- Ultimi 30 giorni:
- 333
- Tutti i Tempi:
- 48.757
Commenti: 13
13 commenti sulla guida.
Vai ai commenti della guidaCompletato: 7 8
7 persone hanno contrassegnato questa guida come "completata". Sarai il prossimo?
8 persone hanno contrassegnato questa guida come "completata". Compreso te, ottimo lavoro!
Preferiti: 0 1
Nessuno ha preferito (e si è iscritto) questa guida. Sarai il primo?
1 persona ha aggiunto ai preferiti (e si è iscritta a) questa guida, e sei tu!
Guida fornita dalla comunità
Un fantastico membro della nostra community ha creato questa guida. Non è stata creata dallo staff di iFixit.
Cosa ti serve
Strumenti


-
-
-
Avevo bisogno di un hard disk e in zona non ci sono negozi di computer economici, quindi ho comprato un Seagate Backup Plus Hub da Costco per estrarre l'unità.
-
Puoi vedere dove ho rotto la custodia cercando di rimuoverlo.
 Chiedi a FixBot
-
-
-
La scocca in plastica è composta da tre parti tenute insieme da clip.
-
Dovresti rimuovere prima la parte superiore piatta e poi i lati.
-
Sfortunatamente, non sapevo che aspetto avesse all'interno e tuttora non so come aprire le clip senza romperle.
-
-
-
Ecco alcuni primi piani. Puoi vedere dove ho rotto la maggior parte delle clip di plastica.
-
-
-
-
Il disco rigido è un Seagate ST5000DM000-1FK178
-
L'unità è ottimizzata per l'archiviazione, quindi è GRANDE e LENTA.
-
Alcune persone la rimuovono da un case e la vendono su Ebay o Amazon. Ottieni un'unità capiente, ma non di ottima qualità.
-
Dovrò acquistare un'altra unità.
-
-


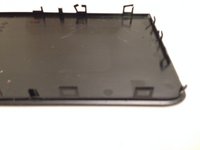
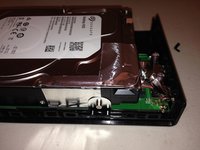
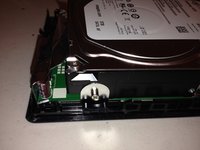


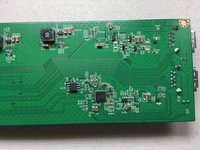
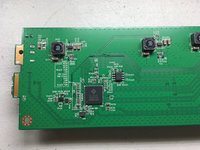
Non sono riuscito a rimontarlo. E si è rivelata una CATTIVA IDEA poiché l'unità è molto LENTA.
Annulla: non ho completato questa guida.
Altre 7 persone hanno completato questa guida.

13Commenti sulla guida
I just wanted to add to this guide. I tried to disassemble it as well. I started by removing the top. As you described I could not find a way to remove the plastic top without damaging the plastic clips. Once the top was removed I was able to remove all the internal components without any issues. To remove the hard drive I unclipped all the plastic clips on the inside of the frame, lifted up the frame and slid the hard drive out of the back of the case.
I have the 8TB version. It uses a Seagate Archive HDD based on SMR technology. It is not fast but good for inexpensive mass storage.
By removing the plastic clips, the casing can easily hold itself together, when only removing the top and wile NOT damaging the HDD frame.
By removing the top i only made some small cosmetic damage at the buttom of the HDD frame and the plastic top as the only damge to the case. (And the of course the plastic clips)
I could not se any way to NOT damage the plastic clips.
Part 1
Use a very small blade screwdriver to get into the gap between rear panel and the large cover that goes round the front and surrounds the 2 usb externals.
Starting at one edge force the tip of the screwdriver in and twist till you get a little gap, then unsert a larger screwdriver blade and twist till the clip pops off.
Move little screww driver to the other side of the bigger one and then move the larger screw driver pass the little one and twist etc
When you get past half way use two more screwdrivers to do the same around the corner where you started. Once you pop a clip around the corner leave the larger screwdriver in the gap and return to the end piece. (Doing the corner now helps stop the end clips slipping back into place.
Continue the end and then do two clips around the corner, then return to the other side and do two clips, then back to the other side and do two clips.
From here you should be able to do the rest with your hands by tilting the cover up.
Part 2
Once the cover is off the drive and electronics just slips out by turning the case open side down, four screws behind the rubber vibration washers and you can unplug it.
Reassembly must be done exactly in reverse from a tilted position at the2 x usb plugs end. You will damage some clips, but I got mine back together ok.
My interest was simply getting the drive out so I could use it connected as a native SATA drive. Expect to wreck the case if this is your goal. As proposed above, remove the flat size. Metal prying tools in my iFixit kit were better for this, the overall strength of this assemble case bested the plastic “pry” tools. Once I had the assembly open, the back (power) end of the system went next; average sized pliers cracked the back and I could pry it and one side away. Eventually you will have a metal chassis in hand. remove the four side screws, and the drive pops off the power/data ports quite easily. If you want to preserve the case disassembly is NOT advised. It appears it was made to snap together and break upon disassembly. Total “destructive” disassembly took about 20 minutes.
