Cosa ti serve
-
-
-
Il Pebble Time Round è stato prodotto per l'ultima volta nel 2015, eppure ha ancora un seguito fedele e una vita propria.
-
Segui la guida per sezionare il tuo smartwatch e-paper preferito.
 Chiedi a FixBot
-
-
-
Usa un plettro di apertura e spingi sul lato sinistro o destro, sopra i pulsanti, per separare il case dalla parte anteriore in vetro.
-
-
-
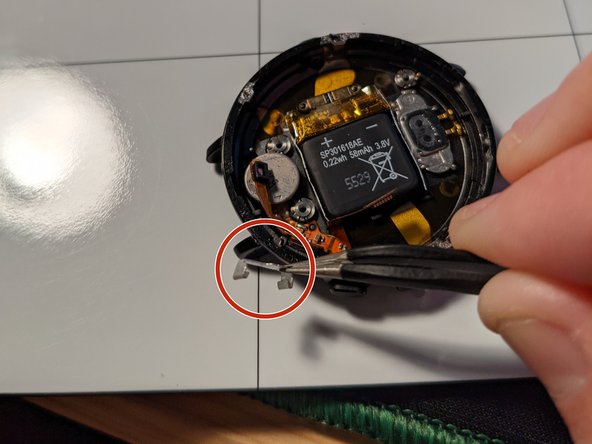
Ci sono tre piccole molle integrate nel rivestimento che non aspettano altro che saltar fuori. Una volta separato il case abbastanza da vedere l'interno, controlla che non si stacchino.
-
-
-
La superficie in vetro dovrebbe staccarsi con un piccolo aiuto da parte di un plettro.
-
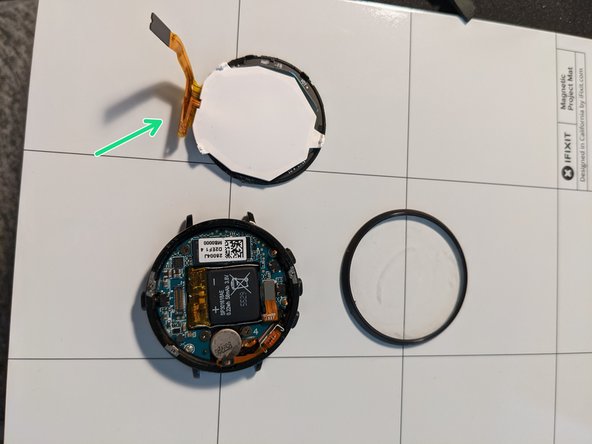
Separa delicatamente il touch screen bianco dal pannello dello schermo. Questi componenti si separano facilmente, ma sono tenuti insieme da due cavi.
-
Usa uno spudger per scollegare il cavo piccolo dal touch screen bianco. Questo cavo serve per il microfono e il motore di vibrazione.
-
Usa uno spudger per scollegare il secondo cavo. Questo cavo serve per il pannello dello schermo. La seconda immagine lo mostra già scollegato.
-
-
-
Inserisci un plettro tra lo schermo e-paper e la cornice. Fai scorrere il plettro lungo tutto il perimetro dello schermo, separando i due pezzi.
-
-
-
Strumento utilizzato in questo passaggio:Tweezers$4.99
-
C'è una piccola quantità di nastro adesivo che tiene uniti i due cavi collegati allo schermo epaper e al pannello di retroilluminazione bianco. Rimuovilo con le pinzette.
-
Separa delicatamente i cavi. Sono solo incollati insieme e possono essere separati facilmente.
-
-
-
Il vetro frontale
-
La cornice
-
Lo schermo e-paper
-
Il pannello di retroilluminazione
-
-
-
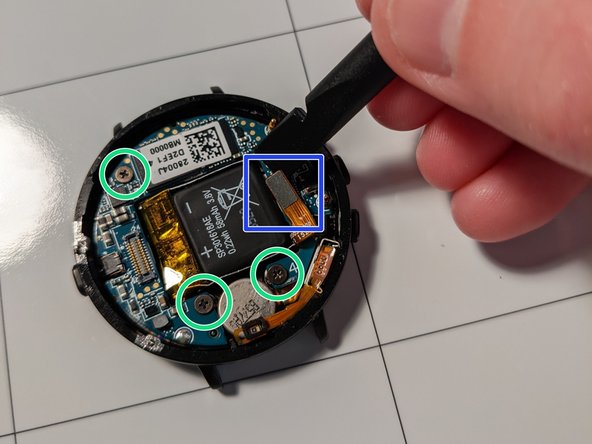
Usa uno spudger per scollegare il cavo della batteria dalla scheda madre.
-
Usa un piccolo cacciavite a croce Phillips (PH000) per rimuovere le viti.
-
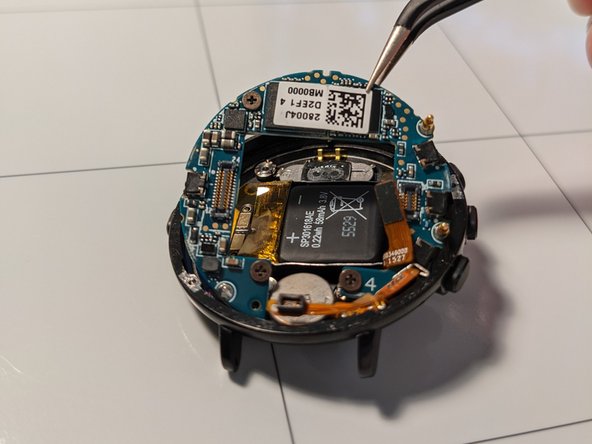
A questo punto la scheda madre può essere sollevata ed estratta dal case.
-
-
-
Usa le pinzette per tirare la staffa metallica che fissa il cavo del microfono e del motore di vibrazione al telaio posteriore. Dovrebbe scorrere verso l'alto ed uscire dal telaio.
-
-
-
Il motore di vibrazione è incollato al telaio; usa uno spudger per fare leva ed estrarlo.
-
Il resto del gruppo cavi è incollato al telaio, ma con meno forza. Una volta che l'adesivo del motore di vibrazione è stato separato dal telaio, anche il resto del gruppo cavi può essere estratto delicatamente.
-
-
-
Tutto ciò che resta è la batteria, anch'essa incollata al case.
-
Fai scorrere un utensile sottile sotto i contatti nella parte superiore della batteria. Ora fai scorrere con attenzione un plettro di plastica sotto la batteria e separala dal case.
-
-
-
Il vetro frontale, realizzato in Gorilla Glass 2.5D.
-
La cornice. È disponibile in due colori (bianco e nero) e tre stili (numerata, liscia, liscia con scanalature).
-
Lo schermo e-paper, in grado di visualizzare 64 colori.
-
Il pannello di retroilluminazione.
-
Il motore di vibrazione e il gruppo cavo del microfono.
-
La batteria da 58 mAh che, in qualche modo, garantisce oltre 24 ore di utilizzo con una singola ricarica di 15 minuti.
-
La scheda madre, con un chip Spansion.
-
Il case completo. Congratulazioni!
-
-








5Commenti sulla guida
Great teardown! It only took six years for a good detailed teardown to be published. Thanks for taking the time to post this for those who still use a pebble time round.
Question, does the battery have to be desoldered from the motherboard to be removed? There’s a battery replacement for purchase on ifixit that does not require soldering, so I am wondering if this battery replacement will be simple without having to desolder the old battery.
Thanks!
Ryan
I also would love to know. Soldering & batteries feels like a bad combination
No need, as you can see in Step 12. If you have a battery replacement with the contacts already soldered on (like the one here on iFixit), you can unplug the connectors and connect the new one.
I haven’t ever replaced a battery, but I’ve seen people mention that they’ve done it on the /r/pebble subreddit. I’ve also seen some youtube videos. The main thing I saw people complaining about in the subreddit was gluing the pebble back together was difficult.
What is called “touchpanel” here more likely is the display backlight, the Pebble Time Round does not have a touchscreen but a backlit screen.
The term “e-paper” for the display is misleading. E-paper is often used as a term for e-ink displays, which is a totally different technology than what the Pebble uses. The Pebble uses a fully reflective low power display much more similar to an LCD than to e-ink. I am not fully sure but I think the technology is based on Sharp’s Memory In Pixel LCDs. The first ones of these were based on some polymer instead of liquid crystals, but I am not completely sure here. But Sharp still makes this type of displays, also with color, the same 64 colors the Pebble has. The Pebble’s display was IIRC made by some “Japan Display” corp or similar - really a long time ago I researched that. Ah, right, here we go:
https://www.j-display.com/english/produc...
They used to list pretty much exactly the Pebble display back in 2015/2016 but obviously moved on.
