Salta al contenuto principale
Unisciti alla Community delle riparazioni - Crea un account

Smart Parts Ion Bolt Replacement

Cosa ti serve

    1. Smart Parts Ion Bolt Replacement, Hopper and the Air Tank: passo 1, immagine 1 di 3 Smart Parts Ion Bolt Replacement, Hopper and the Air Tank: passo 1, immagine 2 di 3 Smart Parts Ion Bolt Replacement, Hopper and the Air Tank: passo 1, immagine 3 di 3
      • Remove the air tank by rotating it counterclockwise.

      • Do not pull the trigger or jostle the gun, there will still be pressurized air inside the gun that could be expelled and cause bodily harm if injected into eyes and/or skin.

      • The pressure gauge will indicate the leftover air in the gun.

      Chiedi a FixBot

      Aggiungi Commento

    2. Smart Parts Ion Bolt Replacement: passo 2, immagine 1 di 2 Smart Parts Ion Bolt Replacement: passo 2, immagine 2 di 2
      • Remove the hopper by pulling it out of the feed tube, located on the top of the body. The hopper should easily come off when pulled straight up.

      Chiedi a FixBot

      Aggiungi Commento

    1. Smart Parts Ion Bolt Replacement, Smart Parts Ion De-Gassing: passo 3, immagine 1 di 1
      • Turn the gun on by pressing the power button until the red light blinks.

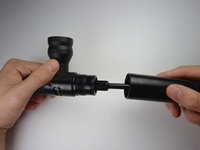
      • Turn vision mode off by pressing the power button again.

      • Red light should be flashing in a double blink sequence.

      Chiedi a FixBot

      Aggiungi Commento

    2. Smart Parts Ion Bolt Replacement: passo 4, immagine 1 di 1
      • Pull the trigger to release the air in the gun.

      • Pressurized air can be forceful, causing particles to be ejected from the gun into your eyes and/or skin. When air bubbles enter the bloodstream, they can block blood vessels, causing embolisms. To avoid this, make sure to point the gun in a safe direction when pulling the trigger because air will be released from the gun.

      Chiedi a FixBot

      Aggiungi Commento

    1. Smart Parts Ion Bolt Replacement, Grip: passo 5, immagine 1 di 1
      • Remove the four 8mm screws on each side of the gun's grip using a Phillips #2 screwdriver.

      Chiedi a FixBot

      Aggiungi Commento

    2. Smart Parts Ion Bolt Replacement: passo 6, immagine 1 di 1
      • Remove the grip by sliding it towards the front of the gun.

      Chiedi a FixBot

      Aggiungi Commento

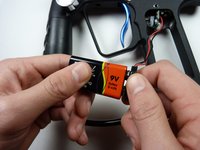
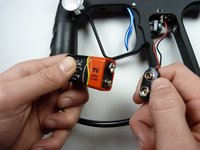
    1. Smart Parts Ion Bolt Replacement, Battery: passo 7, immagine 1 di 2 Smart Parts Ion Bolt Replacement, Battery: passo 7, immagine 2 di 2
      • Remove the 9V battery by unsnapping it.

      Chiedi a FixBot

      Aggiungi Commento

    1. Smart Parts Ion Bolt Replacement, Separate Body From Grip Frame: passo 8, immagine 1 di 3 Smart Parts Ion Bolt Replacement, Separate Body From Grip Frame: passo 8, immagine 2 di 3 Smart Parts Ion Bolt Replacement, Separate Body From Grip Frame: passo 8, immagine 3 di 3
      • Remove the front and rear 1" screws on the gun's grip frame using a 3/32" Allen Wrench.

      Chiedi a FixBot

      Aggiungi Commento

    2. Smart Parts Ion Bolt Replacement: passo 9, immagine 1 di 2 Smart Parts Ion Bolt Replacement: passo 9, immagine 2 di 2
      • Remove the 12 mm screw on the top of the grip frame using a 3/32" Allen wrench.

      Chiedi a FixBot

      Aggiungi Commento

    3. Smart Parts Ion Bolt Replacement: passo 10, immagine 1 di 1
      • Separate the gun's body from the frame by gently pulling them in opposite directions.

      Chiedi a FixBot

      Aggiungi Commento

    4. Smart Parts Ion Bolt Replacement: passo 11, immagine 1 di 1
      • Remove the 1-1/4" screw that's attached to the blue tube above the front grip using a 3/32" Allen Wrench.

      Chiedi a FixBot

      Aggiungi Commento

    1. Smart Parts Ion Bolt Replacement, Removing the Solenoid from the Body: passo 12, immagine 1 di 1
      Strumento utilizzato in questo passaggio:
      Tweezers
      $4.99
      • Gently use tweezers to detach the white vision wire harness, located directly under the feed tube.

      • Another small tool or your fingers will work for this.

      Chiedi a FixBot

      Aggiungi Commento

    2. Smart Parts Ion Bolt Replacement: passo 13, immagine 1 di 1
      • Remove the two 1-1/4" screws on either side of the circuit board using a 3/32" allen wrench.

      Chiedi a FixBot

      Aggiungi Commento

    3. Smart Parts Ion Bolt Replacement: passo 14, immagine 1 di 1
      • Separate the solenoid from the gun's body by gently pulling it upwards.

      Chiedi a FixBot

      Aggiungi Commento

    4. Smart Parts Ion Bolt Replacement: passo 15, immagine 1 di 1
      • Slide the metal body out of the plastic shell by holding one in each hand and gently pulling apart.

      Chiedi a FixBot

      Aggiungi Commento

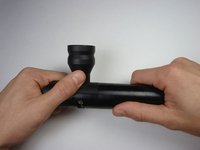
    1. Smart Parts Ion Bolt Replacement, Bolt: passo 16, immagine 1 di 2 Smart Parts Ion Bolt Replacement, Bolt: passo 16, immagine 2 di 2
      • Separate the front body breach from the fire chamber by rotating the breach counterclockwise.

      Chiedi a FixBot

      Aggiungi Commento

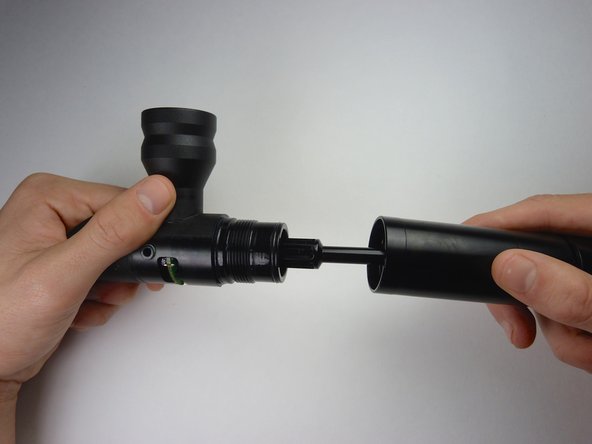
    2. Smart Parts Ion Bolt Replacement: passo 17, immagine 1 di 1
      • Remove the bolt from the front body breach by gently pulling on the bolt.

      Chiedi a FixBot

      Aggiungi Commento

Conclusione

To reassemble your device, follow these instructions in reverse order.

Annulla: non ho completato questa guida.

Altre 3 persone hanno completato questa guida.

Team

Cal Poly, Team 8-42, Amido Winter 2015 Membro di Cal Poly, Team 8-42, Amido Winter 2015

CPSU-AMIDO-W15S8G42

4 Membri

10 guide realizzate

0Commenti sulla guida

Aggiungi Commento

Visualizza statistiche:

Ultime 24 ore: 1

Ultimi 7 giorni: 10

Ultimi 30 giorni: 33

Tutti i Tempi: 3,270