Salta al contenuto principale

Samsung WB35F Menu/Control Buttons Replacement

Cosa ti serve

  1. Samsung WB35F Menu/Control Buttons  Replacement, Rear Case: passo 1, immagine 1 di 3 Samsung WB35F Menu/Control Buttons  Replacement, Rear Case: passo 1, immagine 2 di 3 Samsung WB35F Menu/Control Buttons  Replacement, Rear Case: passo 1, immagine 3 di 3
    • The first thing to do will be unscrew all the screws using Phillips #000 Screwdriver.

    • Keep all the screws in order. Black screws goes under the bottom of camera, and the silver screws goes on the sides and inside of the camera.

  2. Samsung WB35F Menu/Control Buttons  Replacement: passo 2, immagine 1 di 2 Samsung WB35F Menu/Control Buttons  Replacement: passo 2, immagine 2 di 2
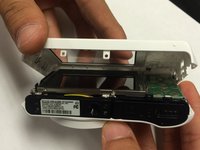
    • Using the spudger, and plastic opening tool open the casing of camera.

  3. Samsung WB35F Menu/Control Buttons  Replacement: passo 3, immagine 1 di 3 Samsung WB35F Menu/Control Buttons  Replacement: passo 3, immagine 2 di 3 Samsung WB35F Menu/Control Buttons  Replacement: passo 3, immagine 3 di 3
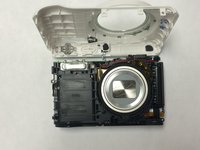
    • Once you open the camera case, you will be able to work on any part of the camera.

  4. Samsung WB35F Menu/Control Buttons  Replacement, Menu/Control Buttons: passo 4, immagine 1 di 2 Samsung WB35F Menu/Control Buttons  Replacement, Menu/Control Buttons: passo 4, immagine 2 di 2
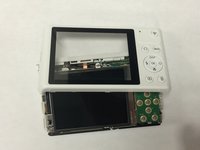
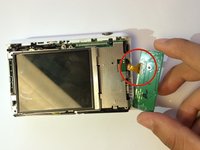
    • Carefully unplug the ribbon from the Menu/Control board.

  5. Samsung WB35F Menu/Control Buttons  Replacement: passo 5, immagine 1 di 1
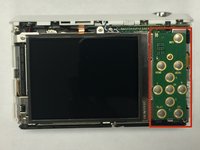
    • Once you unplug the ribbon. Take out the old board and replace it with new menu/control board.

Conclusione

To reassemble your device, follow these instructions in reverse order.

Sarmad Khan

Membro da: 01/09/15

525 Reputazione

5 Guide realizzate

Team

USF Tampa, Team 1-6, Tanski Winter 2015 Membro di USF Tampa, Team 1-6, Tanski Winter 2015

USFT-TANSKI-W15S1G6

4 Membri

10 Guide realizzate

0 Commenti

Aggiungi Commento

Visualizza Statistiche:

Ultime 24 Ore: 1

Ultimi 7 Giorni: 8

Ultimi 30 Giorni: 15

Tutti i Tempi: 580