Salta al contenuto principale
Unisciti alla Community delle riparazioni - Crea un account

Samsung Rogue OLED Screen Replacement

Cosa ti serve

  1. Samsung Rogue OLED Screen Replacement, Battery: passo 1, immagine 1 di 2 Samsung Rogue OLED Screen Replacement, Battery: passo 1, immagine 2 di 2
    • Before disassembling your Samsung Rogue, make sure it is powered off.

    • With your thumbs, push down on the back cover of your phone and slide it away from the camera.

    Chiedi a FixBot

    Aggiungi Commento

  2. Samsung Rogue OLED Screen Replacement: passo 2, immagine 1 di 2 Samsung Rogue OLED Screen Replacement: passo 2, immagine 2 di 2
    • You can now remove the battery by prying it up with your finger.

    Chiedi a FixBot

    Aggiungi Commento

  3. Samsung Rogue OLED Screen Replacement, Motherboard: passo 3, immagine 1 di 1
    • Use a plastic opening tool to carefully pry the back cover surrounding the camera up from the phone.

    Chiedi a FixBot

    Aggiungi Commento

  4. Samsung Rogue OLED Screen Replacement: passo 4, immagine 1 di 1
    • Remove the five 3.4mm Philips screws securing the backing of the phone.

    Chiedi a FixBot

    Aggiungi Commento

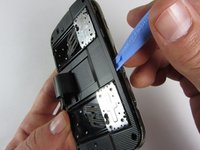
  5. Samsung Rogue OLED Screen Replacement: passo 5, immagine 1 di 3 Samsung Rogue OLED Screen Replacement: passo 5, immagine 2 di 3 Samsung Rogue OLED Screen Replacement: passo 5, immagine 3 di 3
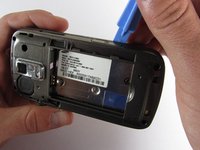
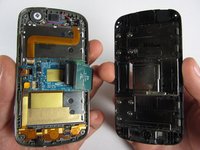
    • Use a plastic opening tool to carefully pry off the back cover.

    • Make sure you are prying along the edge and not between the two halves of the phone that slide away from each other.

    • Be careful to not drop the volume changing piece, for it can easily slip out.

    Chiedi a FixBot

    Aggiungi Commento

  6. Samsung Rogue OLED Screen Replacement: passo 6, immagine 1 di 1
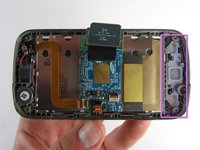
    • Remove the two 3.45 mm Philips screws below the white sticker.

    Chiedi a FixBot

    Aggiungi Commento

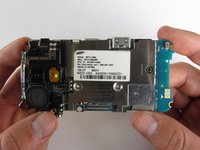
  7. Samsung Rogue OLED Screen Replacement: passo 7, immagine 1 di 2 Samsung Rogue OLED Screen Replacement: passo 7, immagine 2 di 2
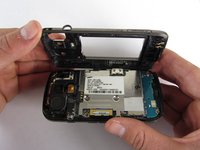
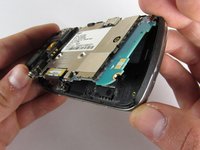
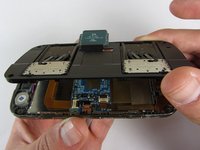
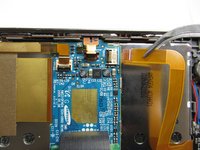
    • Carefully lift the motherboard up from the bottom edge.

    • The film of wires is still attached to the motherboard, so do not completely remove the motherboard just yet or you may damage it.

    Chiedi a FixBot

    Aggiungi Commento

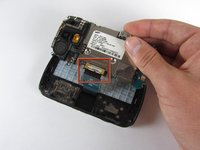
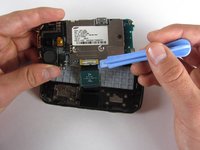
  8. Samsung Rogue OLED Screen Replacement: passo 8, immagine 1 di 2 Samsung Rogue OLED Screen Replacement: passo 8, immagine 2 di 2
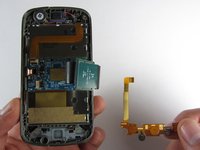
    • Use a plastic opening tool to disconnect the film from the motherboard.

    Chiedi a FixBot

    Aggiungi Commento

  9. Samsung Rogue OLED Screen Replacement, OLED Screen: passo 9, immagine 1 di 1
    • Remove the eight 1.7mm Philips screws above the keyboard.

    Chiedi a FixBot

    Aggiungi Commento

  10. Samsung Rogue OLED Screen Replacement: passo 10, immagine 1 di 1
    • Carefully remove the keyboard frame from the sliding mechanisms underneath.

    Chiedi a FixBot

    Aggiungi Commento

  11. Samsung Rogue OLED Screen Replacement: passo 11, immagine 1 di 1
    • Remove the five 3.0mm Philips screws around the outside of the sliding mechanisms.

    Chiedi a FixBot

    Aggiungi Commento

  12. Samsung Rogue OLED Screen Replacement: passo 12, immagine 1 di 3 Samsung Rogue OLED Screen Replacement: passo 12, immagine 2 di 3 Samsung Rogue OLED Screen Replacement: passo 12, immagine 3 di 3
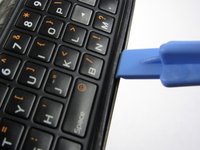
    • Use a plastic opening tool to pry off the upper slide plate.

    • Be careful of the film of wires when taking off the upper slide plate.

    Chiedi a FixBot

    Aggiungi Commento

  13. Samsung Rogue OLED Screen Replacement: passo 13, immagine 1 di 3 Samsung Rogue OLED Screen Replacement: passo 13, immagine 2 di 3 Samsung Rogue OLED Screen Replacement: passo 13, immagine 3 di 3
    Strumento utilizzato in questo passaggio:
    Tweezers
    $4.99
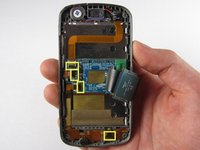
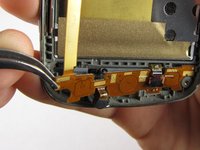
    • Use tweezers to open the four black gates by putting them in the "up" position.

    • With the same tweezers, carefully pull out the orange strips from the four specified gates.

    Chiedi a FixBot

    Aggiungi Commento

  14. Samsung Rogue OLED Screen Replacement: passo 14, immagine 1 di 2 Samsung Rogue OLED Screen Replacement: passo 14, immagine 2 di 2
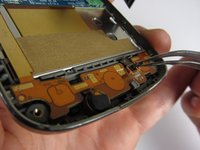
    • Using tweezers, gently remove the bottom orange strip from the device

    Chiedi a FixBot

    Aggiungi Commento

  15. Samsung Rogue OLED Screen Replacement: passo 15, immagine 1 di 2 Samsung Rogue OLED Screen Replacement: passo 15, immagine 2 di 2
    • In this procedure, the rubber function key pad can easily fall out, so it would be best to take it out and set it safely aside.

    Chiedi a FixBot

    Aggiungi Commento

  16. Samsung Rogue OLED Screen Replacement: passo 16, immagine 1 di 3 Samsung Rogue OLED Screen Replacement: passo 16, immagine 2 di 3 Samsung Rogue OLED Screen Replacement: passo 16, immagine 3 di 3
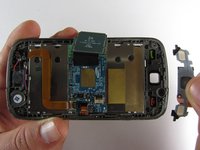
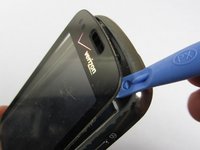
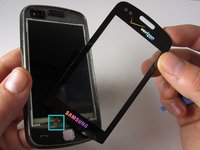
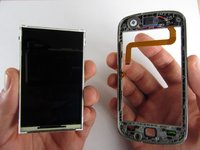
    • Starting at the top, use a plastic opening tool to pry open the protective screen on the front of the phone.

    • One of the strips you pulled out of a gate from a previous step is attached to the screen at the bottom. Be careful not to damage it when you are taking off the screen.

    • The protective screen is glued underneath the edges, so it will be a little more difficult to get off.

    • Keep your hand underneath the OLED screen at all times because it easily falls out once the protective screen detaches.

    Chiedi a FixBot

    Aggiungi Commento

Conclusione

To reassemble your device, follow these instructions in reverse order.

Annulla: non ho completato questa guida.

Un'altra persona ha completato questa guida.

Team

Cal Poly, Team 7-32, Maness Spring 2012 Membro di Cal Poly, Team 7-32, Maness Spring 2012

CPSU-MANESS-S12S7G32

4 Membri

28 guide realizzate

0Commenti sulla guida

Aggiungi Commento

Visualizza statistiche:

Ultime 24 ore: 2

Ultimi 7 giorni: 6

Ultimi 30 giorni: 38

Tutti i Tempi: 2,609