Questa traduzione è stata generata automaticamente e non è stata ancora revisionata da una persona. Parli questa lingua? Dai un’occhiata.
Introduzione
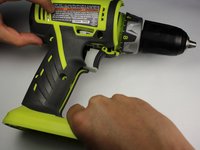
Questa guida descrive il processo di rimozione della copertura esterna. Il processo non richiede la rimozione di alcun componente elettronico interno; tuttavia, si consiglia di rimuovere la batteria per ridurre il rischio di scosse elettriche. Le viti della copertura sono comuni viti Torx T10. È consigliabile disporre di un luogo sicuro dove riporre tutte le viti, in modo che la copertura possa essere fissata correttamente durante il rimontaggio.
Cosa ti serve
-
-
-
Stacca il gruppo batteria dal corpo del trapano premendo i pulsanti di rilascio della batteria su entrambi i lati del gruppo e tirando verso l'esterno.
 Chiedi a FixBot
-
-
-
-
-
-
Usa un cacciavite Torx T10 per svitare tutte le dieci viti da 13,5 mm dall'involucro del trapano per accedere all'interno.
-
-
-
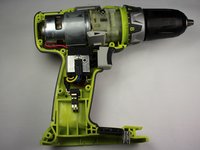
Solleva delicatamente l'involucro dal corpo del trapano.
-
Rimuovi completamente l'involucro dal corpo del trapano per accedere all'interno dell'utensile.
-
-


Per rimontare il dispositivo, segui queste istruzioni in ordine inverso.

Team

Cal Poly, Team 17-6, Forte Spring 2015 Membro di Cal Poly, Team 17-6, Forte Spring 2015
CPSU-FORTE-S15S17G6
4 Membri
108 guide realizzate
