Questa traduzione è stata generata automaticamente e non è stata ancora revisionata da una persona. Parli questa lingua? Dai un’occhiata.
Introduzione
Questa guida mostra come sostituire i contatti della batteria. I contatti della batteria sono saldati e fissati con termorestringente al circuito interno del trapano. A volte i contatti vengono venduti già fissati al gruppo dell'interruttore.
Cosa ti serve
-
-
-
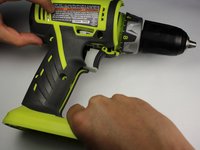
Stacca il gruppo batteria dal corpo del trapano premendo i pulsanti di rilascio della batteria su entrambi i lati del gruppo e tirando verso l'esterno.
 Chiedi a FixBot
-
-
-
-
-
Usa un cacciavite Torx T10 per svitare tutte le dieci viti da 13,5 mm dall'involucro del trapano per accedere all'interno.
-
-
-
-
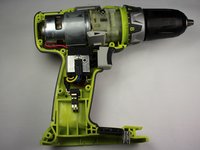
Solleva delicatamente l'involucro dal corpo del trapano.
-
Rimuovi completamente l'involucro dal corpo del trapano per accedere all'interno dell'utensile.
-
-
-
-
-
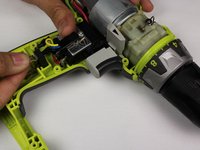
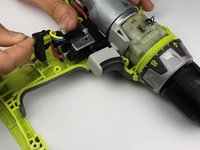
Afferra la clip della batteria e tira verso l'alto per rimuovere i contatti metallici della batteria.
-
Ora puoi pulire i contatti metallici della batteria con alcol isopropilico.
-
-




Per rimontare il dispositivo, segui queste istruzioni in ordine inverso.
Annulla: non ho completato questa guida.
Un'altra persona ha completato questa guida.

Team

Cal Poly, Team 17-6, Forte Spring 2015 Membro di Cal Poly, Team 17-6, Forte Spring 2015
CPSU-FORTE-S15S17G6
4 Membri
108 guide realizzate
4Commenti sulla guida
You don't really need to take apart the drill. You can clean the contacts with Qtips by reaching into cavity. Use rubbing alcohol and long Qtips. Also you can bend the contacts back to normal with a pair of needle nose plyers.
Re snapped contacts, I’ve found this part no. but no supplier yet:
“Ryobi Contact Plate holder 300001044”
Does anybody out there know where to find these as mine has snapped also, not ready to junk it out yet.
