Introduzione
Is your Razer Phone's touch screen unresponsive, cracked, or not displaying properly? If so, here is the guide to replacing the display assembly containing the glass touch screen, the digitizer, and LCD screen. The tools you need are a #000 Phillips screw driver, a Torx head T5, tweezers, metal spudger and Jimmy.
Cosa ti serve
-
-
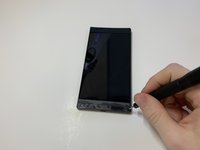
Remove the plastic speaker grills by using the metal spudger to pry underneath the strips.
-
Peel off the plastic speaker grill to reveal the screws.
 Chiedi a FixBot
-
-
-
Pry the top plastic grill off with the metal spudger and reveal the screws.
-
-
-
-
Remove five (two bottom, three top) 2.5 mm screws with the Phillips #000 screwdriver.
-
Remove five (four bottom, one top) 5.5 mm screws with the Torx Head T5 screwdriver.
-
-
-
Remove the display assembly by using the Jimmy to separate the assembly from the phone's frame.
-
Lift the display assembly away from the other half of the phone.
-
-
Strumento utilizzato in questo passaggio:Tweezers$4.99
-
Remove one 2.5 mm screw holding down the metal bracket connector using the Phillips #000 screwdriver.
-
Peel back the metallic shielding over the connector using tweezers.
-
Remove the metal bracket connector.
-
-
-
Grab hold of the the screen ribbon with the tweezers and remove it from the rest of the phone to free the assembly display.
-




To reassemble your device, follow these instructions in reverse order.
Annulla: non ho completato questa guida.
Altre 10 persone hanno completato questa guida.

Team

Cal Poly, Team S19-G6, White Winter 2019 Membro di Cal Poly, Team S19-G6, White Winter 2019
CPSU-WHITE-W19S19G6
4 Membri
15 guide realizzate
14Commenti sulla guida
“Peeling off the plastic speaker grill will ruin the adhesive used to keep it in place. A new adhesive must be used to put the grill back on the device.”
Any suggestions on what adhesive to use to replace the plastic speaker grills?
