Salta al contenuto principale
Unisciti alla Community delle riparazioni - Crea un account

RYOBI P422 Safety Trigger Spring Replacement

Cosa ti serve

    1. RYOBI P422 Safety Trigger Spring Replacement, Battery and Handle: passo 1, immagine 1 di 2 RYOBI P422 Safety Trigger Spring Replacement, Battery and Handle: passo 1, immagine 2 di 2
      • To remove the battery press down on the two buttons located on each side of the battery and pull away from the body of the grinder.

      • To remove the handle hold grinder with one hand and use the other hand to unscrew the handle with a counter-clockwise motion

      Chiedi a FixBot

      Aggiungi Commento

    1. RYOBI P422 Safety Trigger Spring Replacement, Safety Trigger Spring: passo 2, immagine 1 di 1
      • Lay grinder flat on its side so the screws are facing up

      Chiedi a FixBot

      Aggiungi Commento

    2. RYOBI P422 Safety Trigger Spring Replacement: passo 3, immagine 1 di 3 RYOBI P422 Safety Trigger Spring Replacement: passo 3, immagine 2 di 3 RYOBI P422 Safety Trigger Spring Replacement: passo 3, immagine 3 di 3
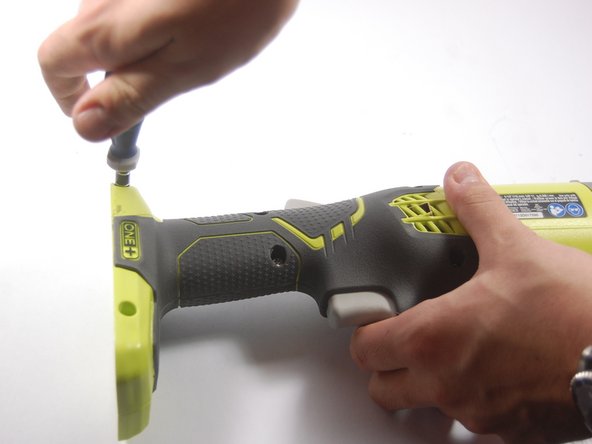
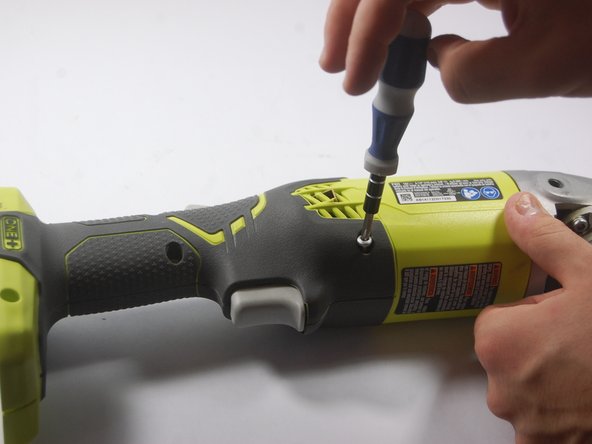
      • Remove the four 1.8 cm screws from the lower and midsection of the body with a T20-20 Torque screwdriver.

      • Remove the 3.7 cm screws from the upper section of the body, with the same screwdriver

      Chiedi a FixBot

      Aggiungi Commento

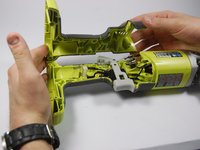
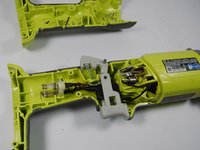
    3. RYOBI P422 Safety Trigger Spring Replacement: passo 4, immagine 1 di 3 RYOBI P422 Safety Trigger Spring Replacement: passo 4, immagine 2 di 3 RYOBI P422 Safety Trigger Spring Replacement: passo 4, immagine 3 di 3
      • Now that the two halves are unscrewed, remove the top half

      Chiedi a FixBot

      Aggiungi Commento

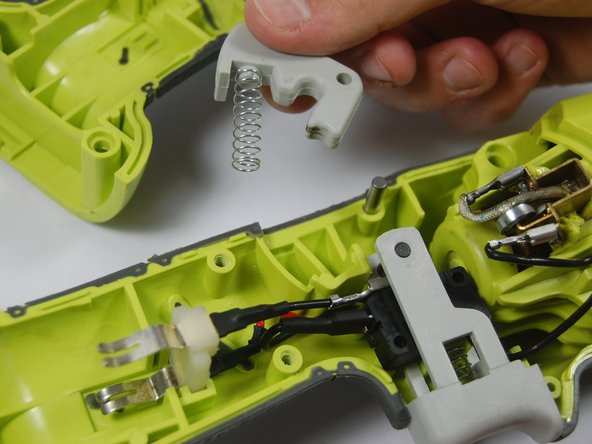
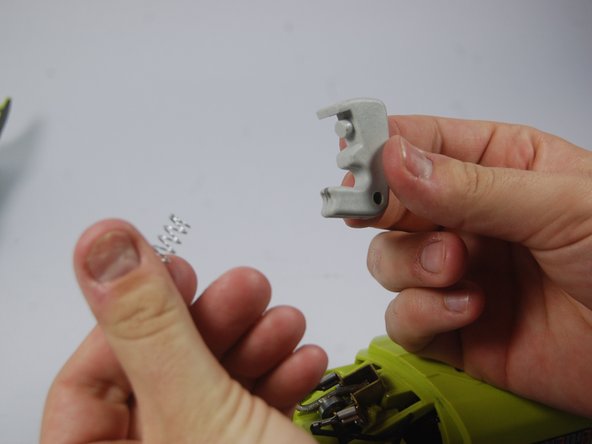
    4. RYOBI P422 Safety Trigger Spring Replacement: passo 5, immagine 1 di 3 RYOBI P422 Safety Trigger Spring Replacement: passo 5, immagine 2 di 3 RYOBI P422 Safety Trigger Spring Replacement: passo 5, immagine 3 di 3
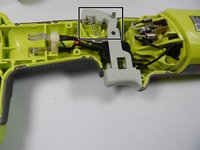
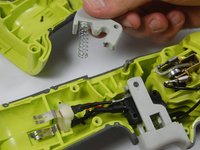
      • Remove the safety trigger along with the spring.

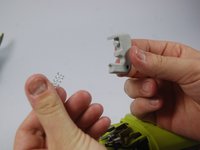
      • To remove the spring, pull it gently off the bottom of the trigger.

      • When putting a new spring in make sure it slides into the grove on the bottom of the trigger.

      Chiedi a FixBot

      Aggiungi Commento

Conclusione

To reassemble your device, follow these instructions in reverse order.

Annulla: non ho completato questa guida.

Team

0Commenti sulla guida

Aggiungi Commento

Visualizza statistiche:

Ultime 24 ore: 1

Ultimi 7 giorni: 8

Ultimi 30 giorni: 36

Tutti i Tempi: 1,988