Salta al contenuto principale

Philips Somneo LCD Assembly Replacement

Cosa ti serve

  1. Philips Somneo LCD Assembly Replacement, Antenna: passo 1, immagine 1 di 1
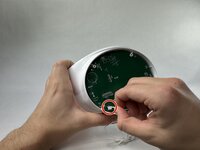
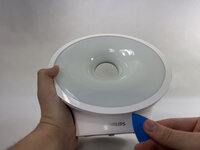
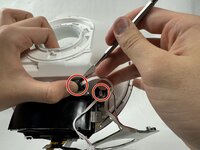
    • Remove the four silicone feet on the bottom plate.

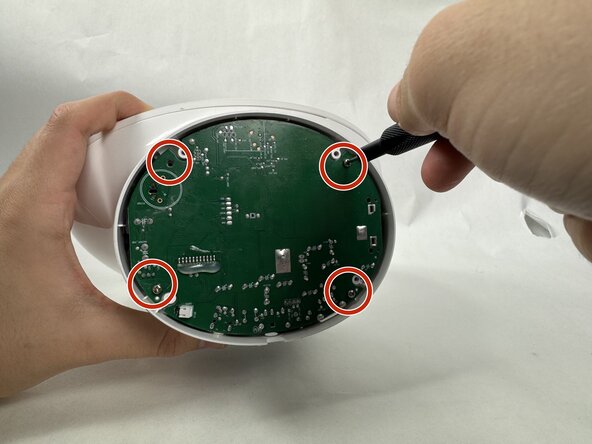
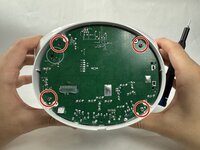
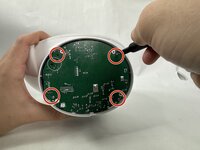
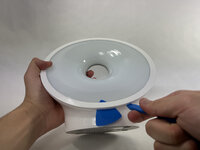
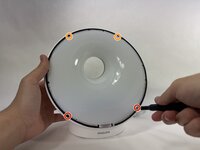
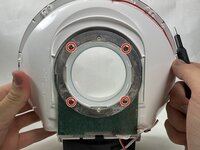
    • Remove the following Phillips screws from the bottom plate:

    • Two 9 mm screws

    • Two 13 mm screws

  2. Philips Somneo LCD Assembly Replacement: passo 2, immagine 1 di 2 Philips Somneo LCD Assembly Replacement: passo 2, immagine 2 di 2
    • Remove the bottom plate from the device.

  3. Philips Somneo LCD Assembly Replacement: passo 3, immagine 1 di 2 Philips Somneo LCD Assembly Replacement: passo 3, immagine 2 di 2
    • Disconnect the antenna connector by pulling it directly out of its port.

    • Remove the antenna.

  4. Philips Somneo LCD Assembly Replacement, Motherboard: passo 4, immagine 1 di 2 Philips Somneo LCD Assembly Replacement, Motherboard: passo 4, immagine 2 di 2
    • Remove the four 9 mm Phillips screws securing the motherboard.

  5. Philips Somneo LCD Assembly Replacement: passo 5, immagine 1 di 2 Philips Somneo LCD Assembly Replacement: passo 5, immagine 2 di 2
    • Gently pull the motherboard down until the cables are visible.

    • Take care not to strain the connected cables.

  6. Philips Somneo LCD Assembly Replacement: passo 6, immagine 1 di 3 Philips Somneo LCD Assembly Replacement: passo 6, immagine 2 di 3 Philips Somneo LCD Assembly Replacement: passo 6, immagine 3 di 3
    • Remove each cord by gently disconnecting each connector with your hand.

  7. Philips Somneo LCD Assembly Replacement: passo 7, immagine 1 di 3 Philips Somneo LCD Assembly Replacement: passo 7, immagine 2 di 3 Philips Somneo LCD Assembly Replacement: passo 7, immagine 3 di 3
    • Continue gently removing each cord with you hand.

  8. Philips Somneo LCD Assembly Replacement: passo 8, immagine 1 di 2 Philips Somneo LCD Assembly Replacement: passo 8, immagine 2 di 2
    • Finish gently removing the final cord attached to the motherboard to successfully remove the motherboard.

  9. Philips Somneo LCD Assembly Replacement, LED Assembly: passo 9, immagine 1 di 3 Philips Somneo LCD Assembly Replacement, LED Assembly: passo 9, immagine 2 di 3 Philips Somneo LCD Assembly Replacement, LED Assembly: passo 9, immagine 3 di 3
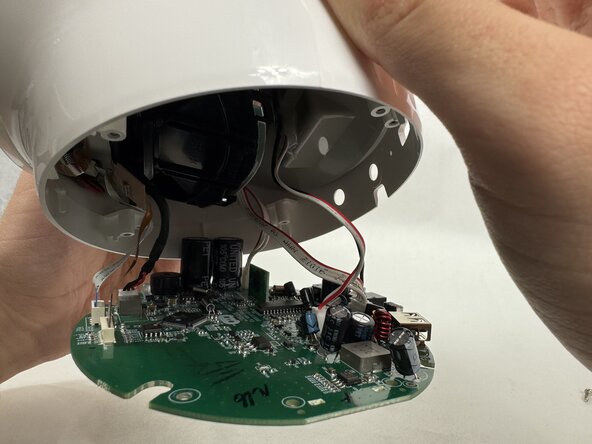
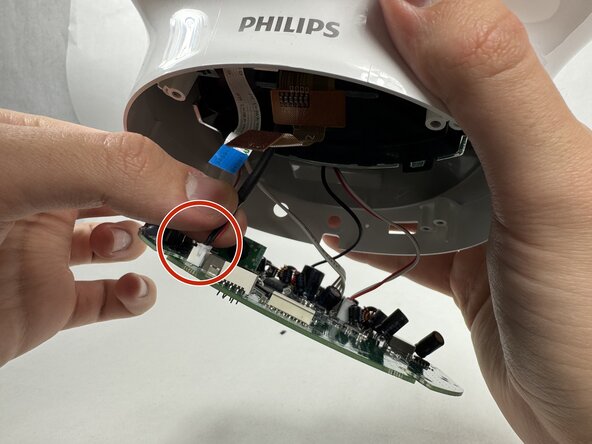
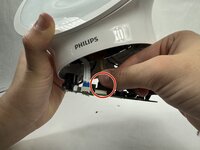
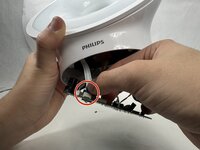
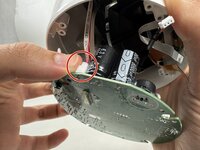
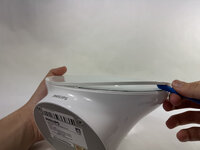
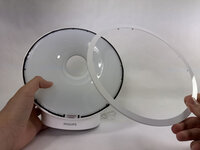
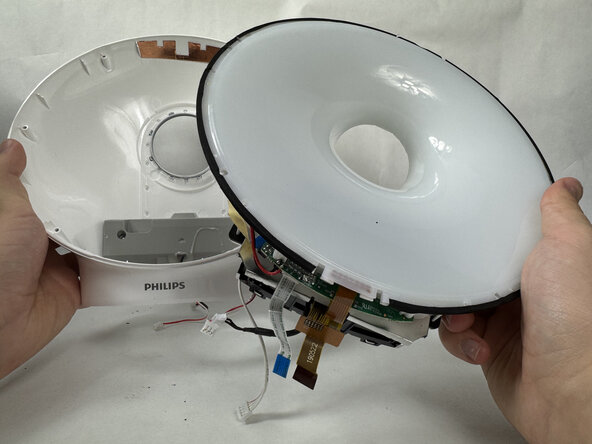
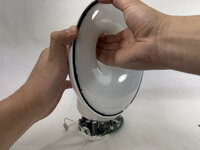
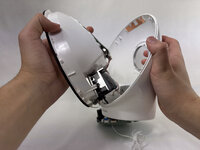
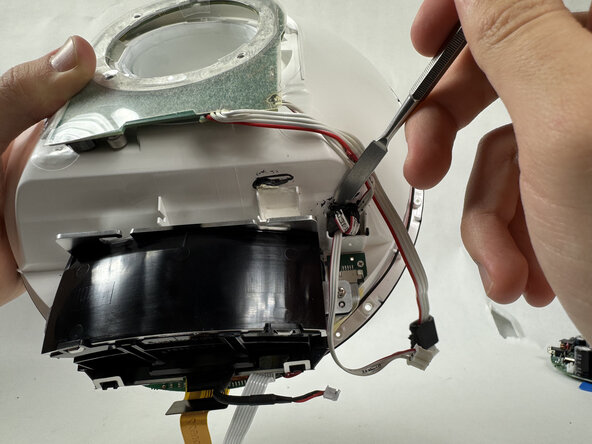
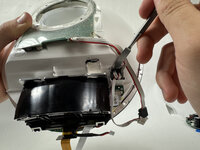
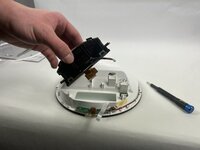
    • Use an opening pick to pry underneath the plastic covering the edges of the screen.

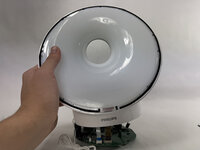
    • Place an opening tool in the space made between the screen and this plastic piece and pry up, working around the length of this circular piece to significantly loosen it.

  10. Philips Somneo LCD Assembly Replacement: passo 10, immagine 1 di 2 Philips Somneo LCD Assembly Replacement: passo 10, immagine 2 di 2
    • The panel should be loosened significantly enough to be pulled off the main body, revealing the edges of the screen.

  11. Philips Somneo LCD Assembly Replacement: passo 11, immagine 1 di 2 Philips Somneo LCD Assembly Replacement: passo 11, immagine 2 di 2
    • Remove the two 13 mm Phillips #0 screws on the bottom edges of the screen.

    • Remove the 9 mm Phillips #0 screws on the upper edge of the screen.

  12. Philips Somneo LCD Assembly Replacement: passo 12, immagine 1 di 3 Philips Somneo LCD Assembly Replacement: passo 12, immagine 2 di 3 Philips Somneo LCD Assembly Replacement: passo 12, immagine 3 di 3
    • Remove the display assembly.

  13. Philips Somneo LCD Assembly Replacement: passo 13, immagine 1 di 3 Philips Somneo LCD Assembly Replacement: passo 13, immagine 2 di 3 Philips Somneo LCD Assembly Replacement: passo 13, immagine 3 di 3
    • On the back of the screen, remove the four 9 mm Phillips #00 screws, disconnecting the LED assembly.

  14. Philips Somneo LCD Assembly Replacement: passo 14, immagine 1 di 3 Philips Somneo LCD Assembly Replacement: passo 14, immagine 2 di 3 Philips Somneo LCD Assembly Replacement: passo 14, immagine 3 di 3
    • Two cables connected to the LED were once connected to the motherboard, but are still attached to the body. They are threaded through black ovals connected to the body by a hard black adhesive.

    • Using a metal spudger, scrape underneath this adhesive and pry up, freeing the cable from the body. Repeat this for the other cable to free the LED.

  15. Philips Somneo LCD Assembly Replacement, LCD Assembly: passo 15, immagine 1 di 1
    • Remove the two 13 mm Phillips screws securing the LCD assembly.

  16. Philips Somneo LCD Assembly Replacement: passo 16, immagine 1 di 2 Philips Somneo LCD Assembly Replacement: passo 16, immagine 2 di 2
    • Remove the LCD assembly.

Conclusione

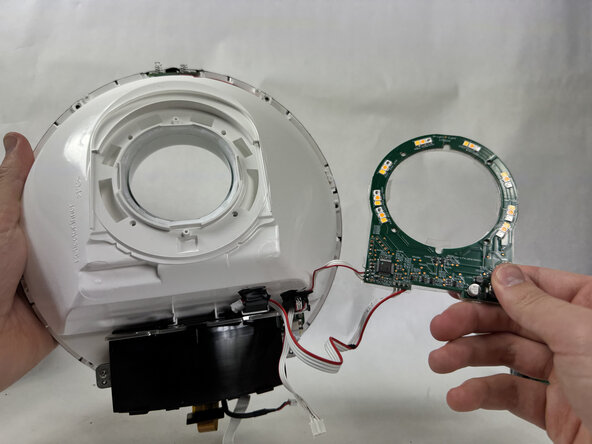
To reassemble your device, follow the above steps in reverse order.
Take your e-waste to an R2 or e-Stewards certified recycler.
Repair didn’t go as planned? Try some basic troubleshooting or ask our Answers community for help.

Isaiah

Membro da: 03/21/25

332 Reputazione

2 Guide realizzate

Team

0Commenti sulla guida

Aggiungi Commento

Visualizza Statistiche:

Ultime 24 Ore: 0

Ultimi 7 Giorni: 3

Ultimi 30 Giorni: 9

Tutti i Tempi: 68