Salta al contenuto principale
Unisciti alla Community delle riparazioni - Crea un account

Oster 6329 Lever Catch Spring Replacement

Cosa ti serve

  1. Oster 6329 Lever Catch Spring Replacement, Outer Shell Removal: passo 1, immagine 1 di 2 Oster 6329 Lever Catch Spring Replacement, Outer Shell Removal: passo 1, immagine 2 di 2
    • Using the Phillips-head #2 screwdriver, unscrew the three 1cm Phillips-head screws on the plastic base of the toaster to separate the outer metal shell from the plastic base.

    Chiedi a FixBot
  2. Oster 6329 Lever Catch Spring Replacement: passo 2, immagine 1 di 1
    • Push the plastic push-down handle down and pull the plastic handle straight from metal arm.

    Chiedi a FixBot
  3. Oster 6329 Lever Catch Spring Replacement: passo 3, immagine 1 di 1
    • Loosen the outer metal shell from the plastic base by holding the plastic base while pulling up on the metal shell.

    • Only lift the outer shell a little so as not to disconnect the cables that connect the circuit board.

    Chiedi a FixBot
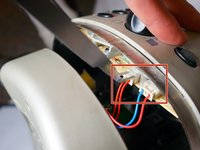
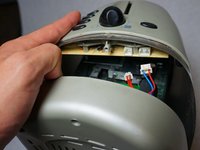
  4. Oster 6329 Lever Catch Spring Replacement: passo 4, immagine 1 di 2 Oster 6329 Lever Catch Spring Replacement: passo 4, immagine 2 di 2
    Strumento utilizzato in questo passaggio:
    Tweezers
    $4.99
    • Disconnect the cable clips from the circuit board using the tweezers to free the outer metal shell from the plastic base.

    Chiedi a FixBot
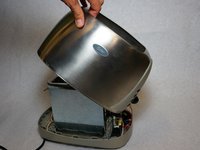
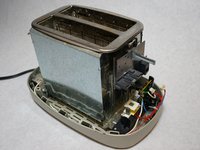
  5. Oster 6329 Lever Catch Spring Replacement: passo 5, immagine 1 di 2 Oster 6329 Lever Catch Spring Replacement: passo 5, immagine 2 di 2
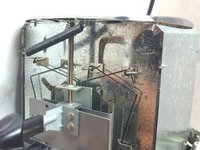
    • Lift the top outer metal shell.

    • Carefully lift the outer metal shell at an angle so as not to damage the components in the front of the toaster.

    Chiedi a FixBot
  6. Oster 6329 Lever Catch Spring Replacement, Lever Catch Spring: passo 6, immagine 1 di 1
    Strumento utilizzato in questo passaggio:
    Tweezers
    $4.99
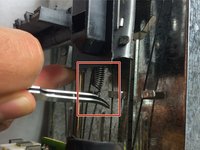
    • Insert the tweezers between the spring and the bottom of the lever to release the spring.

    Chiedi a FixBot
  7. Oster 6329 Lever Catch Spring Replacement: passo 7, immagine 1 di 2 Oster 6329 Lever Catch Spring Replacement: passo 7, immagine 2 di 2
    • Remove spring from the bottom of the lever.

    • The spring should only be connected to the top of the toaster after this is complete.

    Chiedi a FixBot
  8. Oster 6329 Lever Catch Spring Replacement: passo 8, immagine 1 di 1
    • Insert the tweezers between the two metal flaps located at the top of the toaster.

    • Hold the spring and turn it sideways to lay it flat along the top of the toaster.

    • Pry the spring from the top of the toaster.

    Chiedi a FixBot
Conclusione

To reassemble your device, follow these instructions in reverse order.

Blaine Oelkers

Membro da: 01/24/14

131 Reputazione

Una guida realizzata

Team

Cal Poly, Team 13-15, Regan Winter 2014 Membro di Cal Poly, Team 13-15, Regan Winter 2014

CPSU-REGAN-W14S13G15

5 Membri

6 guide realizzate

0Commenti sulla guida

Aggiungi Commento

Visualizza Statistiche:

Ultime 24 Ore: 1

Ultimi 7 Giorni: 13

Ultimi 30 Giorni: 95

Tutti i Tempi: 1,552