Salta al contenuto principale

Nook HD Battery Replacement

Cosa ti serve

  1. Nook HD Battery Replacement, Case: passo 1, immagine 1 di 3 Nook HD Battery Replacement, Case: passo 1, immagine 2 di 3 Nook HD Battery Replacement, Case: passo 1, immagine 3 di 3
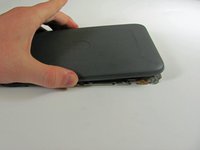
    • Be sure the device is powered off. Clean the device to prevent any dirt and dust from entering into the device.

    • Use the plastic opening tool to gently pry the plastic screen frame away from the screen. Run the plastic opening tool along the interior edge of the screen until the screen frame is completely separated from the glass.

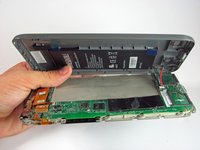
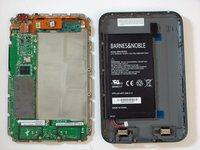
    • The screen frame is held onto the Nook by a set of tab that run around the outside of the frame. There may also be a line of rubber cement around the Nook under the screen frame. If your Nook has this, you will have to dig deep to separate the frame from the Nook.

  2. Nook HD Battery Replacement: passo 2, immagine 1 di 2 Nook HD Battery Replacement: passo 2, immagine 2 di 2
    • Use a T5 screwdriver to remove the seventeen 5.0 millimeter screws from the back casing.

  3. Nook HD Battery Replacement: passo 3, immagine 1 di 3 Nook HD Battery Replacement: passo 3, immagine 2 di 3 Nook HD Battery Replacement: passo 3, immagine 3 di 3
    • Slowly pull the back casing away from the screen and motherboard.

    • There is a cable attaching the battery in the back plate to the motherboard. Avoid detaching either end of the cable during this step.

  4. Nook HD Battery Replacement: passo 4, immagine 1 di 3 Nook HD Battery Replacement: passo 4, immagine 2 di 3 Nook HD Battery Replacement: passo 4, immagine 3 di 3
    • Use the plastic opening tool to gently unclip the wire from the pins by pulling the white connector up.

  5. Nook HD Battery Replacement, Battery: passo 5, immagine 1 di 2 Nook HD Battery Replacement, Battery: passo 5, immagine 2 di 2
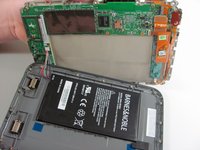
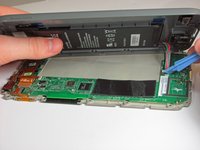
    • Use the plastic opening tool to lever the battery out of the back plate by inserting it under the side and pulling up gently.

Conclusione

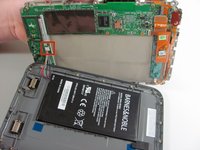
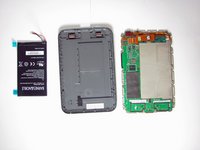
To reassemble your device, follow these instructions in reverse order.

Altre 20 persone hanno completato questa guida.

Team

Cal Poly, Team 3-43, Maness Spring 2014 Membro di Cal Poly, Team 3-43, Maness Spring 2014

CPSU-MANESS-S14S3G43

5 Membri

10 Guide realizzate

3 Commenti

This is an awesome step by step guide detailing each step along the way for battery replacement. The only discrepancy that I saw is that it says at the top of the guide that a T6 torx is a necessary tool to replace the battery when only a T5 torx is needed for this job. There is a 4000mAh replacement battery available for under $20 here: http://www.mpfproducts.com/bna-b0002-bat... for those interested. It even comes with all of the necessary installation tools.

michaelf33707 - Replica

I just replaced the battery. I bought the new one from MPF. This was a great instructional. Only one size screw used so that made it easier to do, and truly anyone should be able to do this themselves.

dentednj - Replica

Thanks for the help

canutakeall9 - Replica

Aggiungi Commento

Visualizza Statistiche:

Ultime 24 Ore: 0

Ultimi 7 Giorni: 3

Ultimi 30 Giorni: 19

Tutti i Tempi: 27,298