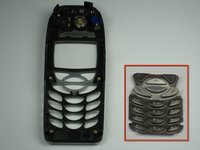
Salta al contenuto principale
Unisciti alla Community delle riparazioni - Crea un account

Nokia 6310i Keypad Replacement

Cosa ti serve

  1. Nokia 6310i Keypad Replacement, Battery: passo 1, immagine 1 di 2 Nokia 6310i Keypad Replacement, Battery: passo 1, immagine 2 di 2
    • Press and hold the battery release button and slide the battery away from the Nokia logo

    Chiedi a FixBot
  2. Nokia 6310i Keypad Replacement, SIM card: passo 2, immagine 1 di 3 Nokia 6310i Keypad Replacement, SIM card: passo 2, immagine 2 di 3 Nokia 6310i Keypad Replacement, SIM card: passo 2, immagine 3 di 3
    • Slide the SIM card lock away from the SIM card.

    • The SIM card pops out. Remove the SIM card.

    Chiedi a FixBot
  3. Nokia 6310i Keypad Replacement, Back Cover: passo 3, immagine 1 di 1
    • Unscrew and remove the four T6 Torx screws.

    Chiedi a FixBot
  4. Nokia 6310i Keypad Replacement: passo 4, immagine 1 di 3 Nokia 6310i Keypad Replacement: passo 4, immagine 2 di 3 Nokia 6310i Keypad Replacement: passo 4, immagine 3 di 3
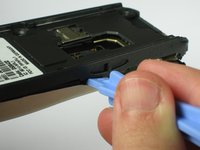
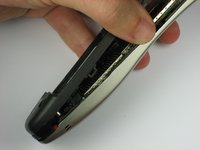
    • Insert a plastic opening tool between the faceplate and the black backplate. Gently pry them apart, working from the lower end to the upper side of the phone.

    Chiedi a FixBot
  5. Nokia 6310i Keypad Replacement: passo 5, immagine 1 di 3 Nokia 6310i Keypad Replacement: passo 5, immagine 2 di 3 Nokia 6310i Keypad Replacement: passo 5, immagine 3 di 3
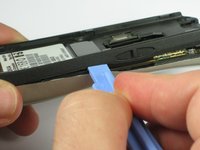
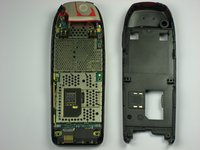
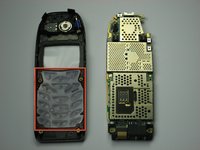
    • Use the plastic opening tool to separate the top part of the backplate.

    • The plastic clips at the top require slightly more force to separate.

    Chiedi a FixBot
  6. Nokia 6310i Keypad Replacement, Antenna: passo 6, immagine 1 di 2 Nokia 6310i Keypad Replacement, Antenna: passo 6, immagine 2 di 2
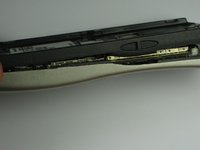
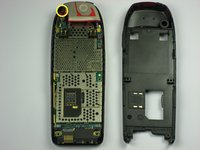
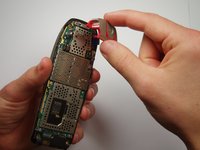
    • Remove the screw holding the antenna to the circuit board.

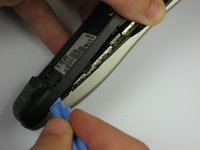
    • Carefully lift off the antenna from the circuit board.

    Chiedi a FixBot
  7. Nokia 6310i Keypad Replacement, Motherboard: passo 7, immagine 1 di 1
    • Lift off the motherboard from the faceplate.

    Chiedi a FixBot
  8. Nokia 6310i Keypad Replacement, Keypad: passo 8, immagine 1 di 2 Nokia 6310i Keypad Replacement, Keypad: passo 8, immagine 2 di 2
    • Remove the plastic keypad from the faceplate.

    Chiedi a FixBot
Conclusione

To reassemble your device, follow these instructions in reverse order.

Un'altra persona ha completato questa guida.

Ka Siu

Membro da: 09/30/10

84 Reputazione

Una guida realizzata

Team

Cal Poly, Team 14-41, Forte Fall 2010 Membro di Cal Poly, Team 14-41, Forte Fall 2010

CPSU-FORTE-F10S14G41

5 Membri

22 guide realizzate

0Commenti sulla guida

Aggiungi Commento

Visualizza statistiche:

Ultime 24 ore: 4

Ultimi 7 giorni: 14

Ultimi 30 giorni: 54

Tutti i Tempi: 6,022