Introduzione
The keypad is fairly easy to retrieve and it is not actually secured by any piece of the phone other than the cover plate. When replacing the keypad, make sure it is oriented properly because it tends to slide around.
-
-
Remove the back cover plate of the phone. To do this press down the lock as you slide the cover toward the bottom of the phone.
 Chiedi a FixBot
-
-
-
Once the back cover plate is removed, the battery should be exposed. Remove the battery by prying it out. This can be done with your finger-nail or a prying tool.
-
-
-
-
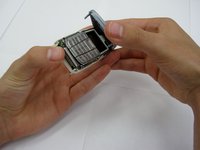
Using your fingernails or another tool, pry the front face plate out along its edges and corners.
-
-
-
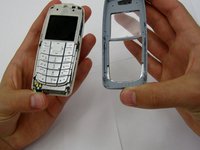
Once the cover plate has been removed, the existing keypad should be easily removed.
-
To install a new keypad, simply place the new keypad in the same place where the old keypad was.
-


To reassemble your device, follow these instructions in reverse order.
Annulla: non ho completato questa guida.
Altre 2 persone hanno completato questa guida.

Team

Clemson, Team 13-2, Benson Spring 2013 Membro di Clemson, Team 13-2, Benson Spring 2013
CLEM-BENSON-S13S13G2
3 Membri
14 guide realizzate