Introduzione
This guide is needed to replace the mounting clips if they do not securely hold the camera in its mount. Make sure the device is unplugged before opening.
Cosa ti serve
-
-
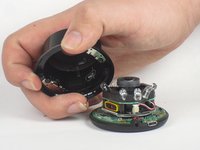
Press in the mounting clips on each side of the case to remove the camera from the mount.
 Chiedi a FixBot
-
-
-
-
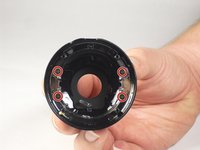
Lift the front of the case slowly, as there is an antenna cable attached to the motherboard.
-
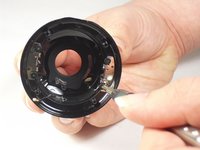
Carefully disconnect the antenna cable from the motherboard. You will feel this cable "pop" out of place when disconnected.
-
-
-
Using a Philips #0 screwdriver, remove the four 4 mm screws that are attaching the mounting clips to the case.
-


To reassemble your device, follow these instructions in reverse order.
Team

USF Tampa, Team 15-4, Blackwell Fall 2015 Membro di USF Tampa, Team 15-4, Blackwell Fall 2015
USFT-BLACKWELL-F15S15G4
3 Membri
12 guide realizzate