Salta al contenuto principale
Unisciti alla Community delle riparazioni - Crea un account

Munchkinz Battery Replacement

Cosa ti serve

  1. Munchkinz Battery Replacement, Opening Device: passo 1, immagine 1 di 1
    • Insert spudger into the USB Micro slot and pry the case apart.

    • Be careful not to go too deep and bend the prong inside the Micro USB port.

    Chiedi a FixBot
  2. Munchkinz Battery Replacement, Pry Device Apart: passo 2, immagine 1 di 2 Munchkinz Battery Replacement, Pry Device Apart: passo 2, immagine 2 di 2
    • Slide the wide plastic opening tool across the seem, separating it if you can't pry the device open using just the spudger.

    • Gently separate the case so none of the cords inside are disconnected

    Chiedi a FixBot
  3. Munchkinz Battery Replacement, Separated Device: passo 3, immagine 1 di 1
    • After prying the device apart, it should look like this.

    Chiedi a FixBot
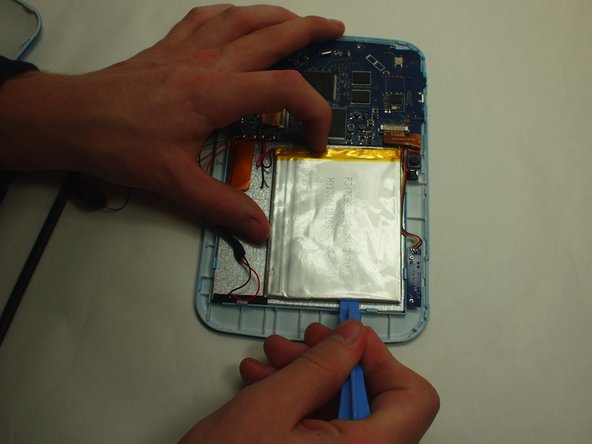
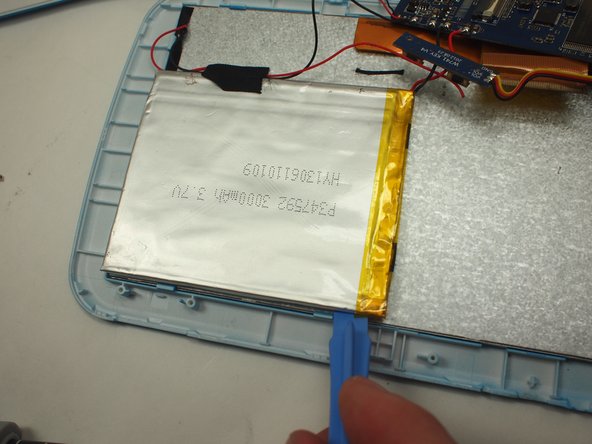
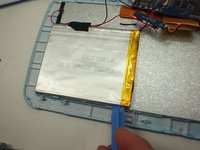
  4. Munchkinz Battery Replacement, Removing battery: passo 4, immagine 1 di 3 Munchkinz Battery Replacement, Removing battery: passo 4, immagine 2 di 3 Munchkinz Battery Replacement, Removing battery: passo 4, immagine 3 di 3
    • Use the wide plastic opening tool to slowly pry each side of the battery up.

    • Be careful not to bend the battery too much.

    Chiedi a FixBot
  5. Munchkinz Battery Replacement, Remove battery completely: passo 5, immagine 1 di 1
    • Use the Soldering Iron to disconnect the each cable.

    Chiedi a FixBot
Conclusione

To reassemble your device, follow these instructions in reverse order.

Hee Jin Cho

Membro da: 01/14/15

113 Reputazione

Una guida realizzata

Team

UW Tacoma, Team 3-6, Rose Winter 2015 Membro di UW Tacoma, Team 3-6, Rose Winter 2015

UWT-ROSE-W15S3G6

3 Membri

14 guide realizzate

0Commenti sulla guida

Aggiungi Commento

Visualizza statistiche:

Ultime 24 ore: 1

Ultimi 7 giorni: 4

Ultimi 30 giorni: 42

Tutti i Tempi: 697