Introduzione
Consulta la guida per effettuare correttamente la sostituzione.
Cosa ti serve
-
-
Chiudi il telefono assicurandoti che la copertura posteriore sia davanti a te.
-
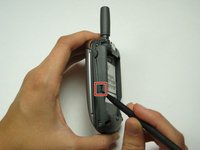
Ora premi il pulsante che trovi in alto sul telefono vicino l'antenna con un dito o uno spudger.
 Chiedi a FixBot
-
-
-
Solleva e rimuovi la copertura del telefono.
-
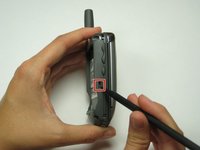
Premi il pulsante che trovi in basso vicino alla batteria con un dito o uno spudger così da liberare la batteria.
-
-
-
Utilizza un cacciavite Torx T6 per rimuovere le quattro viti dal lato posteriore del dispositivo.
-
-
-
-
Premi contemporaneamente i due pulsanti che trovi ai lati del dispositivo (quelli evidenziati nelle foto).
-
-
-
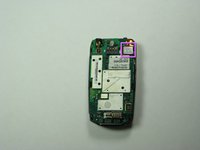
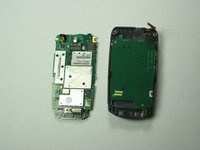
Solleva gentilmente la scheda logica dalla copertura posteriore.
-
-
-
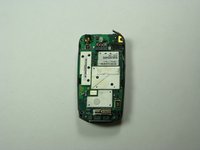
Metti la scheda logica sulla copertura anteriore.
-
Sgancia il cavo arancione che connette la scheda logica al sensore del tastierino, così da poter muovere la scheda liberamente.
-
-
-
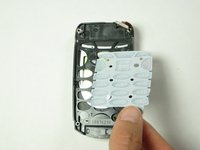
Dopo aver rimosso la scheda logica, solleva il sensore verde del tastierino che trovi sul lato anteriore del dispositivo.
-
-
-
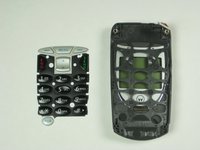
Per sostituire il tastierino, solleva il supporto per la tastiera di colore bianco.
-


Per rimontare il dispositivo, segui le istruzioni nell'ordine.
Un ringraziamento speciale a questi traduttori:
100%
Virginia Quaranta ci sta aiutando ad aggiustare il mondo! Vuoi partecipare?
Inizia a tradurre ›
Team

Cal Poly, Team 30-40, Garner Spring 2010 Membro di Cal Poly, Team 30-40, Garner Spring 2010
CPSU-GARNER-S10S30G40
4 Membri
19 guide realizzate