Salta al contenuto principale
Unisciti alla Community delle riparazioni - Crea un account

Motorola Droid X2 Screen Replacement

Cosa ti serve

  1. Motorola Droid X2 Screen Replacement, Battery: passo 1, immagine 1 di 3 Motorola Droid X2 Screen Replacement, Battery: passo 1, immagine 2 di 3 Motorola Droid X2 Screen Replacement, Battery: passo 1, immagine 3 di 3
    • Slide the plastic case off of the back of the phone, exposing the battery.

    Chiedi a FixBot

    Aggiungi Commento

  2. Motorola Droid X2 Screen Replacement: passo 2, immagine 1 di 3 Motorola Droid X2 Screen Replacement: passo 2, immagine 2 di 3 Motorola Droid X2 Screen Replacement: passo 2, immagine 3 di 3
    • Pull up on the red battery release tab and pull the battery out of the phone.

    Chiedi a FixBot

    Aggiungi Commento

  3. Motorola Droid X2 Screen Replacement, Motherboard: passo 3, immagine 1 di 2 Motorola Droid X2 Screen Replacement, Motherboard: passo 3, immagine 2 di 2
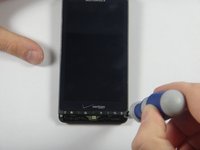
    • Remove the circled screws using a T-5 torques. These screws will be 4.3 millimeters in length.

    • Be careful to not strip any screws.

    Chiedi a FixBot

    Aggiungi Commento

  4. Motorola Droid X2 Screen Replacement: passo 4, immagine 1 di 3 Motorola Droid X2 Screen Replacement: passo 4, immagine 2 di 3 Motorola Droid X2 Screen Replacement: passo 4, immagine 3 di 3
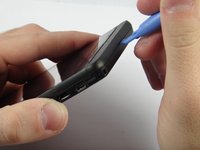
    • Using a prying tool, snap off the front casing on the top and bottom of the phone.

    • Be careful not to lose the small rubber piece that sits over the microphone.

    Chiedi a FixBot

    Aggiungi Commento

  5. Motorola Droid X2 Screen Replacement: passo 5, immagine 1 di 2 Motorola Droid X2 Screen Replacement: passo 5, immagine 2 di 2
    • Remove the circled screws using a T-5 torques.. These screws should be 5.8 millimeters in length.

    Chiedi a FixBot

    Aggiungi Commento

  6. Motorola Droid X2 Screen Replacement: passo 6, immagine 1 di 3 Motorola Droid X2 Screen Replacement: passo 6, immagine 2 di 3 Motorola Droid X2 Screen Replacement: passo 6, immagine 3 di 3
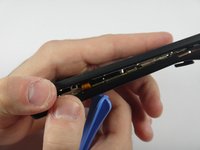
    • Using a plastic opening tool, snap open the phone. It should separate into a front piece with the hardware and a plastic backing.

    Chiedi a FixBot

    Aggiungi Commento

  7. Motorola Droid X2 Screen Replacement: passo 7, immagine 1 di 3 Motorola Droid X2 Screen Replacement: passo 7, immagine 2 di 3 Motorola Droid X2 Screen Replacement: passo 7, immagine 3 di 3
    Strumento utilizzato in questo passaggio:
    Tweezers
    $4.99
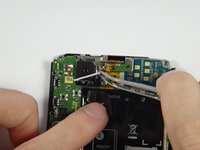
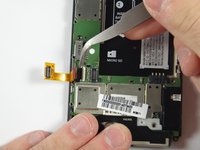
    • Using tweezers, remove the white wire at the top of the phone near the camera.

    Chiedi a FixBot

    Aggiungi Commento

  8. Motorola Droid X2 Screen Replacement: passo 8, immagine 1 di 2 Motorola Droid X2 Screen Replacement: passo 8, immagine 2 di 2
    • Remove these nine screws using a T-3 torques. These screws should be 2.40 mm in length

    Chiedi a FixBot

    Aggiungi Commento

  9. Motorola Droid X2 Screen Replacement: passo 9, immagine 1 di 2 Motorola Droid X2 Screen Replacement: passo 9, immagine 2 di 2
    • Using tweezers, removed the white electrical tape on the motherboard.

    Chiedi a FixBot

    Aggiungi Commento

  10. Motorola Droid X2 Screen Replacement: passo 10, immagine 1 di 2 Motorola Droid X2 Screen Replacement: passo 10, immagine 2 di 2
    • Using the plastic opening tool, lift up to remove the connector.

    Chiedi a FixBot

    Aggiungi Commento

  11. Motorola Droid X2 Screen Replacement: passo 11, immagine 1 di 2 Motorola Droid X2 Screen Replacement: passo 11, immagine 2 di 2
    • Using a pry tool, lift the jawbone connector.

    Chiedi a FixBot

    Aggiungi Commento

  12. Motorola Droid X2 Screen Replacement: passo 12, immagine 1 di 2 Motorola Droid X2 Screen Replacement: passo 12, immagine 2 di 2
    • Using tweezers, carefully disconnect the cable connector by pulling the cable out.

    Chiedi a FixBot

    Aggiungi Commento

  13. Motorola Droid X2 Screen Replacement: passo 13, immagine 1 di 3 Motorola Droid X2 Screen Replacement: passo 13, immagine 2 di 3 Motorola Droid X2 Screen Replacement: passo 13, immagine 3 di 3
    • Use a spudger to disconnect the cable connector.

    Chiedi a FixBot

    Aggiungi Commento

  14. Motorola Droid X2 Screen Replacement: passo 14, immagine 1 di 3 Motorola Droid X2 Screen Replacement: passo 14, immagine 2 di 3 Motorola Droid X2 Screen Replacement: passo 14, immagine 3 di 3
    • Using a spudger, remove the camera. Lift up the motherboard and slide the spudger under the camera.

    Chiedi a FixBot

    Aggiungi Commento

  15. Motorola Droid X2 Screen Replacement, Screen: passo 15, immagine 1 di 2 Motorola Droid X2 Screen Replacement, Screen: passo 15, immagine 2 di 2
    • Remove the 4 screws using a T-3 torques.. These screws are 2.40 mm in length.

    • Be careful to not strip the screws.

    Chiedi a FixBot

    Aggiungi Commento

  16. Motorola Droid X2 Screen Replacement: passo 16, immagine 1 di 3 Motorola Droid X2 Screen Replacement: passo 16, immagine 2 di 3 Motorola Droid X2 Screen Replacement: passo 16, immagine 3 di 3
    Strumento utilizzato in questo passaggio:
    Tweezers
    $4.99
    • Using tweezers, remove the white tape to reveal the connector

    Chiedi a FixBot

    Aggiungi Commento

  17. Motorola Droid X2 Screen Replacement: passo 17, immagine 1 di 1
    • Using the plastic opening tool, lift the jawbone connector.

    Chiedi a FixBot

    Aggiungi Commento

  18. Motorola Droid X2 Screen Replacement: passo 18, immagine 1 di 2 Motorola Droid X2 Screen Replacement: passo 18, immagine 2 di 2
    • Using tweezers, remove cable from the connector

    Chiedi a FixBot

    Aggiungi Commento

  19. Motorola Droid X2 Screen Replacement: passo 19, immagine 1 di 3 Motorola Droid X2 Screen Replacement: passo 19, immagine 2 di 3 Motorola Droid X2 Screen Replacement: passo 19, immagine 3 di 3
    • Using a plastic opening tool, lift the connector from the device

    Chiedi a FixBot

    Aggiungi Commento

  20. Motorola Droid X2 Screen Replacement: passo 20, immagine 1 di 3 Motorola Droid X2 Screen Replacement: passo 20, immagine 2 di 3 Motorola Droid X2 Screen Replacement: passo 20, immagine 3 di 3
    • Lift the ribbon from the device

    • This does require some effort to remove.

    Chiedi a FixBot

    Aggiungi Commento

  21. Motorola Droid X2 Screen Replacement: passo 21, immagine 1 di 3 Motorola Droid X2 Screen Replacement: passo 21, immagine 2 di 3 Motorola Droid X2 Screen Replacement: passo 21, immagine 3 di 3
    • Lift the screen off of the device

    Chiedi a FixBot

    Aggiungi Commento

  22. Motorola Droid X2 Screen Replacement: passo 22, immagine 1 di 2 Motorola Droid X2 Screen Replacement: passo 22, immagine 2 di 2
    • Using a heat gun, gently heat the edges of the screen

    • Be careful as overheating can damage the electronics.

    • The screen will be hot after.

    Chiedi a FixBot

    Aggiungi Commento

  23. Motorola Droid X2 Screen Replacement: passo 23, immagine 1 di 3 Motorola Droid X2 Screen Replacement: passo 23, immagine 2 di 3 Motorola Droid X2 Screen Replacement: passo 23, immagine 3 di 3
    • Lift the screen from the frame.

    Chiedi a FixBot

    Aggiungi Commento

Conclusione

To reassemble your device, follow these instructions in reverse order.

Annulla: non ho completato questa guida.

Aaron Mak

Membro da: 10/29/14

658 Reputazione

4 guide realizzate

Team

UMass Dartmouth, Team 4-3, Miles Fall 2014 Membro di UMass Dartmouth, Team 4-3, Miles Fall 2014

UMASSD-MILES-F14S4G3

3 Membri

12 guide realizzate

1Commento della guida

I recently ran into an interesting situation with the Droid X2 at my repair shop. I know this is an older device, but this is still a very important piece of information: there are 2 different types of digitizers and 2 different types of LCD's, depending on the Droid X2's transceiver number. Type A digitizer has a smaller front row button connector, Type B is larger. Same with the LCD, there is a Type A small connector and a Type B larger connector. Under the battery on the barcode sticker, right below the "MB870" barcode is the transceiver number, starting with "SJUG" and ending in either 6250 (type A) or 6065 (type B). Anyone buying a replacement LCD or digitizer needs to know which one to get, or else the connectors won't fit.

Andrew F - Rispondi Condividi

Aggiungi Commento

Visualizza statistiche:

Ultime 24 ore: 3

Ultimi 7 giorni: 13

Ultimi 30 giorni: 39

Tutti i Tempi: 1,504